
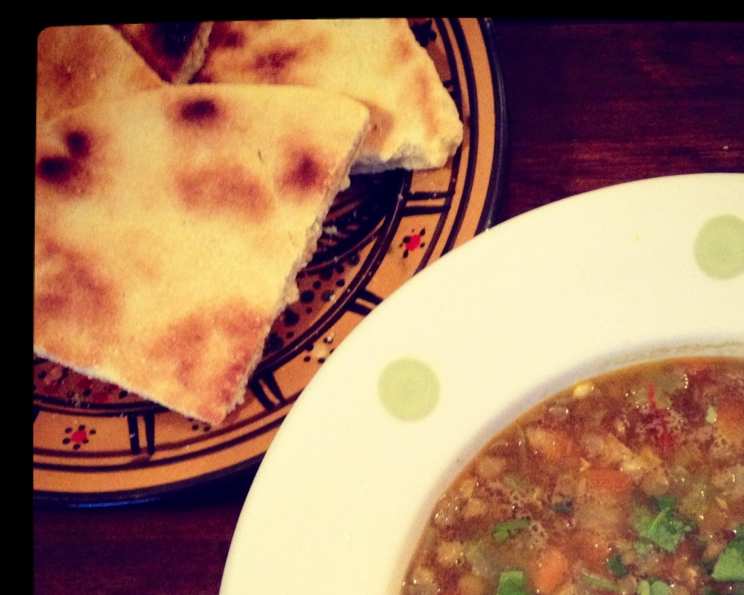
Kesra: A Taste of Algerian Home
The scent of warm bread, especially when it’s kissed with the subtle aroma of semolina and olive oil, instantly transports me back to my travels through North Africa. In a small Algerian village, I watched a woman, her hands weathered with time and tradition, expertly shape and cook Kesra on a simple griddle over an open fire. The resulting flatbread, slightly crisp on the outside and wonderfully soft within, was unlike anything I’d tasted before. It was a simple food, but made with such care and love, it spoke volumes about Algerian hospitality and culinary heritage. This recipe is my attempt to recreate that experience, to bring a bit of that Algerian warmth into your kitchen.
Recipe Overview
- Prep Time: 20 minutes
- Cook Time: 20 minutes
- Total Time: 40 minutes
- Servings: 2-4
- Yield: 2 flatbreads
- Dietary Type: Vegetarian
Ingredients
- 300 g fine semolina
- 100 g medium semolina
- 3 tablespoons olive oil
- 1 teaspoon salt (to taste)
- 125 ml water
Equipment Needed
- Large mixing bowl
- Frying pan or kesra griddle
- Clean kitchen towel
Instructions
-
In a large mixing bowl, combine the fine semolina and medium semolina. Add the salt and mix thoroughly to ensure even distribution.
-
Pour in the olive oil. Using your fingertips, rub the olive oil into the semolina mixture until all the grains are evenly coated. This process is crucial for achieving the right texture.
-
Gradually add the water while mixing the ingredients together. Incorporate the water slowly, ensuring it is absorbed properly and doesn’t make the dough too wet. The goal is to create a soft, pliable dough.
-
Once the dough comes together, transfer it to a lightly floured surface. Knead the dough for about 5-7 minutes until it becomes smooth and has a slight spring when pressed. This develops the gluten and contributes to the bread’s texture.
-
Place the kneaded dough back into the bowl, cover it with a clean kitchen towel, and let it rest for 30 minutes. This resting period allows the gluten to relax, making the dough easier to work with.
-
After the dough has rested, divide it into two equal portions if using a frying pan. On a lightly floured surface, press each portion into a circular disc, approximately 1/4 inch deep. Aim for a uniform thickness to ensure even cooking.
-
Heat a frying pan or kesra griddle over medium heat. No oil is needed in the pan.
-
Carefully place one of the kesra discs into the hot pan. Cook for about 10 minutes on each side, turning frequently, until golden brown and cooked through. The kesra should have a firm, slightly crumbly exterior and be moist inside.
-
Repeat the cooking process with the second disc of dough.
-
Once cooked, remove the kesra from the pan and let it cool slightly before serving.
Expert Tips & Tricks
- Semolina Quality: The quality of the semolina greatly affects the final texture of the Kesra. Opt for a high-quality fine and medium semolina for the best results.
- Water Temperature: Using lukewarm water can help the dough come together more easily.
- Kneading Technique: Don’t over-knead the dough, as this can result in a tough bread. Knead just until it becomes smooth and elastic.
- Cooking Temperature: The heat of the pan is crucial. If it’s too high, the outside will burn before the inside is cooked. If it’s too low, the bread will be pale and hard. Adjust the heat as needed.
- Texture Check: To check for doneness, press lightly on the center of the Kesra. It should feel firm but still slightly soft to the touch.
- Prevent Sticking: Ensure the pan is hot enough before adding the dough to prevent sticking.
- Flavor Enhancement: For an extra layer of flavor, try adding a pinch of anise seeds or nigella seeds to the dough.
- Make Ahead: The dough can be made ahead of time and stored in the refrigerator for up to 24 hours. Bring it to room temperature before shaping and cooking.
- For a softer texture Kesra, you can add a tablespoon of milk powder to the flour mixture.
Serving & Storage Suggestions
Kesra is best served warm, either on its own or as an accompaniment to soups, stews, and tagines. It’s also delicious with a drizzle of olive oil and a sprinkle of za’atar. At room temperature, Kesra will keep for about 2 days in an airtight container. In the refrigerator, it will last for up to 5 days. To reheat, simply warm it in a dry frying pan or in a low oven until heated through. You can also freeze Kesra for up to 2 months. Thaw it completely before reheating.
Nutritional Information
| Nutrient | Amount per Serving | % Daily Value |
|---|---|---|
| Calories | 450 kcal | 23% |
| Total Fat | 15g | 23% |
| Saturated Fat | 2g | 10% |
| Cholesterol | 0mg | 0% |
| Sodium | 300mg | 13% |
| Total Carbohydrate | 70g | 23% |
| Dietary Fiber | 5g | 20% |
| Sugars | 0g | 0% |
| Protein | 10g | 20% |
Note: Nutritional information is an estimate and may vary based on specific ingredients and portion sizes.
Variations & Substitutions
- Gluten-Free Kesra: While traditional Kesra relies on semolina, you can experiment with gluten-free flour blends. A mix of rice flour, tapioca starch, and almond flour might work, but you’ll need to adjust the liquid accordingly.
- Whole Wheat Kesra: Replace some of the semolina with whole wheat flour for a nuttier flavor and added fiber.
- Herb Infused: Add finely chopped fresh herbs like rosemary, thyme, or oregano to the dough for an aromatic twist.
- Spicy Kesra: Incorporate a pinch of red pepper flakes or a dash of harissa paste into the dough for a touch of heat.
- Sweet Kesra: A touch of sugar (about a tablespoon) and a sprinkle of cinnamon can transform Kesra into a slightly sweet treat, perfect with tea or coffee.
- Different Oils: Experiment with other flavorful oils like walnut oil or avocado oil instead of olive oil.
FAQs (Frequently Asked Questions)
Q: Can I use only fine semolina for this recipe?
A: Yes, you can use purely fine semolina if you prefer. However, using a mix of fine and medium semolina gives the Kesra a slightly more complex texture.
Q: How do I know when the Kesra is cooked through?
A: The Kesra should be golden brown on both sides and have a firm, slightly crumbly exterior. When pressed lightly, the center should feel firm but still slightly soft.
Q: Can I bake the Kesra in the oven instead of cooking it in a pan?
A: While traditionally cooked on a griddle or in a pan, you can bake Kesra in the oven. Preheat your oven to 375°F (190°C) and bake for about 20-25 minutes, or until golden brown.
Q: My Kesra is too dry. What did I do wrong?
A: You may have added too much semolina or not enough water. Ensure you measure the ingredients accurately and add the water gradually until the dough comes together.
Q: How do I store leftover Kesra?
A: Store leftover Kesra in an airtight container at room temperature for up to 2 days, or in the refrigerator for up to 5 days. You can also freeze it for longer storage.
Final Thoughts
Kesra is more than just bread; it’s a connection to a rich culinary heritage, a symbol of Algerian hospitality, and a taste of home. I encourage you to try this recipe, experiment with variations, and make it your own. Whether you serve it alongside a hearty tagine, a comforting bowl of soup, or simply enjoy it with a drizzle of olive oil, I hope this Kesra brings a little bit of Algerian sunshine into your kitchen. Don’t hesitate to share your creations and feedback – I’m eager to hear about your experience!