
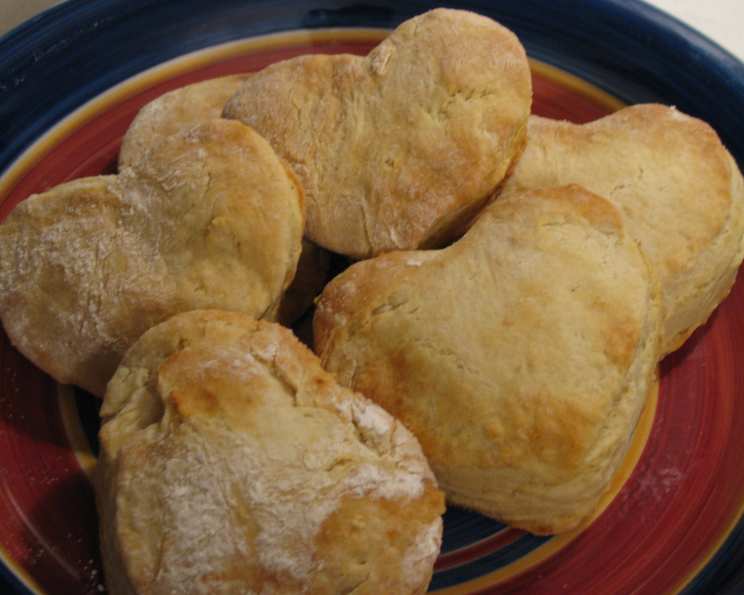
The Quest for the Perfect Flaky Biscuit: A Kentucky Fried Chicken Tribute
The scent of warm biscuits has always been a trigger for cherished memories. As a child, a trip to KFC wasn’t just about the fried chicken; it was about those golden-brown, flaky biscuits that practically melted in your mouth. Slathered with honey butter (a sinful addition, I know!), they were the perfect comforting counterpart to the crispy, savory chicken. I remember carefully peeling apart the layers, letting the steam escape, and savoring each buttery bite. Recreating that magic at home has been a personal mission, and this recipe comes darn close!
Recipe Overview
- Prep Time: 15 minutes
- Cook Time: 10-13 minutes
- Total Time: 25-28 minutes
- Servings: 9
- Yield: 9 biscuits
- Dietary Type: Not Gluten-Free
Ingredients
- 1 1/2 cups flour
- 1 1/2 teaspoons salt
- 1 tablespoon sugar
- 1 tablespoon baking powder
- 2/3 cup milk
- 1/3 cup vegetable shortening
Note: Using cold ingredients is crucial for achieving the desired flaky texture. Consider chilling the milk and vegetable shortening before beginning. All-purpose flour works well, but you can substitute with a lower protein flour like pastry flour for an even more tender biscuit.
Equipment Needed
- Mixing bowl
- Measuring cups and spoons
- Baking sheet
- Pastry blender or your hands
- Floured surface
- Biscuit cutter or knife
Instructions
-
Preheat your oven to 425ºF (220°C). Ensuring your oven is properly preheated is vital for achieving that beautiful golden-brown color and maximizing the rise of the biscuits.
-
In a mixing bowl, sift together the flour, salt, sugar, and baking powder. Sifting ensures that the dry ingredients are evenly distributed and helps create a lighter, more tender biscuit. If you don’t have a sifter, whisk the ingredients together vigorously for about 30 seconds.
-
Make a well in the center of the dry ingredients. This creates a space to evenly incorporate the wet ingredients.
-
Add the milk to the well.
-
Add the vegetable shortening. Now, using a pastry blender or your fingers, cut in the vegetable shortening into the flour mixture until it resembles coarse crumbs. This process is crucial for creating those desirable pockets of fat that melt during baking, resulting in a flaky biscuit. The mixture should still have visible pieces of shortening, about the size of small peas. Avoid overmixing at this stage.
-
If needed, add milk to form a cohesive dough. Be careful not to add too much liquid, as a wet dough will result in tough biscuits. The dough should be slightly sticky but manageable.
-
Turn the dough out onto a lightly floured board or countertop.
-
Knead the dough gently 6 to 8 times. Over-kneading develops the gluten in the flour, leading to a tough biscuit. The goal here is simply to bring the dough together.
-
Pat the dough down to approximately 1/2-inch thickness. Use a rolling pin if you prefer, but gently patting it by hand helps maintain the pockets of fat and create a more rustic appearance.
-
Cut out the biscuits using a biscuit cutter (about 2-3 inches in diameter) or a sharp knife. If using a knife, cut straight down, avoiding twisting motions, which can seal the edges and prevent proper rising. If using a biscuit cutter, press straight down and lift up. When re-rolling scraps, try to stack them on top of each other instead of squishing together. This creates layers.
-
Place the biscuits on an ungreased baking sheet, leaving a small space between each biscuit.
-
Bake in the preheated oven for 10-13 minutes, or until the biscuits are golden brown on top. Keep a close eye on them during the last few minutes of baking to prevent burning.
-
Remove from the oven and let cool slightly on the baking sheet before serving.
Expert Tips & Tricks
- Cold is Key: As mentioned earlier, using cold ingredients is paramount. Chill the flour, milk, and vegetable shortening for at least 30 minutes before starting. Some chefs even recommend freezing the shortening for 15 minutes.
- Don’t Overmix: Overmixing develops gluten, which results in tough biscuits. Mix the ingredients just until they come together.
- Lamination for Layers: For even more flaky layers, try a simple lamination technique. After the initial mixing, pat the dough into a rectangle, fold it in thirds like a letter, turn it 90 degrees, and repeat the process 2-3 times before cutting out the biscuits.
- Buttermilk Boost: Substitute buttermilk for regular milk for a tangier flavor and more tender texture.
- High Heat Advantage: The high baking temperature helps the biscuits rise quickly and creates a crispy exterior while keeping the inside soft.
- Brush with Butter: For an extra touch of richness and shine, brush the tops of the biscuits with melted butter before baking or immediately after removing them from the oven.
Serving & Storage Suggestions
These biscuits are best served warm, straight from the oven. They are delicious on their own, but even better with butter, jam, honey, or gravy. They make a perfect accompaniment to fried chicken, of course, but also pair well with soups, stews, and scrambled eggs.
Leftover biscuits can be stored at room temperature in an airtight container for up to 2 days, or in the refrigerator for up to 5 days. To reheat, wrap the biscuits in foil and warm them in a 350°F (175°C) oven for about 5-10 minutes. You can also microwave them for a few seconds, but they may become slightly tougher. For longer storage, freeze the baked biscuits in a freezer-safe bag or container. Thaw them completely before reheating.
Nutritional Information
| Nutrient | Amount per Serving | % Daily Value |
|---|---|---|
| Calories | 160.7 kcal | N/A |
| Calories from Fat | 76 g | 47% |
| Total Fat | 8.4 g | 12% |
| Saturated Fat | 2.6 g | 13% |
| Cholesterol | 2.5 mg | 0% |
| Sodium | 517.9 mg | 21% |
| Total Carbohydrate | 18.5 g | 6% |
| Dietary Fiber | 0.6 g | 2% |
| Sugars | 1.4 g | 5% |
| Protein | 2.8 g | 5% |
Note: These values are estimates and may vary based on specific ingredients and preparation methods.
Variations & Substitutions
- Cheese Biscuits: Add 1/2 cup of shredded cheddar cheese to the dry ingredients for cheesy biscuits.
- Herb Biscuits: Incorporate 1-2 tablespoons of chopped fresh herbs, such as rosemary, thyme, or chives, into the dough.
- Garlic Biscuits: Mix 1-2 teaspoons of garlic powder into the dry ingredients.
- Sweet Biscuits: Increase the sugar to 2-3 tablespoons and add a pinch of cinnamon for a sweeter treat.
- Gluten-Free Biscuits: Substitute the all-purpose flour with a gluten-free all-purpose flour blend. You may need to adjust the amount of liquid to achieve the desired consistency. Note that gluten-free biscuits may not rise as much as those made with wheat flour.
- Vegan Biscuits: Substitute the milk with plant-based milk (such as almond, soy, or oat milk) and the vegetable shortening with vegan butter or coconut oil.
FAQs (Frequently Asked Questions)
Q: Why are my biscuits tough?
A: Overmixing the dough develops the gluten, resulting in tough biscuits. Be sure to mix the ingredients just until they come together and avoid excessive kneading.
Q: How do I get my biscuits to rise higher?
A: Using cold ingredients, ensuring your baking powder is fresh, and avoiding overmixing are all crucial for achieving a good rise. Also, make sure your oven is properly preheated.
Q: Can I make the dough ahead of time?
A: Yes, you can prepare the dough ahead of time, wrap it tightly in plastic wrap, and refrigerate it for up to 24 hours. Let the dough come to room temperature slightly before cutting out the biscuits.
Q: Can I freeze the biscuits?
A: Yes, you can freeze the baked biscuits in a freezer-safe bag or container. Thaw them completely before reheating.
Q: What can I use instead of vegetable shortening?
A: You can substitute vegetable shortening with butter, lard, or coconut oil. However, keep in mind that the flavor and texture of the biscuits may vary slightly depending on the substitute used.
Final Thoughts
These biscuits are more than just a recipe; they’re a nostalgic journey back to simpler times, filled with the comforting aroma of a home-cooked meal. Don’t be intimidated by the process; with a few simple steps and some mindful attention, you can easily recreate these delicious KFC-inspired biscuits in your own kitchen. Whether you’re serving them alongside fried chicken, slathering them with butter and jam, or simply enjoying them on their own, I hope this recipe brings a little bit of joy and warmth to your table. Experiment with variations, share your creations, and most importantly, have fun in the kitchen!