
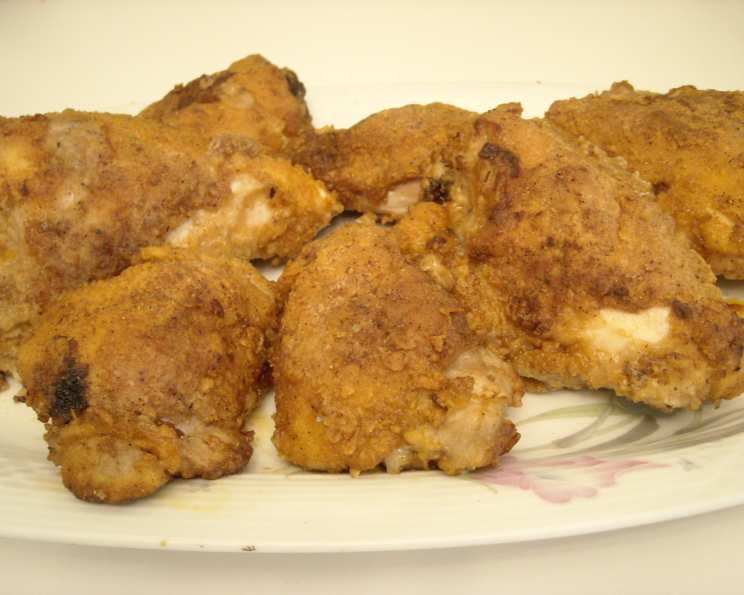
Unleashing the Secrets of Homemade Fried Chicken: A Tribute to the Colonel
The aroma of fried chicken has always held a special place in my heart. I remember, as a child, the sheer excitement of family picnics, where a bucket of crispy, golden-brown chicken was the undisputed star. The satisfying crunch, the savory spices, and the tender, juicy meat created a symphony of flavors that transported me to pure bliss. While many seek the fast-food variety, recreating that iconic taste at home has become a personal mission, a way to honor the simple joys of a well-prepared meal and share it with loved ones.
Recipe Overview
- Prep Time: 15 minutes
- Cook Time: 20 minutes
- Total Time: 35 minutes
- Servings: 4
- Yield: 1 whole chicken
- Dietary Type: Not specified
Ingredients
For the Chicken:
- 1 whole chicken, cut into pieces
- 3 beaten eggs
- 4 tablespoons oil
For the Coating:
- 2 cups flour
- 4 teaspoons paprika
- 2 ½ teaspoons salt
- 1 teaspoon pepper
- 1 teaspoon poultry seasoning
- 1 teaspoon thyme
- 1 teaspoon oregano
- 1 teaspoon tarragon
- ½ teaspoon garlic salt
- ½ teaspoon onion salt
- ½ teaspoon celery salt
Equipment Needed
- Large mixing bowl or clean plastic bag
- Large skillet or deep frying pan
- Paper towels
Instructions
-
In a large mixing bowl, or a clean plastic bag, combine all the coating ingredients: flour, paprika, salt, pepper, poultry seasoning, thyme, oregano, tarragon, garlic salt, onion salt, and celery salt. Sift or whisk them together thoroughly to ensure even distribution of spices. This is crucial for that signature flavor in every bite.
-
Coat each chicken piece first in the beaten eggs, ensuring every surface is covered. The egg wash acts as a binder, helping the flour mixture adhere to the chicken.
-
Transfer the egg-coated chicken to the plastic bag containing the flour mixture. Seal the bag and shake vigorously until each piece is completely coated in the flour mixture. If using a mixing bowl, dredge each piece individually, pressing the flour onto the surface to ensure maximum coverage. The key here is to achieve a thick, even coating, as this is what creates the crispy crust.
-
Heat the oil in a skillet over medium-high heat. Ensure there is enough oil to come up at least halfway up the chicken pieces. The oil should be hot enough to sizzle gently when a small amount of flour is dropped in. Be careful not to overheat the oil, as this will cause the chicken to burn on the outside before it is cooked through.
-
Carefully place the flour-coated chicken pieces into the hot oil, being mindful not to overcrowd the pan. Overcrowding lowers the oil temperature, resulting in soggy chicken. Brown the chicken in the oil slowly, uncovered, turning occasionally to ensure even browning on all sides. This process should take about 5-7 minutes per side, or until golden brown.
-
Once the chicken is browned, cover the skillet with a lid. Reduce the heat to very low and continue frying the chicken on a gentle heat until it is fully cooked through. This step is essential for ensuring that the chicken is cooked to a safe internal temperature (165°F or 74°C). The cooking time will vary depending on the size and thickness of the chicken pieces, but generally, it will take about 10-15 minutes.
-
To check for doneness, insert a meat thermometer into the thickest part of the chicken, avoiding the bone. Alternatively, you can pierce the chicken with a fork; the juices should run clear, not pink.
-
Once cooked through, remove the chicken from the skillet and place it on paper towels to drain out any excess oil. This step helps to ensure that the chicken remains crispy and not greasy.
Expert Tips & Tricks
- Spice Adjustment: Feel free to adjust the spices in the coating to your liking. If you prefer a spicier chicken, add a pinch of cayenne pepper or a dash of hot sauce to the egg wash.
- Double Dredge: For an extra-crispy crust, try double-dredging the chicken. After the initial coating, dip the chicken back into the egg wash and then back into the flour mixture.
- Buttermilk Soak: Soaking the chicken in buttermilk for at least 30 minutes (or even overnight) before coating can help to tenderize the meat and add flavor.
- Oil Temperature: Maintaining the correct oil temperature is crucial. If the oil is too hot, the chicken will burn on the outside before it’s cooked on the inside. If the oil is not hot enough, the chicken will absorb too much oil and become greasy. Use a thermometer to monitor the oil temperature.
- Resting: Allowing the chicken to rest for a few minutes after cooking helps the juices redistribute, resulting in a more tender and flavorful product.
Serving & Storage Suggestions
Serve the fried chicken hot, ideally with classic sides such as mashed potatoes, coleslaw, biscuits, or corn on the cob. For a complete meal, consider adding a side salad or some fresh vegetables.
Leftover fried chicken can be stored in an airtight container in the refrigerator for up to 3-4 days. For longer storage, you can freeze the chicken for up to 2-3 months. To reheat, bake the chicken in a preheated oven at 350°F (175°C) until heated through, or use an air fryer to restore the crispness. Reheating in the microwave is not recommended as it can make the chicken soggy.
Nutritional Information
| Nutrient | Amount per Serving | % Daily Value |
|---|---|---|
| Calories | 1133.2 kcal | N/A |
| Calories from Fat | 640 g | 57% |
| Total Fat | 71.2 g | 109% |
| Saturated Fat | 18.2 g | 91% |
| Cholesterol | 402.4 mg | 134% |
| Sodium | 1735.4 mg | 72% |
| Total Carbohydrate | 49.7 g | 16% |
| Dietary Fiber | 2.6 g | 10% |
| Sugars | 0.7 g | 2% |
| Protein | 68.9 g | 137% |
Note: Nutritional information is an estimate and may vary based on specific ingredients and preparation methods.
Variations & Substitutions
- Gluten-Free Fried Chicken: Substitute the all-purpose flour with a gluten-free blend for a gluten-free version.
- Spicy Fried Chicken: Add cayenne pepper, chili powder, or hot sauce to the flour mixture or egg wash for a spicier kick.
- Herb-Infused Fried Chicken: Experiment with different herbs in the coating, such as rosemary, sage, or parsley, to create unique flavor profiles.
- Air Fryer Fried Chicken: For a healthier alternative, cook the chicken in an air fryer. Preheat the air fryer to 375°F (190°C) and cook for 15-20 minutes, or until the chicken is cooked through and crispy, flipping halfway through.
FAQs (Frequently Asked Questions)
Q: Can I use boneless, skinless chicken breasts for this recipe?
A: Yes, you can use boneless, skinless chicken breasts, but be mindful that they will cook faster than bone-in pieces. Adjust the cooking time accordingly to avoid drying them out.
Q: How do I prevent the chicken from sticking to the skillet?
A: Make sure the oil is hot enough before adding the chicken. Also, avoid overcrowding the pan, as this can lower the oil temperature and cause the chicken to stick.
Q: What is poultry seasoning and can I make my own?
A: Poultry seasoning is a blend of herbs and spices typically used to season poultry dishes. You can easily make your own by combining dried thyme, sage, rosemary, marjoram, and pepper.
Q: How do I keep the fried chicken crispy after it’s cooked?
A: Place the cooked chicken on a wire rack instead of paper towels to allow air to circulate around the pieces and prevent them from becoming soggy.
Q: Can I prepare the chicken ahead of time?
A: Yes, you can coat the chicken with the flour mixture ahead of time and store it in the refrigerator for up to 24 hours. However, it’s best to fry the chicken just before serving for optimal crispness.
Final Thoughts
Now that you’re armed with this recipe, I encourage you to venture into the kitchen and create your own batch of homemade fried chicken. Don’t be afraid to experiment with different spices and seasonings to create a flavor that suits your palate. Whether you’re serving it at a picnic, a family gathering, or a simple weeknight dinner, this fried chicken is sure to be a crowd-pleaser. So, gather your ingredients, roll up your sleeves, and get ready to savor the satisfying crunch and savory goodness of homemade fried chicken!