
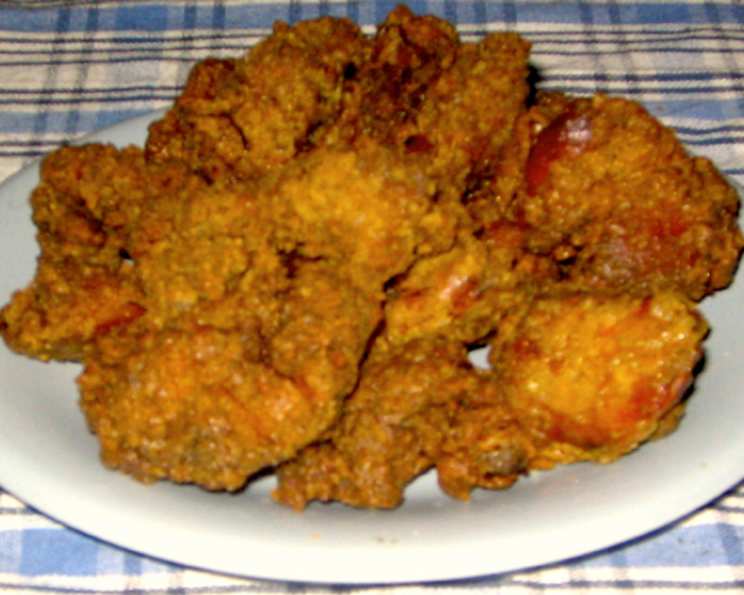
KFC Original Recipe Chicken Livers (Copycat)
My grandmother, bless her heart, had a thing for offal. While other kids were wrinkling their noses at the thought of liver and onions, I was eagerly anticipating Granny’s famous fried chicken livers. She never revealed her secret, but there was something undeniably addictive about their crispy, flavorful coating and the tender, almost creamy interior. For years, I’ve tried to recreate that nostalgic taste, and I believe I’ve finally cracked the code with this copycat recipe that captures the essence of KFC’s long-gone Original Recipe Chicken Livers. It’s a taste of childhood, resurrected.
Recipe Overview
- Prep Time: 2 hours 15 minutes
- Cook Time: 10-12 minutes
- Total Time: 2 hours 25-27 minutes
- Servings: 6-12
- Yield: 2-4 pounds
- Dietary Type: Not specified
Ingredients
- 2-4 lbs premium quality fresh chicken livers
For the Brine:
- 4 cups cold water
- 1 tablespoon fine sea salt
- 1 teaspoon Accent seasoning (recommended flavor enhancer)
For the Seasoned Flour:
- 2 cups pre-sifted all-purpose flour
- 1/2 cup Bulk KFC Original Recipe Seasoning (Copycat) (Recipe #453973 – one batch without added flour)
For Frying:
- Vegetable oil or pure vegetable shortening (peanut oil recommended)
Equipment Needed
- Large bowl or container for brining
- Large sealable container (e.g., GLAD food storage container or Ziploc bag)
- Tongs
- Wire rack
- Deep-fryer (or deep, heavy stovetop pot)
- Deep-fryer thermometer (if using stovetop)
- Paper towel-lined baking sheet
- Baking sheet
Instructions
- In a large bowl or container, prepare the brine by combining 4 cups cold water, 1 tablespoon fine sea salt, and 1 teaspoon Accent seasoning. Stir until the salt is dissolved.
- Add the 2-4 lbs of chicken livers to the brine. Ensure they are submerged.
- Cover the container and marinate the chicken livers in the refrigerator for at least 2 hours, turning them periodically with tongs to ensure even marination.
- While the livers are marinating, prepare the seasoned flour. In a large sealable container, such as a GLAD food storage container or a Ziploc bag, measure 2 cups of pre-sifted all-purpose flour and 1/2 cup of Bulk KFC Original Recipe Seasoning (Copycat) (Recipe #453973 – one batch without added flour).
- Seal the container tightly and shake well to combine the flour and seasoning evenly.
- After the chicken livers have marinated for at least 2 hours, remove them from the brine using tongs.
- Rinse or soak the chicken livers in very warm water to remove excess salt and seasoning from the brine. This step is crucial for preventing the final product from being overly salty.
- Place a few pieces of the rinsed chicken livers at a time into the container of seasoned flour.
- Seal the container firmly and shake gently in all directions to thoroughly coat the livers with the seasoned flour mixture. Be sure each piece is generously coated.
- Place the breaded chicken livers on a wire rack. This allows excess flour to fall off and helps the breading adhere better.
- Allow the breaded chicken livers to rest and absorb the breading for a few minutes before frying (about 10-15 minutes). This step is important for a crispy crust that doesn’t fall off during frying.
- Preheat the manufacturer’s recommended amount of frying oil in your deep-fryer to 315°F (OR) preheat enough fat to immerse the chicken completely in a deep, heavy stovetop pot to 315°F. Use a deep-fryer thermometer to monitor the temperature if using a stovetop pot. Maintaining the correct temperature is essential for properly cooked and crispy chicken livers.
- Add the breaded chicken livers to the elevated fry basket in the deep-fryer without overcrowding. Overcrowding will lower the oil temperature and result in soggy livers. If using a pot, carefully lower the livers into the hot oil, ensuring not to splash.
- Lower the basket slowly into the hot oil.
- Turn the livers only once midway through frying, approximately after 5-6 minutes.
- Fry until golden brown and fully cooked, about 10-12 minutes. Check for doneness by cutting into a liver; it should be cooked through with no pink remaining.
- Drain the fried chicken livers on a wire rack over a paper towel-lined baking sheet to remove excess oil.
- Transfer the rack over a baking sheet and keep the chicken livers warmed in a preheated 170°F oven until serving. This will keep them warm and crispy without overcooking.
- Serve and enjoy!
Expert Tips & Tricks
- Don’t skip the brining step! This not only seasons the livers but also helps tenderize them, resulting in a more pleasant texture.
- Use a thermometer! Maintaining the correct oil temperature is crucial for crispy, evenly cooked chicken livers. If the oil is too hot, the outside will burn before the inside is cooked. If it’s too cool, the livers will be greasy.
- Don’t overcrowd the fryer! Fry in batches to maintain the oil temperature and ensure even cooking.
- Double dip for extra crispiness: After the initial coating of seasoned flour, dip the livers back into the brine, then back into the seasoned flour. This creates a thicker, crispier coating.
- Consider adding a pinch of cayenne pepper to the seasoned flour for a little kick.
Serving & Storage Suggestions
Serve your KFC-inspired Original Recipe Chicken Livers hot and crispy. They pair perfectly with classic Southern sides like mashed potatoes, coleslaw, green beans, or biscuits. For a truly authentic experience, serve them in a paper bucket!
Leftover chicken livers can be stored in an airtight container in the refrigerator for up to 3 days. Reheat them in a preheated 350°F oven or in an air fryer until heated through and crispy. Microwaving is not recommended, as it will make them soggy. Freezing is not recommended.
Nutritional Information
(Estimated Nutritional Information per Serving – varies depending on the amount of oil absorbed and specific ingredient brands)
| Nutrient | Amount per Serving | % Daily Value |
|---|---|---|
| Calories | 332 kcal | 17% |
| Total Fat | 21g | 27% |
| Saturated Fat | 7.7g | 38% |
| Cholesterol | 522mg | 174% |
| Sodium | 1270mg | 53% |
| Total Carbs | 33g | 11% |
| Dietary Fiber | 1.1g | 4% |
| Sugars | 0.1g | 0% |
| Protein | 30g | 60% |
Variations & Substitutions
- Gluten-Free: Use a gluten-free all-purpose flour blend in the seasoned flour mixture. Ensure your seasoning blend is also gluten-free.
- Spicier Livers: Add more cayenne pepper or hot sauce to the brine or seasoned flour for a spicier kick.
- Herbaceous Flavor: Add dried herbs like thyme, oregano, or rosemary to the seasoned flour for a more complex flavor profile.
- Buttermilk Brine: Substitute the water in the brine with buttermilk for extra tender and tangy livers.
- Air Fryer Version: For a lower-fat option, cook the breaded livers in an air fryer at 375°F for 15-20 minutes, flipping halfway through, until golden brown and cooked through.
FAQs (Frequently Asked Questions)
Q: Why is the brining step so important?
A: Brining not only seasons the chicken livers throughout but also helps tenderize them, resulting in a more palatable texture. It also helps the breading adhere better.
Q: Can I use a different type of oil for frying?
A: Yes, you can use other high-smoke-point oils like canola, sunflower, or corn oil. Peanut oil is recommended for its flavor, but vegetable shortening also works well.
Q: How do I know when the chicken livers are fully cooked?
A: The chicken livers are fully cooked when they are golden brown and the internal temperature reaches 165°F. You can also cut into one to check for any remaining pinkness.
Q: Can I prepare the chicken livers ahead of time?
A: You can bread the chicken livers ahead of time and store them in the refrigerator for up to 2 hours before frying. However, for best results, fry them immediately after breading.
Q: My breading keeps falling off. What am I doing wrong?
A: Make sure to dry the chicken livers well before breading, and allow them to rest on a wire rack for a few minutes after breading to help the coating adhere. Also, ensure your oil is at the correct temperature.
Final Thoughts
Whether you’re a seasoned cook or a beginner in the kitchen, this copycat KFC Original Recipe Chicken Livers recipe is a fun and rewarding culinary adventure. It brings back the nostalgic taste of yesteryear, and allows you to enjoy a dish that is no longer available. Don’t be intimidated by the process; follow the steps carefully, and you’ll be rewarded with tender, flavorful, and crispy chicken livers that will impress your friends and family. I encourage you to give it a try, experiment with different variations, and share your feedback! Perhaps serve them with a side of creamy coleslaw and a cold glass of sweet tea for the full Southern experience! Enjoy!