
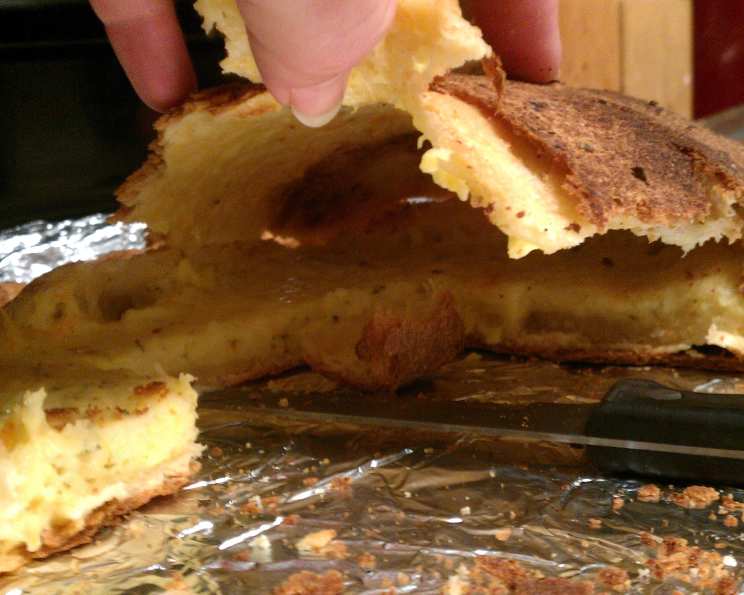
Khachapuri: A Taste of Georgian Sunshine
The aroma of warm bread and melted cheese instantly transports me back to a small, bustling bakery in Tbilisi. Sunlight streamed through the windows, illuminating bakers skillfully shaping dough, their hands dusted with flour. I remember the sheer joy of tearing into a freshly baked khachapuri, the cheese still bubbling, the crust perfectly crisp. That first bite – the tangy, salty cheese mingling with the soft, yeasty bread – was pure culinary bliss. It wasn’t just food; it was an experience, a warm embrace of Georgian hospitality and tradition. To this day, khachapuri remains one of my ultimate comfort foods, a simple yet profound reminder of that unforgettable journey.
Recipe Overview
- Prep Time: 30 minutes
- Cook Time: 45-55 minutes
- Total Time: 1 hour 15 minutes (plus 90-135 minutes rising time)
- Servings: 8
- Yield: 1 pie
- Dietary Type: Vegetarian
Ingredients
For the Crust:
- 2 1⁄4 teaspoons active dry yeast
- 1 teaspoon sugar
- 1⁄4 cup warm water
- 3⁄4 cup milk, at room temperature
- 2 tablespoons sugar
- 1⁄2 cup melted butter
- 1 teaspoon table salt
- 3 1⁄2 cups bread flour
For the Filling:
- 1⁄2 lb muenster cheese, shredded
- 1⁄2 lb jarlsberg cheese or 1/2 lb swiss cheese, shredded
- 1⁄2 lb white cheddar cheese, shredded
- 2 eggs, slightly beaten
- 2 tablespoons chopped parsley
- 1⁄4 teaspoon white pepper
For the Glaze:
- 1 egg white
- 1 tablespoon water
Equipment Needed
- 9-inch springform pan
- Large bowl
- Measuring cups and spoons
- Fork
- Oven
- Cooling rack
Instructions
-
Proof the yeast: In a small bowl, dissolve the active dry yeast and 1 teaspoon of sugar in 1/4 cup of warm water. Let it stand for 5-10 minutes, or until it becomes foamy, indicating that the yeast is active.
-
Combine wet ingredients: In a large bowl, combine the milk, 2 tablespoons of sugar, melted butter, and salt.
-
Form the dough: Add the proofed yeast mixture to the wet ingredients. Gradually add the bread flour, mixing until a soft dough forms.
-
Knead the dough: Turn the dough out onto a lightly floured surface and knead for 5-7 minutes, or until it is soft and smooth.
-
First rise: Grease a large bowl with oil. Place the dough in the oiled bowl, turning to coat all sides. Cover the bowl with a clean cloth or plastic wrap and let it rise in a warm place for 60-90 minutes, or until it has doubled in bulk.
-
Prepare the pan: While the dough is rising, grease a 9-inch springform pan very well. This is crucial to prevent the khachapuri from sticking.
-
Prepare the filling: In a separate bowl, mix together the shredded muenster, jarlsberg (or Swiss), and white cheddar cheeses. Add the slightly beaten eggs, chopped parsley, and white pepper. Combine all ingredients thoroughly until well-combined.
-
Shape the khachapuri: Once the dough has doubled, punch it down to release the air. Shape it into a ball and roll it out on a lightly floured surface to a 20-inch circle.
-
Assemble: Carefully ease the dough into the prepared springform pan. You can fold it in half to make it easier to lift and unfold. Let the excess dough hang over the edge of the pan.
-
Add the filling: Mound the cheese filling evenly onto the dough in the pan.
-
Fold and pleat: Bring the overhanging dough up over the cheese filling, folding it to create 8-12 evenly spaced pleats around the edge.
-
Create the knob: Twist and pinch the ends of the pleats together in the center to form a rough knob. This adds to the rustic charm of the khachapuri.
-
Second rise: Cover the filled khachapuri with a buttered 12-inch square of waxed paper (buttered side down). Let it rise for another 30-45 minutes, or until it has doubled in bulk again.
-
Preheat the oven: While the khachapuri is rising for the second time, preheat your oven to 375°F (190°C).
-
Glaze the dough: Remove and discard the waxed paper. In a small bowl, beat together the egg white and water with a fork. Brush the top of the dough with this glaze to give it a beautiful golden-brown color.
-
Bake: Bake the khachapuri in the preheated oven for 40-50 minutes, or until it is a deep golden brown.
-
Bottom crust browning: Remove the khachapuri from the springform pan and place it directly on the oven rack for an additional 5 minutes to brown the bottom crust. This step ensures a crispy base.
-
Cool: Transfer the baked khachapuri to a cooling rack and let it cool for at least 45 minutes before cutting it into wedges and serving.
Expert Tips & Tricks
- Cheese choice matters: The combination of cheeses in this recipe provides a great balance of flavor and meltability. Feel free to experiment with other cheeses like mozzarella, provolone, or feta, but ensure they melt well and complement each other.
- Don’t over-knead: Over-kneading can result in a tough dough. Knead only until the dough is smooth and elastic.
- Warm environment for rising: A warm environment is essential for the dough to rise properly. If your kitchen is cold, you can place the dough in a slightly warmed oven (turned off!) or near a warm stovetop.
- Prevent a soggy bottom: Ensuring the bottom crust is browned properly is key to preventing sogginess. The extra 5 minutes on the oven rack makes a big difference.
- Make-ahead option: You can prepare the dough and cheese filling ahead of time. Store them separately in the refrigerator and assemble the khachapuri just before baking.
Serving & Storage Suggestions
Serve the khachapuri warm, cut into wedges. It’s delicious on its own or with a side salad. Leftovers can be stored in an airtight container in the refrigerator for up to 3 days. To reheat, wrap individual wedges in foil and warm them in a preheated oven at 350°F (175°C) for about 10-15 minutes, or until heated through. You can also microwave them, but the crust won’t be as crispy. Freezing is not recommended, as the texture of the cheese may change.
Nutritional Information
| Nutrient | Amount per Serving | % Daily Value |
|---|---|---|
| Calories | 680.8 kcal | N/A |
| Calories from Fat | 360 g | 53% |
| Total Fat | 40 g | 61% |
| Saturated Fat | 24.8 g | 123% |
| Cholesterol | 163.4 mg | 54% |
| Sodium | 839.5 mg | 34% |
| Total Carbohydrate | 49.4 g | 16% |
| Dietary Fiber | 1.8 g | 7% |
| Sugars | 4.8 g | N/A |
| Protein | 30.4 g | 60% |
Note: Nutritional information is an estimate and can vary based on specific ingredients and portion sizes.
Variations & Substitutions
- Different cheeses: Experiment with different cheese combinations to create your own unique flavor profile. Consider adding some crumbled feta, smoked gouda, or even a little blue cheese for a bolder taste.
- Herbs and spices: Add other herbs or spices to the filling, such as dill, cilantro, or a pinch of red pepper flakes for a little heat.
- Crust variations: For a slightly different crust, you can use all-purpose flour instead of bread flour, although the bread flour will give a chewier texture.
- Adjaruli Khachapuri: Try the boat-shaped version, Adjaruli Khachapuri, by leaving the center of the dough open and adding a raw egg and a pat of butter just before serving. The heat from the bread cooks the egg slightly, creating a rich and creamy sauce.
FAQs (Frequently Asked Questions)
Q: Can I use instant yeast instead of active dry yeast?
A: Yes, you can substitute instant yeast for active dry yeast. Simply add it directly to the flour without proofing it first. Use the same amount (2 1/4 teaspoons).
Q: My dough isn’t rising. What could be the problem?
A: The most common reason for dough not rising is inactive yeast. Make sure your yeast is fresh and properly proofed. Also, ensure the dough is in a warm environment.
Q: Can I make this recipe gluten-free?
A: While this recipe is not inherently gluten-free, you can try substituting the bread flour with a gluten-free all-purpose flour blend. Keep in mind that the texture may be slightly different.
Q: How do I prevent the cheese from burning?
A: If you notice the cheese browning too quickly, you can loosely tent the khachapuri with foil during the last 15-20 minutes of baking.
Q: Can I add meat to the filling?
A: Absolutely! Cooked and crumbled sausage, bacon, or ham would be delicious additions to the cheese filling. Just be sure to drain any excess grease before adding it to the mixture.
Final Thoughts
Now it’s your turn to bring a taste of Georgia into your kitchen. Don’t be intimidated by the process; it’s easier than it looks, and the reward is well worth the effort. Imagine the smiles on your loved ones’ faces as they tear into a warm, cheesy wedge of khachapuri. Pair it with a crisp green salad and a glass of chilled white wine for a truly memorable meal. I encourage you to experiment with different cheeses and herbs to create your own signature version. And please, share your experiences and feedback – I’d love to hear how your khachapuri journey unfolds!