
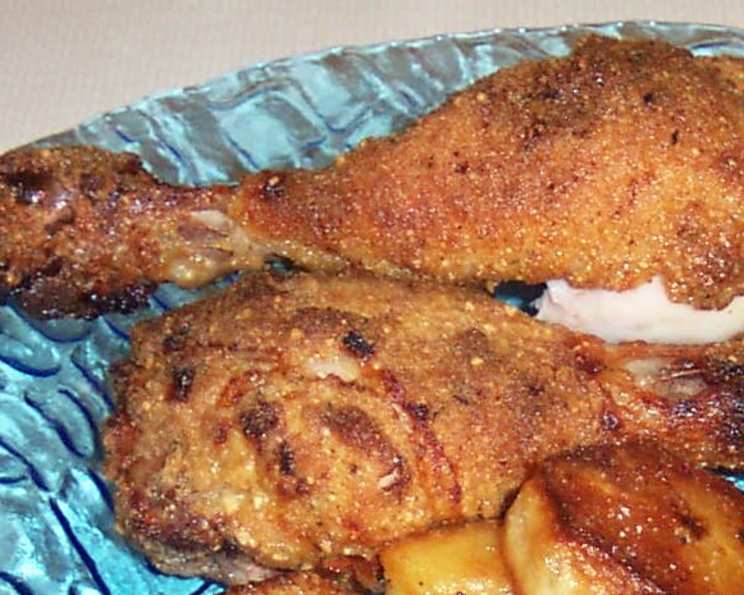
Kicked Up Oven Fried Chicken
The aroma still takes me back. As a child, Sunday afternoons at Grandma’s always meant one thing: fried chicken. But Grandma, bless her heart, wasn’t always fond of standing over a hot stove. She discovered a method that delivered all the crispy, juicy goodness of fried chicken, but baked in the oven. This “oven fried” version became a family favorite, and I’ve since taken it upon myself to give it a little kick with some heat and depth of flavor. This recipe is an ode to Grandma’s ingenuity, amplified for the modern palate.
Recipe Overview
- Prep Time: 5 hours 45 minutes
- Cook Time: 45 minutes
- Total Time: 6 hours 30 minutes
- Servings: 5-6
- Yield: 11-12 chicken pieces
- Dietary Type: Not specified
Ingredients
- 1 1/2 cups buttermilk
- 1/4 cup oil (can use olive oil)
- 2 tablespoons hot pepper sauce (I use President’s Choice Louisiana hot sauce)
- 2 tablespoons Dijon mustard
- 1 tablespoon minced fresh garlic (or to taste)
- 2 1/2 teaspoons seasoning salt, divided
- 1/2 teaspoon black pepper
- 2 medium onions, sliced
- 11-12 chicken pieces (skin on)
- 2 cups dry breadcrumbs (use only dry breadcrumbs!)
- 2/3 cup grated Parmesan cheese
- 1/2 cup all-purpose flour
- 1 teaspoon dried thyme
- 1 teaspoon paprika
- 1 teaspoon cayenne pepper
- 1 tablespoon garlic powder
- 4-5 tablespoons melted butter
Equipment Needed
- Large bowl
- Whisk
- Cookie rack
- 15×10-inch baking sheet
- Another bowl for breading
Instructions
- In a large bowl (large enough to hold all the chicken pieces), whisk together the buttermilk, oil, hot pepper sauce, minced garlic, Dijon mustard, 1 teaspoon seasoning salt, and black pepper. This is the flavor bomb that will infuse your chicken with deliciousness.
- Add in the sliced onions and chicken pieces. Turn the chicken to coat thoroughly, ensuring every piece is nicely submerged in the marinade.
- Cover the bowl tightly and refrigerate for a minimum of 4 hours, or up to 24 hours. Turn the chicken occasionally during this time to ensure even marination. The longer it sits, the more flavorful and tender it becomes. I like to marinate the chicken in the morning and bake it for dinner.
- Prepare your baking setup. Place a cookie rack on a foil-lined 15×10-inch baking sheet. This elevates the chicken, allowing air to circulate and crisp up the bottom. If you don’t have a cookie rack, you can place the chicken directly on the foil-lined baking sheet, but it might not be quite as crispy. I was able to fit 11 pieces on my rack.
- In a separate bowl, combine the dry breadcrumbs, Parmesan cheese, flour, thyme, paprika, cayenne pepper, 1 1/2 teaspoons seasoning salt, and garlic powder. This breading mixture is what will give the chicken its signature crunch.
- Remove the chicken pieces from the marinade, allowing any excess to drip off. You don’t want the breading to get soggy.
- Dip each chicken piece into the breadcrumb mixture, turning to coat completely. Press the breadcrumbs gently to help them adhere. Make sure every nook and cranny is covered for maximum crispiness.
- Arrange the breaded chicken (skin-side up) on the prepared rack or racks on the baking sheet.
- Let the chicken stand for exactly 30 minutes. No more, no less! This crucial step allows the breading to set, which helps it stay in place during baking and promotes extra crispiness.
- Preheat your oven to 425°F with the rack placed in the bottom third of the oven. This intense heat helps to crisp the chicken quickly.
- Drizzle the melted butter evenly over the chicken pieces. The butter adds richness and helps the chicken to brown beautifully.
- Bake until the chicken is crisp, golden brown, and cooked through, about 45 minutes. This might take a little longer depending on your oven. An instant-read thermometer inserted into the thickest part of the thigh should read 165°F.
Expert Tips & Tricks
- Don’t overcrowd the pan: If you have too many chicken pieces for one baking sheet, use two. Overcrowding will steam the chicken instead of baking it, resulting in a less crispy final product.
- Check for doneness: The internal temperature is key. Use an instant-read thermometer to ensure the chicken is cooked through. Insert it into the thickest part of the thigh, avoiding the bone.
- Breadcrumb variation: For an even more intense flavor, try using seasoned breadcrumbs. Panko breadcrumbs can also add extra crunch.
- Spice level control: Adjust the amount of hot pepper sauce and cayenne pepper to your liking. If you’re sensitive to spice, start with a smaller amount and add more to taste.
- The wire rack: This is essential for getting that all-around crispiness. The air circulation underneath helps to prevent the bottom from becoming soggy. If you don’t have one, try flipping the chicken halfway through cooking.
Serving & Storage Suggestions
Serve this “kicked up” oven fried chicken hot out of the oven for the best crispiness. Classic sides like mashed potatoes, coleslaw, corn on the cob, or green beans complement it perfectly. Store leftovers in an airtight container in the refrigerator for up to 3 days. To reheat, bake in a preheated oven at 350°F until warmed through, or use an air fryer to restore some of the crispness. Microwaving is not recommended as it will make the chicken soggy.
Nutritional Information
| Nutrient | Amount per Serving | % Daily Value |
|---|---|---|
| Calories | 215 kcal | N/A |
| Calories from Fat | 102 g | 48% |
| Total Fat | 11.4 g | 17% |
| Saturated Fat | 4.4 g | 22% |
| Cholesterol | 16.3 mg | 5% |
| Sodium | 374.9 mg | 15% |
| Total Carbohydrate | 21.7 g | 7% |
| Dietary Fiber | 1.6 g | 6% |
| Sugars | 3.5 g | N/A |
| Protein | 6.7 g | N/A |
Note: Nutritional information is an estimate and may vary based on specific ingredients and portion sizes.
Variations & Substitutions
- Gluten-free: Use gluten-free breadcrumbs and a gluten-free all-purpose flour blend.
- Dairy-free: Substitute the buttermilk with a mixture of non-dairy milk (such as almond or soy milk) and lemon juice or vinegar (1 tablespoon of lemon juice or vinegar per cup of non-dairy milk). Omit the Parmesan cheese or use a dairy-free Parmesan alternative.
- Herb variations: Experiment with different herbs and spices. Try adding dried rosemary, oregano, or basil to the breadcrumb mixture.
- Spicy level variations: If you like your chicken really spicy, add a pinch of cayenne pepper to the buttermilk marinade as well as the breadcrumb mixture.
- Sweet & savory: Add a tablespoon of brown sugar to the breadcrumb mixture for a touch of sweetness.
FAQs (Frequently Asked Questions)
Q: Can I use boneless, skinless chicken breasts for this recipe?
A: While you can, the skin adds a lot of flavor and helps to keep the chicken moist. If you use boneless, skinless breasts, reduce the baking time slightly to avoid overcooking.
Q: Can I use regular milk instead of buttermilk?
A: Buttermilk adds a tangy flavor and helps to tenderize the chicken. If you don’t have buttermilk, you can make a substitute by adding 1 tablespoon of lemon juice or vinegar to 1 cup of regular milk and letting it sit for 5 minutes.
Q: How do I know when the chicken is done?
A: The best way to ensure the chicken is cooked through is to use an instant-read thermometer. Insert it into the thickest part of the thigh, avoiding the bone. It should read 165°F.
Q: My breading is falling off. What am I doing wrong?
A: Make sure you’re using dry breadcrumbs, not fresh. Also, letting the chicken stand for 30 minutes before baking is crucial for the breading to set. Press the breadcrumbs firmly onto the chicken.
Q: Can I prepare the chicken ahead of time and bake it later?
A: Yes, you can bread the chicken and store it in the refrigerator for up to 2 hours before baking. This allows the breading to adhere even better.
Final Thoughts
I truly hope this recipe brings as much joy to your table as it has to mine. This “kicked up” oven fried chicken is a wonderful combination of comfort food and bold flavors. It’s a versatile dish that can be enjoyed year-round, and it’s sure to impress your family and friends. Don’t be afraid to experiment with the spices and herbs to create your own signature version. I would love to hear your feedback and any variations you come up with. Enjoy!