
Kidd Kraddick’s Famous Brown Bag Turkey: A Thanksgiving Tradition
My family’s Thanksgiving table has seen its fair share of roasted birds, from dry, flavorless experiments to brined masterpieces. However, there’s one turkey recipe that has stood the test of time, a quirky, almost unbelievable method passed down through generations of holiday cooks: Kidd Kraddick’s Brown Bag Turkey. I remember my own grandmother, initially skeptical, cautiously placing a water-soaked brown bag over a massive turkey, her brow furrowed with a mixture of apprehension and curiosity. The result? A juicy, perfectly roasted turkey with crispy skin that defied all expectations.
Recipe Overview
- Prep Time: 30 minutes
- Cook Time: 4 hours
- Total Time: 4 hours 30 minutes
- Servings: 6-8
- Yield: One large turkey
- Dietary Type: Varies (depending on broth used in gravy)
Ingredients
- 1 (18-20 lb) whole turkey
- 2 stalks celery, roughly chopped
- 1 carrot, roughly chopped
- 1 onion, cut into quarters
- 3-4 crushed garlic cloves
- Olive oil
- 6 oz. boiling chicken broth (low sodium preferred)
- 1/8 cup cornstarch
Equipment Needed
- Large roasting pan
- Large brown paper bag(s)
- Stapler
- Meat thermometer
- Large pot
- Strainer
Instructions
- Begin by preparing the turkey. Remove everything from the cavity of the turkey, including the giblet bag and any other packaging.
- Prepare the aromatic vegetables. There is no need to peel the vegetables, as they are only being used to infuse the turkey with flavor and will be discarded later.
- Cut one onion into quarters.
- Roughly chop one long carrot.
- Chop a couple of celery stalks.
- Crush 3-4 garlic cloves. You can do this easily by placing the garlic cloves on a cutting board and using the flat side of a broad kitchen knife to press down on them firmly.
- Stuff the turkey cavity with the prepared onion, carrot, celery, and garlic.
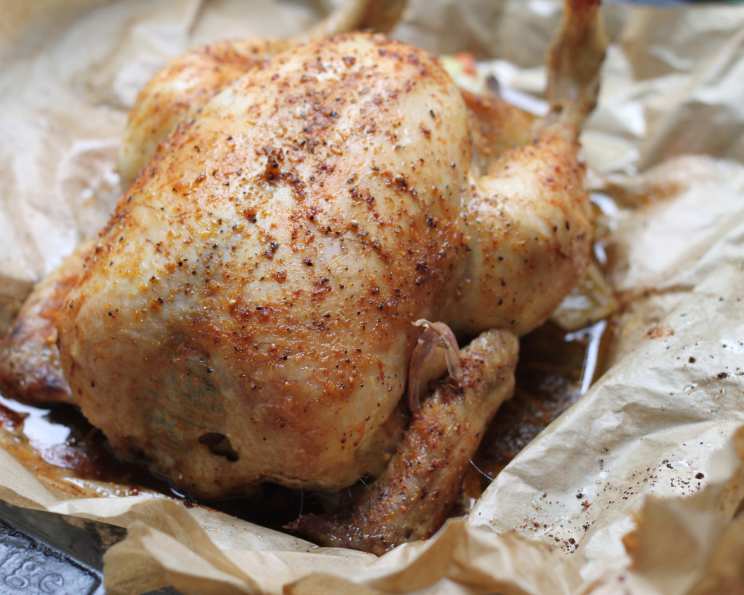
- Rub the entire turkey generously with olive oil. Ensure the entire bird is coated. The olive oil is crucial, as it prevents the bag from sticking and helps achieve crispy skin. Do not use butter, as butter usually contains salt, which can dry out the turkey.
- Place the turkey in a roasting pan.
- Cover the turkey completely with a large brown paper bag. If your turkey is very large, you may need to use two paper bags, stapling them together at the ends to create a larger covering.
- Staple the bag shut.
- Sprinkle the entire bag with water. This helps create a steamy environment inside the bag, promoting even cooking and moisture retention.
- Place the turkey in a preheated 375°F oven on the MIDDLE RACK. It’s crucial to ensure the bag doesn’t touch any heating elements.
- Roast for 13-15 minutes per pound. For an 18-20 lb turkey, this translates to roughly 3 hours and 54 minutes to 5 hours.
- When you think the turkey is nearly done, check the internal temperature using a meat thermometer. Insert the thermometer through the bag into the thickest part of the thigh, being careful not to touch the bone.
- The thermometer should register between 163-170°F. The internal temperature will continue to rise slightly after removing the turkey from the oven.
- Remove the turkey from the oven. Carefully cut away the bag and remove the turkey from the roasting pan.
- Reserve the pan drippings! These are the foundation for a delicious gravy.
- To make the gravy, strain the pan drippings into a large pot. Add any juices that have accumulated on the turkey platter.
- Add 6 oz of boiling chicken broth and 1/8 cup of cornstarch to the pot.
- Cook the gravy over low heat, stirring constantly, until it thickens.
- If the gravy is not thick enough, add a little more cornstarch, a teaspoon at a time, until you reach the desired consistency.
Expert Tips & Tricks
- Don’t skip the olive oil: It’s essential for preventing the bag from sticking to the skin.
- Middle rack matters: Placing the turkey on the middle rack ensures even cooking and prevents the bag from getting too close to the heating element.
- Watch the bag: Although the bag won’t burn at 375°F, keep an eye on it throughout the cooking process. If it seems like it’s browning too quickly, you can lightly mist it with more water.
- Resting is key: After removing the turkey from the oven, let it rest for at least 20-30 minutes before carving. This allows the juices to redistribute, resulting in a more tender and flavorful bird.
- Deglaze the pan: For an even richer gravy, after straining the pan drippings, deglaze the roasting pan with a little white wine or additional chicken broth. Scrape up any browned bits from the bottom of the pan and add them to the gravy.
Serving & Storage Suggestions
Serve the turkey hot, carved and arranged on a platter. Garnish with fresh herbs like parsley, rosemary, or thyme. The gravy should be served warm in a gravy boat.
Leftover turkey should be stored in an airtight container in the refrigerator for up to 3-4 days. You can also freeze leftover turkey for up to 2-3 months. To reheat, slice the turkey and warm it in a covered dish with a little chicken broth to prevent it from drying out. The gravy can also be reheated gently on the stovetop or in the microwave.
Nutritional Information
| Nutrient | Amount per Serving | % Daily Value |
|---|---|---|
| Calories | 1609.5 kcal | N/A |
| Calories from Fat | 719 kcal | 45% |
| Total Fat | 80 g | 123% |
| Saturated Fat | 22.5 g | 112% |
| Cholesterol | 677.3 mg | 225% |
| Sodium | 666.1 mg | 27% |
| Total Carbohydrate | 3.6 g | 1% |
| Dietary Fiber | 0.8 g | 3% |
| Sugars | 1.5 g | 6% |
| Protein | 203.9 g | 407% |
Note: Nutritional information is an estimate and may vary based on specific ingredients and portion sizes.
Variations & Substitutions
- Herb-Infused Oil: Instead of plain olive oil, infuse it with fresh herbs like rosemary, thyme, and sage for added flavor. Gently heat the olive oil with the herbs for about 30 minutes before using.
- Citrus Infusion: Add citrus notes by placing lemon or orange slices inside the turkey cavity along with the vegetables.
- Smoked Paprika: For a smoky flavor, add a teaspoon of smoked paprika to the olive oil before rubbing it on the turkey.
- Gluten-Free Gravy: Ensure your chicken broth is gluten-free. You can also use a gluten-free cornstarch alternative if needed.
FAQs (Frequently Asked Questions)
Q: Is it safe to cook a turkey in a brown paper bag?
A: Yes, it is safe as long as the bag does not come into direct contact with the oven’s heating element. The water sprinkled on the bag helps prevent it from burning.
Q: Will the brown paper bag impart any flavors to the turkey?
A: No, the olive oil acts as a barrier. The brown paper bag primarily functions to create a moist, self-basting environment, resulting in a juicy and flavorful bird.
Q: Can I use a plastic oven bag instead of a brown paper bag?
A: While you can use a plastic oven bag, the brown paper bag allows the turkey to roast rather than steam, which results in a different flavor and texture. The recipe specifically recommends a brown paper bag for optimal results.
Q: How do I ensure the turkey is cooked through?
A: The best way to ensure the turkey is cooked through is to use a meat thermometer and check the internal temperature in the thickest part of the thigh, making sure it reaches 163-170°F.
Q: What if the bag starts to brown too much during cooking?
A: If the bag starts to brown too much, you can lightly mist it with more water.
Final Thoughts
Don’t let the unconventional method fool you – Kidd Kraddick’s Brown Bag Turkey is a Thanksgiving game-changer. It’s a testament to the fact that sometimes, the most surprising techniques yield the most delicious results. This Thanksgiving, dare to be different, embrace the brown bag, and prepare for a turkey that will have everyone singing your praises. And be sure to let me know how it turns out!