
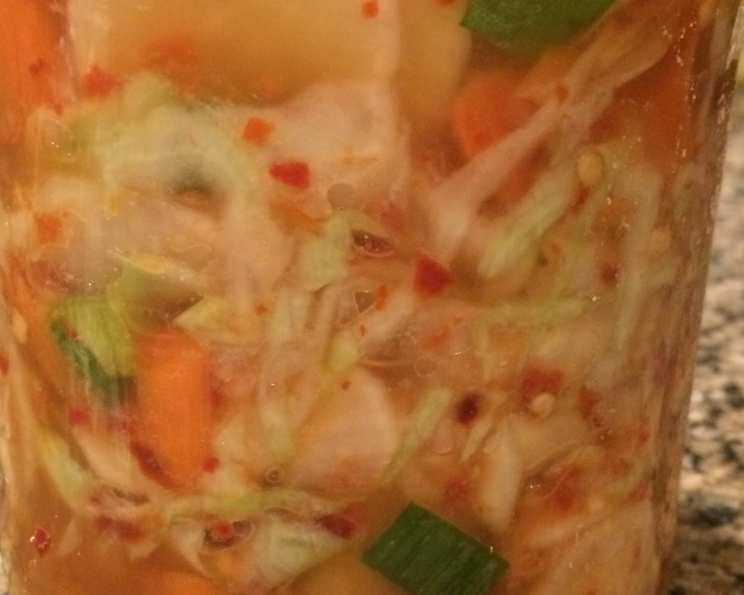
Crunchy, Spicy Delight: Daikon Radish Kimchi (Kakdugi)
The scent of kimchi always brings me back to my grandmother’s kitchen. She kept a massive earthenware crock bubbling away in the corner, a constant source of tangy, spicy goodness. While napa cabbage kimchi was her staple, she also experimented with other vegetables, and her daikon radish kimchi, or Kakdugi, was a particular favorite of mine. The satisfying crunch of the radish combined with the fiery, umami-rich sauce was simply irresistible, a taste I’ve been chasing ever since.
Recipe Overview
- Prep Time: 30 minutes
- Cook Time: 0 minutes (plus overnight fermentation)
- Total Time: 1 day
- Servings: Varies, approximately 4 cups
- Yield: 1 quart jar
- Dietary Type: Vegan-Adaptable (see variations)
Ingredients
- 1 lb daikon radish, peeled
- 4 ounces cabbage, shredded
- 2 ounces carrots, peeled
- 2 ounces gingerroot, peeled and grated
- 2 garlic cloves, grated
- 1 ounce green onion, chopped
- 5 tablespoons kosher salt
- 1 teaspoon crushed red pepper flakes (or Korean chili flakes/gochugaru)
- 3 anchovy fillets, finely chopped (omit for vegan)
- 1 ounce fish sauce (omit for vegan, substitute with extra salt and/or seaweed flakes)
- 2 ounces rice vinegar
- 1 teaspoon sugar
Equipment Needed
- Mandoline or sharp knife
- Large bowl
- Sieve or colander
- 1-quart glass jar or container
Instructions
- Start by preparing the daikon radish. After peeling, carefully inspect the radish and discard any remaining rootlets. Using a mandoline set to approximately 1/8 inch (3 mm) thickness, thinly slice the radish into uniform pieces. If you don’t have a mandoline, a very sharp knife and a steady hand will work; aim for consistent thickness.
- Next, prepare the carrots. Using the same mandoline setting (or a knife), slice the carrots to match the thickness of the radish. For smaller baby carrots, you can cut them lengthwise before slicing to create more uniform pieces. Always use a cut-proof glove when using a mandoline to protect your fingers.
- Now, prepare the brine. In a large bowl, dissolve 5 tablespoons of kosher salt in 5 cups of warm water. Ensure the salt is fully dissolved before proceeding.
- Add the sliced radish, carrots, and shredded cabbage to the saltwater brine. Make sure the vegetables are fully submerged to ensure even salting and fermentation. Soak for 1 hour. This process helps to soften the vegetables and draw out excess moisture, resulting in a crisper final product.
- While the vegetables are soaking, prepare the chili paste, the heart of the kimchi flavor. In a separate large bowl, combine 1/4 cup of water, rice vinegar, fish sauce, and sugar. Stir well until the sugar is dissolved.
- Add the remaining flavor components to the chili paste: crushed red pepper flakes (or gochugaru), grated ginger, grated garlic, and finely chopped anchovy fillets. Blend thoroughly until the mixture is a vibrant, aromatic paste. The anchovies add a crucial umami depth to the kimchi; if omitting for a vegan version, consider adding extra salt or a small amount of dried seaweed flakes for a similar savory note.
- After the vegetables have soaked for an hour, drain them using a sieve or colander set over a bowl. Be sure to reserve the brined juices; you will need them later.
- Transfer the drained vegetables to the bowl containing the chili paste. Mix thoroughly, ensuring that all the vegetables are well coated with the vibrant red paste. Use your hands (wearing gloves is recommended!) to gently massage the paste into the vegetables for even distribution.
- Pack the kimchi mixture into a clean 1-quart glass jar. An old pickle jar or mason jar works perfectly. Press the mixture down firmly to remove any air pockets.
- Pour some of the reserved brine into the bowl with the chili paste residue. Swirl to capture any leftover seasonings, and then pour this chili-infused brine into the jar, over the packed kimchi. The liquid should cover the vegetables, but leave about an inch of headspace at the top of the jar to allow for expansion during fermentation.
- Cover the jar loosely or use an airlock lid if you have one. Let the kimchi stand at room temperature overnight to begin the fermentation process. The warmer the room, the faster it will ferment.
- After the overnight fermentation, transfer the kimchi to the refrigerator. The cold temperature will slow down the fermentation process. Refrigerate for at least 24 hours before eating. The flavor will continue to develop over time, becoming more sour and complex. The kimchi is best eaten within 1 week for optimal crunch and flavor, but will still be safe to eat for longer, though the texture will soften.
Expert Tips & Tricks
- Spice Level Adjustment: The amount of red pepper flakes can be adjusted to your preference. Start with half the amount for a milder kimchi, or add more for an extra kick. Different brands of gochugaru also vary in heat, so taste-test as you go.
- Salt Concentration: The initial brining is critical. Too little salt, and the kimchi may spoil. Too much, and it will be overly salty. Follow the recipe carefully, but you can always adjust the saltiness by adding a small amount of fresh water if needed.
- Fermentation Time: The overnight fermentation time depends on the ambient temperature. Warmer temperatures will speed up fermentation, while cooler temperatures will slow it down. Check the kimchi after 12 hours; if it smells noticeably sour and has some bubbles, it’s likely ready to refrigerate.
- Vegetable Crunch: To ensure the vegetables remain crisp, avoid over-handling them during the mixing process. Gently toss the vegetables with the chili paste rather than aggressively squeezing them.
Serving & Storage Suggestions
Serve Daikon Radish Kimchi chilled, straight from the refrigerator. It’s a fantastic side dish to Korean barbecue, rice bowls, or noodle soups. I love it on top of grilled meats, in tacos, or even mixed into scrambled eggs. It will last for several weeks in the refrigerator. Always use a clean utensil to remove kimchi from the jar to prevent contamination. Properly fermented kimchi won’t spoil easily, but mold growth indicates spoilage and should be discarded.
Nutritional Information
| Nutrient | Amount per Serving | % Daily Value |
|---|---|---|
| Calories | 25 kcal | 1% |
| Total Fat | 0g | 0% |
| Saturated Fat | 0g | 0% |
| Cholesterol | 0mg | 0% |
| Sodium | 1120mg | 47% |
| Total Carbohydrate | 6g | 2% |
| Dietary Fiber | 1g | 4% |
| Sugars | 2g | 4% |
| Protein | 1g | 2% |
Note: Nutritional information is an estimate and may vary based on specific ingredients and portion sizes.
Variations & Substitutions
- Vegan Kimchi: Omit the anchovy fillets and fish sauce. Substitute with 1-2 teaspoons of seaweed flakes or a small amount of miso paste for umami. Increase salt to taste.
- Spicy Level: Adjust the amount of red pepper flakes to suit your taste. Use gochugaru (Korean chili flakes) for a more authentic flavor and vibrant red color.
- Added Vegetables: Feel free to add other vegetables like cucumbers, Asian pear, or mustard greens.
- Gluten-Free: This recipe is naturally gluten-free, but always double-check the ingredients in your fish sauce and rice vinegar to ensure they are certified gluten-free.
FAQs (Frequently Asked Questions)
Q: Can I use a different type of radish?
A: While daikon radish is traditional for Kakdugi, you can experiment with other types like red radishes or black radishes, but the flavor and texture will vary.
Q: How do I know when the kimchi is ready?
A: After the initial fermentation, taste the kimchi. It should be noticeably sour and have a tangy aroma. The longer it ferments, the more sour it will become.
Q: Can I ferment the kimchi for longer than overnight?
A: Yes, you can ferment it for longer, but be mindful of the temperature. In warmer temperatures, longer fermentation times can lead to overly sour kimchi. Taste it daily to monitor the flavor development.
Q: What if my kimchi gets moldy?
A: If you see mold growing on the surface of the kimchi, it’s best to discard it. This indicates spoilage and can be a health risk.
Q: How long does the kimchi last in the refrigerator?
A: The kimchi will last for several weeks in the refrigerator, but the texture will soften over time. The flavor will also continue to develop, becoming more sour. For optimal crunch and flavor, eat it within 1 week.
Final Thoughts
Making Daikon Radish Kimchi is a rewarding culinary adventure that brings a vibrant, spicy, and tangy flavor to your table. Don’t be intimidated by the fermentation process; it’s easier than you might think! I encourage you to try this recipe, experiment with different vegetables and spice levels, and make it your own. Share your creations and feedback, and perhaps even pair it with some Korean BBQ for the full experience. Happy fermenting!