
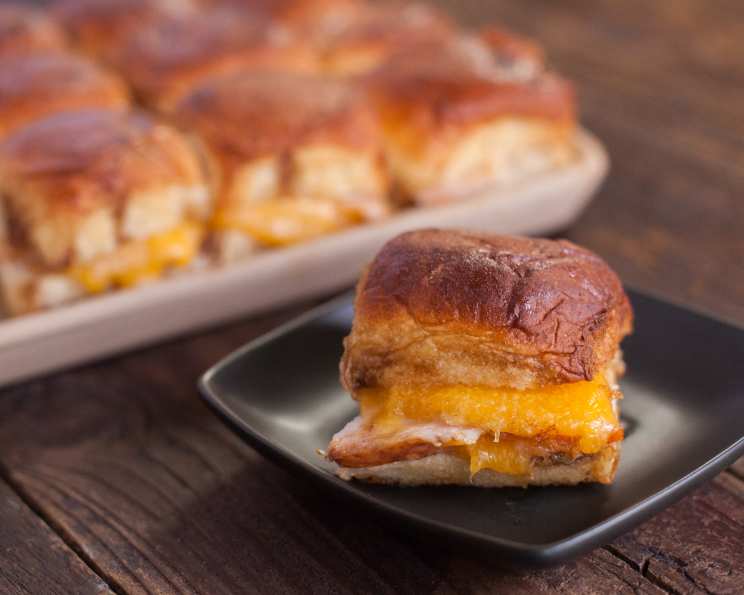
Kim’s Bite-Size Sandwiches: The Perfect Party Pleaser
My memories of family gatherings are always intertwined with the aroma of delicious, easy-to-eat appetizers. I can vividly picture my aunt rushing into the kitchen, a big smile on her face, carrying a tray piled high with these very sandwiches. They were always the first to disappear, devoured by kids and adults alike. They were warm, cheesy, and the perfect finger food for any occasion.
Recipe Overview
- Prep Time: 10 minutes
- Cook Time: 10 minutes
- Total Time: 20 minutes
- Yields: 16 sandwiches
- Serves: 16
- Dietary Type: Not specified (can be modified)
Ingredients
- 16 Hawaiian rolls, halved
- 1 lb Sliced roast beef (or your favorite lunch meat)
- 16 slices Monterey Jack pepper cheese (or your favorite cheese)
- ¼ cup Butter
- 3 tablespoons Worcestershire sauce
Equipment Needed
- Baking sheet
- Small saucepan or microwave-safe bowl
- Pastry brush or spoon
Instructions
- Preheat your oven to 350°F (175°C).
- Prepare the sandwiches: Halve each of the 16 Hawaiian rolls. Layer the bottom half of each roll with a slice of roast beef and a slice of Monterey Jack pepper cheese. Place the top half of the roll back on to complete the sandwich. Arrange the prepared sandwiches on a baking sheet.
- Make the butter sauce: In a small saucepan over low heat, or in a microwave-safe bowl, melt the butter. Once melted, stir in the Worcestershire sauce until well combined.
- Brush the sandwiches: Using a pastry brush or spoon, generously spread the butter mixture over the tops of each sandwich. Ensure each roll is evenly coated.
- Bake: Place the baking sheet with the sandwiches in the preheated oven and bake for approximately 10 minutes, or until the butter is melted and the tops of the sandwiches are slightly browned and the cheese is melted.
- Serve immediately and enjoy!
Expert Tips & Tricks
- Don’t overbake! The goal is melted cheese and a slightly toasted top, not dried-out bread. Start checking around 8 minutes to prevent burning.
- For an extra touch of flavor, try adding a sprinkle of garlic powder or onion powder to the melted butter mixture.
- If you want a spicier kick, add a pinch of red pepper flakes to the butter mixture.
- To ensure even melting of the cheese, use thinly sliced cheese.
- For a softer crust, cover the baking sheet loosely with foil during the first half of the baking time. Remove the foil for the last few minutes to brown the tops.
- If you don’t have a pastry brush, a spoon works just as well for drizzling the butter mixture.
- For easy cleanup, line your baking sheet with parchment paper.
- Make ahead: Assemble the sandwiches ahead of time, but wait to add the butter mixture until just before baking to prevent the rolls from getting soggy. You can keep them assembled and covered in the refrigerator for up to 24 hours. Add about 2-3 minutes to baking time if baking from chilled.
- Add some sliced tomato, lettuce or onion for some added freshness.
Serving & Storage Suggestions
These bite-size sandwiches are best served warm and fresh, straight from the oven. Arrange them on a platter for an easy appetizer. They pair perfectly with a variety of sides, such as potato salad, coleslaw, or a simple green salad.
Leftover sandwiches should be stored in an airtight container in the refrigerator. They will keep for up to 2-3 days. To reheat, wrap the sandwiches in foil and bake in a 350°F (175°C) oven for about 5-7 minutes, or until warmed through. Alternatively, you can reheat them in a microwave, but be aware that the bread may become slightly soggy.
These sandwiches are best enjoyed within a few hours and can sit out for a maximum of two hours at room temperature. After that, bacteria can begin to grow and make the sandwiches unsafe to eat.
They don’t freeze exceptionally well, as the bread can become soggy upon thawing. However, if you must freeze them, wrap them individually in plastic wrap and then place them in a freezer-safe bag. Thaw them in the refrigerator overnight and reheat as described above.
Nutritional Information
(Estimates will vary based on specific ingredients used)
| Nutrient | Amount per Serving | % Daily Value |
|---|---|---|
| Calories | 205 kcal | 10% |
| Total Fat | 12g | 18% |
| Saturated Fat | 7g | 35% |
| Cholesterol | 40mg | 13% |
| Sodium | 350mg | 15% |
| Total Carbohydrate | 12g | 4% |
| Dietary Fiber | 0g | 0% |
| Sugars | 3g | N/A |
| Protein | 10g | 20% |
Variations & Substitutions
- Cheese Variety: Feel free to experiment with different cheeses. Provolone, Swiss, cheddar, or even a smoked Gouda would be delicious.
- Meat Options: Roast beef is classic, but you can use turkey, ham, chicken, or even vegetarian options like sliced portobello mushrooms or marinated tofu.
- Roll Alternatives: If you can’t find Hawaiian rolls, slider buns or mini brioche rolls work well.
- Spicy Kick: Add a dash of hot sauce to the butter mixture for a spicy twist.
- Italian Herb Butter: Mix Italian herbs, such as oregano, basil, and thyme, into the melted butter for an Italian-inspired flavor.
- Garlic Lover’s Version: Add minced garlic to the butter mixture.
- Make it Vegetarian: Replace the roast beef with thinly sliced grilled vegetables like zucchini, eggplant, and bell peppers, and use a vegetarian cheese alternative.
- Make it Gluten-Free: Use gluten-free slider buns.
FAQs (Frequently Asked Questions)
Q: Can I make these sandwiches ahead of time?
A: Yes, you can assemble the sandwiches ahead of time, but it’s best to wait to add the butter mixture until just before baking to prevent the rolls from getting soggy.
Q: What is the best way to store leftover sandwiches?
A: Store leftover sandwiches in an airtight container in the refrigerator for up to 2-3 days.
Q: Can I use a different type of cheese?
A: Absolutely! Feel free to experiment with your favorite cheeses, such as provolone, Swiss, or cheddar.
Q: Can I use a different type of meat?
A: Yes, turkey, ham, chicken, or even vegetarian options like sliced portobello mushrooms or marinated tofu can be used as substitutes for roast beef.
Q: How do I prevent the bottoms of the rolls from getting soggy?
A: Lining the baking sheet with parchment paper helps, and avoid adding the butter mixture too far in advance. Also, ensure the baking sheet isn’t overcrowded.
Final Thoughts
These bite-size sandwiches are more than just a recipe; they’re a memory waiting to be made. Whether you’re hosting a party, need a quick and easy weeknight dinner, or just want a comforting snack, these sandwiches are sure to be a hit. So, gather your ingredients, preheat your oven, and get ready to create a delicious and crowd-pleasing treat! Don’t be afraid to experiment with different flavors and fillings to make them your own. And most importantly, enjoy the process and the delicious results. We would love to see your creations, please share with us how you make these uniquely yours!