
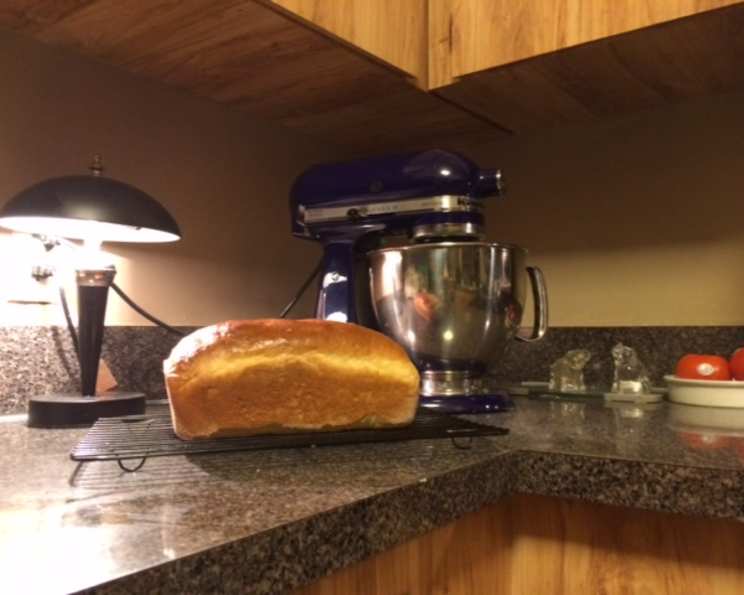
KitchenAid Kneaded Basic White Bread: A Baker’s Comfort
The aroma of baking bread is a time machine, whisking me back to my grandmother’s kitchen. She had hands that seemed permanently dusted with flour, and her white bread was a staple. It wasn’t fancy, but it was always there, a soft, pillowy comfort served with a pat of butter and a side of stories. Recreating that simple loaf, using the dependable help of my KitchenAid mixer, is a way to keep her memory alive and share that same comforting experience with my own family.
Recipe Overview
- Prep Time: 1 hour
- Cook Time: 45 minutes
- Total Time: 2 hours 15 minutes
- Yield: 1 loaf
- Dietary Type: Vegetarian
Ingredients
- 3/4 cup water
- 1/2 cup milk
- 1 1/2 tablespoons sugar
- 1 teaspoon honey
- 1 tablespoon oil (vegetable, canola, or olive oil all work well) or 1 tablespoon butter, melted
- 1 (1/4 ounce) package active dry yeast (make sure it’s not rapid rise yeast)
- 3 cups flour (bread flour is highly recommended for a chewier texture, but all-purpose will also work)
- 1 teaspoon salt
Equipment Needed
- Liquid measuring cup
- Small saucepan or microwave-safe bowl
- Mixing bowls
- KitchenAid stand mixer with dough hook attachment
- Measuring spoons
- Measuring cups
- Plastic wrap
- Clean kitchen towel
- Greased 9×5 inch loaf pan
- Cooling rack
Instructions
- First, gently warm the water, milk, sugar, honey, and oil (or melted butter) in a small saucepan or microwave-safe bowl until the mixture reaches approximately 120 degrees Fahrenheit. This temperature is crucial for activating the yeast without killing it.
- Remove the mixture from the heat source. Sprinkle the active dry yeast over the warm liquid and stir gently until dissolved. Let the mixture sit for about 10 minutes, or until it becomes foamy. This indicates that the yeast is alive and active.
- In the bowl of your KitchenAid stand mixer, combine the flour and salt. Reserve a small amount of flour (about 1-2 tablespoons) for dusting your work surface later.
- Once the yeast mixture has foamed, pour it into the bowl with the flour and salt. Attach the dough hook to your mixer.
- Mix on low speed (setting 1) for one minute to initially combine the ingredients. This prevents the flour from flying everywhere.
- Increase the mixer speed to setting 2 and knead the dough for another 9 minutes. The dough should form a relatively smooth ball and pull away from the sides of the bowl. It will still be slightly sticky, but not excessively so.
- Remove the dough from the mixer and turn it out onto a lightly floured surface. Gently shape the dough into a smooth ball.
- Grease a mixing bowl with a little oil or butter. Place the dough ball in the greased bowl, turning it to coat all sides with the grease.
- Cover the bowl with plastic wrap and then a clean kitchen towel. Place the bowl in a warm place (such as a preheated oven turned off or a sunny spot) and let the dough rise until it has doubled in size, about 30 minutes to an hour depending on the warmth of your environment.
- Once the dough has doubled, gently punch it down to release the air. Transfer the dough back to the mixer bowl.
- Using the dough hook again, knead the dough for another 3-5 minutes on speed 2. This step helps to further develop the gluten and improve the texture of the final bread.
- Remove the dough from the mixer and shape it into a loaf. There are many techniques for shaping a loaf, but a simple method is to flatten the dough into a rectangle and then tightly roll it up. Pinch the seam closed to seal it.
- Place the shaped loaf into a greased 9×5 inch loaf pan.
- Lightly cover the loaf pan with plastic wrap and then a clean kitchen towel. Let the dough rise in a warm place for another 30 to 45 minutes, or until it has almost doubled in size again.
- Preheat your oven to 375 degrees Fahrenheit (190 degrees Celsius).
- Bake the bread in the preheated oven for 45 minutes, or until the crust is golden brown and the internal temperature reaches 200-210 degrees Fahrenheit. An optional water bath (placing a pan of hot water on the rack below the bread) can help create a softer crust.
- Once baked, immediately remove the bread from the loaf pan and place it on a wire cooling rack to cool completely before slicing and serving.
Expert Tips & Tricks
- Temperature is Key: The water/milk mixture must be warm enough to activate the yeast, but not so hot that it kills it. Use a thermometer for best results.
- Kneading Time: Don’t skimp on the kneading time. Proper kneading develops the gluten in the flour, which gives the bread its structure and chewy texture.
- Humidity Matters: The amount of flour needed can vary depending on the humidity. Add flour a tablespoon at a time if the dough is too sticky.
- Oven Calibration: Oven temperatures can vary. If your bread is browning too quickly, tent it with foil during the last 15 minutes of baking.
- Listen to Your Dough: Experienced bakers rely on the feel of the dough. It should be smooth, elastic, and slightly tacky, not sticky.
Serving & Storage Suggestions
Serve warm, freshly baked slices of this bread with butter, jam, or your favorite spread. It’s also delicious toasted or used for sandwiches.
Store leftover bread at room temperature in an airtight container or bread bag for up to 3 days. For longer storage, wrap the bread tightly in plastic wrap and freeze it for up to 2 months. Thaw the bread completely at room temperature before serving. To refresh the bread, wrap it in foil and warm it in a 350°F oven for 10-15 minutes.
Nutritional Information
| Nutrient | Amount per Serving (estimated) | % Daily Value (based on 2000 calorie diet) |
|---|---|---|
| Calories | 210 kcal | 10% |
| Total Fat | 4g | 5% |
| Saturated Fat | 1g | 5% |
| Cholesterol | 0mg | 0% |
| Sodium | 200mg | 8% |
| Total Carbohydrate | 38g | 14% |
| Dietary Fiber | 2g | 7% |
| Sugars | 4g | – |
| Protein | 6g | 12% |
Nutritional information is an estimate and may vary based on specific ingredients and serving sizes.
Variations & Substitutions
- Whole Wheat Bread: Substitute up to half of the bread flour with whole wheat flour for a nuttier flavor and added fiber.
- Herb Bread: Add 1-2 tablespoons of chopped fresh herbs (such as rosemary, thyme, or oregano) to the flour mixture.
- Cheese Bread: Add 1/2 cup of shredded cheese (such as cheddar, mozzarella, or parmesan) to the flour mixture.
- Sweet Bread: Increase the sugar to 1/4 cup and add 1/4 teaspoon of ground cinnamon for a sweeter bread.
- Dairy-Free: Substitute the milk with almond milk, soy milk, or oat milk. Use oil instead of butter.
FAQs (Frequently Asked Questions)
Q: Why is my bread dense and not rising properly?
A: Several factors can cause this. Make sure your yeast is fresh and active, the water/milk mixture is the correct temperature, and you’re kneading the dough long enough to develop the gluten.
Q: Can I use rapid rise yeast instead of active dry yeast?
A: While you can use rapid rise yeast, active dry yeast provides a better flavor and texture. If you do substitute, follow the instructions on the package for activation, and you may need to reduce the rising time.
Q: How do I know when the bread is done baking?
A: The crust should be golden brown, and the internal temperature should reach 200-210 degrees Fahrenheit. You can also tap the bottom of the loaf; it should sound hollow.
Q: What if my dough is too sticky?
A: Add flour, one tablespoon at a time, until the dough is smooth and elastic but still slightly tacky.
Q: Can I make the dough ahead of time?
A: Yes! After the first rise, punch down the dough, wrap it tightly in plastic wrap, and refrigerate it for up to 24 hours. Let it come to room temperature before shaping and baking.
Final Thoughts
Baking bread is an act of love, a way to nurture ourselves and those around us. This KitchenAid-kneaded white bread recipe is a simple yet satisfying way to experience the joy of baking. Don’t be afraid to experiment with variations and make it your own. Share your creations, savor each bite, and let the comforting aroma fill your home. I can’t wait to hear how it turns out for you!