
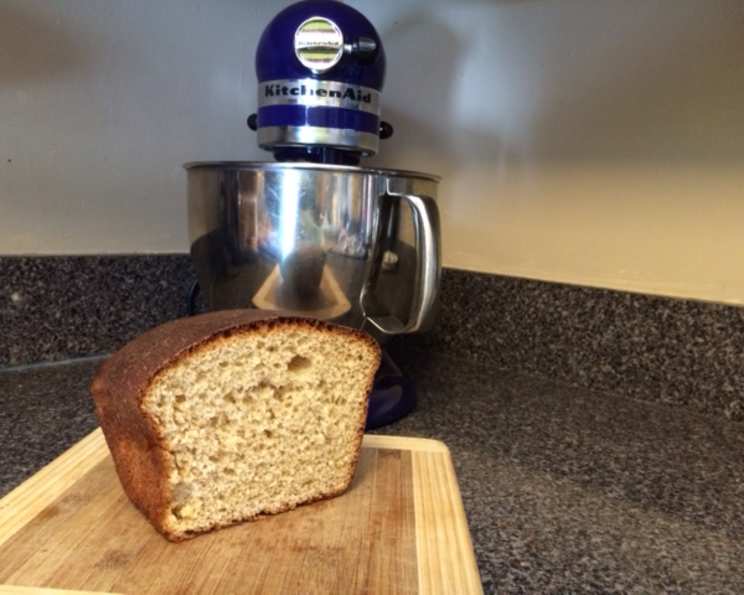
KitchenAid Kneaded Mostly Wheat Bread: A Hearty Loaf Made Easy
There’s something deeply comforting about the aroma of freshly baked bread wafting through the house. I remember baking bread with my grandmother as a child, the warmth of the oven a welcome embrace on chilly autumn days. While I loved the taste of her crusty white loaves, I’ve always been drawn to the slightly nutty, wholesome flavor of wheat bread. This recipe brings back those nostalgic memories but with a healthier twist, and the KitchenAid mixer handles all the kneading like a charm!
Recipe Overview
- Prep Time: 30 minutes
- Cook Time: 40-45 minutes
- Total Time: 2 hours 10 minutes (includes rising time)
- Yield: 1 loaf
- Dietary Type: Vegetarian
Ingredients
- ¾ cup water
- ½ cup low-fat milk
- ¼ cup honey
- 1 tablespoon canola oil (or olive oil)
- 1 (¼ ounce) package active dry yeast (not rapid rise)
- 2 cups white wheat flour
- 1 cup bread flour
- ½ teaspoon salt
Equipment Needed
- Liquid measuring cup
- Small saucepan
- Mixing bowl
- KitchenAid stand mixer with dough hook
- Greased bowl
- Plastic wrap
- Towel
- 9×5 inch bread pan
- Wire cooling rack
Instructions
-
In a small saucepan, combine the water, low-fat milk, honey, and canola oil. Warm the mixture over low heat to approximately 120°F (49°C). It’s crucial to use a thermometer to avoid overheating, as temperatures above 130°F (54°C) can kill the yeast.
-
Remove the saucepan from the heat and gently sprinkle the active dry yeast over the warm liquid mixture. Stir until the yeast is fully dissolved. Let the mixture sit for about 10 minutes, or until it becomes foamy. This step confirms that the yeast is active and ready to leaven the bread.
-
In the bowl of your KitchenAid stand mixer, combine the white wheat flour, bread flour, and salt. Reserve a small amount of the white wheat flour (about 2 tablespoons) for dusting your work surface later.
-
Once the yeast mixture has foamed, pour it into the bowl with the flour mixture. Attach the dough hook to the mixer.
-
Begin mixing on speed setting 1 for about one minute. This initial slow mixing helps to incorporate the wet and dry ingredients without creating a flour cloud.
-
Increase the mixer speed to setting 2 and continue to mix and knead the dough for 9 minutes. The dough should become smooth and elastic. It will likely pull away from the sides of the bowl but might still be slightly tacky.
-
Remove the dough from the mixer bowl and place it on a lightly floured surface (using the reserved white wheat flour). Gently shape the dough into a smooth ball.
-
Grease a separate bowl with a little canola oil. Place the dough in the greased bowl and turn it to coat all sides. This prevents the dough from drying out as it rises.
-
Cover the bowl tightly with plastic wrap, and then drape a clean kitchen towel over the plastic wrap. Place the bowl in a warm, draft-free location to rise. A slightly warm oven (turned off, of course!) or a sunny spot in your kitchen works well.
-
Let the dough rise until it has doubled in size, which should take approximately 30 minutes, depending on the temperature of your environment.
-
Once the dough has doubled, gently punch it down to release the trapped air.
-
Transfer the dough back to the KitchenAid mixer bowl. Using the dough hook, knead the dough for another 3-5 minutes. This second kneading helps to redistribute the yeast and develop the gluten further, resulting in a better texture.
-
Remove the dough from the mixer and shape it into a loaf. There are many tutorials online demonstrating how to properly roll a loaf; aim for a tight, even roll to prevent air pockets in the finished bread.
-
Grease a 9×5 inch bread pan with canola oil. Place the shaped loaf into the prepared pan.
-
Lightly cover the bread pan with plastic wrap and a clean kitchen towel. Place the pan in a warm place and let the dough rise again for another 30-45 minutes, or until it has nearly doubled in size and reaches the top of the pan.
-
Preheat your oven to 375°F (190°C).
-
Once the dough has risen sufficiently, carefully remove the plastic wrap and towel. Place the bread pan in the preheated oven. You can optionally place a pan of hot water on the rack below the bread to create a steamy environment, which will help to produce a crustier loaf.
-
Bake for 40-45 minutes, or until the bread is golden brown and sounds hollow when tapped on the bottom.
-
Immediately remove the bread from the pan and place it on a wire cooling rack to cool completely before slicing.
Expert Tips & Tricks
- Temperature is key: Ensure your liquids are the correct temperature (around 120°F) to activate the yeast without killing it.
- Don’t over-knead: Over-kneading can result in tough bread. Pay attention to the dough’s texture; it should be smooth and elastic.
- Proofing: The rising time will vary depending on the warmth of your environment. Be patient and allow the dough to fully double in size.
- Water Bath: Baking with a water bath (placing a pan of hot water in the oven) creates steam that helps the bread rise higher and develop a crispier crust.
- Resting: Resist the temptation to slice the bread while it’s still warm! Allowing it to cool completely ensures that the crumb sets properly and prevents a gummy texture.
Serving & Storage Suggestions
This KitchenAid Kneaded Mostly Wheat Bread is delicious served warm with butter or your favorite spread. It’s also excellent for sandwiches, toast, or as a side to soups and salads.
Store the bread at room temperature in an airtight container or bread bag for up to 3 days. For longer storage, you can freeze the loaf for up to 2 months. To freeze, wrap the bread tightly in plastic wrap and then place it in a freezer bag. Thaw completely at room temperature before slicing. To refresh the bread, you can lightly toast it or warm it in a low oven.
Nutritional Information
| Nutrient | Amount per Serving | % Daily Value* |
|---|---|---|
| Calories | 215 kcal | 11% |
| Total Fat | 3g | 4% |
| Saturated Fat | 0.4g | 2% |
| Cholesterol | 0.5mg | 0% |
| Sodium | 103mg | 4% |
| Total Carbohydrate | 43g | 15% |
| Dietary Fiber | 4g | 16% |
| Sugars | 6.5g | |
| Protein | 7g | 14% |
*Percent Daily Values are based on a 2,000 calorie diet. Your daily values may be higher or lower depending on your calorie needs. Values are estimates and may vary depending on exact ingredient measurements.
Variations & Substitutions
- Higher Fiber: Substitute ½ cup of wheat bran for ½ cup of the white wheat flour for a boost of fiber.
- Different Flours: Experiment with other types of flour, such as spelt flour or rye flour, for a different flavor profile. Keep in mind that these flours may require adjustments to the amount of liquid.
- Sweetness: Adjust the amount of honey to your liking. You can also use other natural sweeteners, such as maple syrup or agave nectar.
- Herbs and Spices: Add a teaspoon of dried rosemary or thyme to the flour mixture for an herby twist.
- Seeds: Sprinkle the top of the loaf with sesame seeds, poppy seeds, or sunflower seeds before baking for added texture and flavor.
FAQs (Frequently Asked Questions)
Q: Can I use rapid rise yeast instead of active dry yeast?
A: While you can, active dry yeast generally provides a better flavor and texture for bread. If using rapid rise, follow the package instructions for proofing.
Q: My dough is too sticky. What should I do?
A: If your dough is overly sticky, gradually add a little more flour (1 tablespoon at a time) until it becomes manageable. Avoid adding too much, as this can result in dry bread.
Q: My bread didn’t rise enough. What could be the reason?
A: Several factors can affect rising: the yeast may be old or inactive, the temperature might be too cold, or there may be too much salt in the dough. Ensure your yeast is fresh and that the rising environment is warm.
Q: How do I get a crispier crust?
A: Baking with a water bath (a pan of hot water in the oven) creates steam, which helps to produce a crispier crust. You can also brush the top of the loaf with an egg wash or milk before baking.
Q: Can I make this bread without a KitchenAid mixer?
A: Yes! You can knead the dough by hand on a floured surface for about 10-12 minutes, or until it becomes smooth and elastic.
Final Thoughts
This KitchenAid Kneaded Mostly Wheat Bread is a testament to the joy of simple, wholesome baking. It’s a forgiving recipe that yields a delicious and satisfying loaf, perfect for any occasion. Don’t be afraid to experiment with variations and make it your own! I encourage you to give this recipe a try and share your creations. Pair it with a hearty soup or a simple salad for a truly comforting meal. Happy baking!