
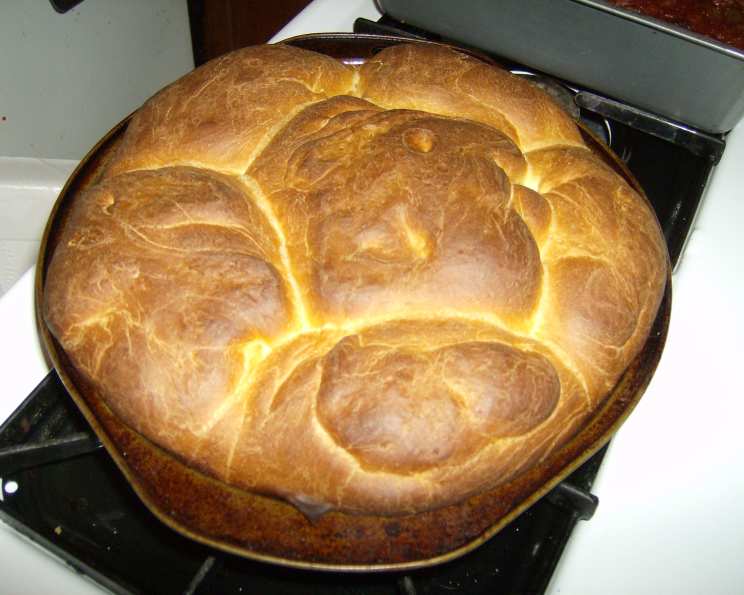
KitchenAid Small-Batch Pull-Apart Dinner Rolls: A Taste of Home
The aroma of freshly baked bread has always transported me back to my grandmother’s cozy kitchen. She had this uncanny ability to transform simple ingredients into moments of pure bliss, and her dinner rolls were legendary. I remember eagerly anticipating those warm, golden pillows of dough, slathered in butter and served alongside her famous Sunday roast. While her recipe remains a closely guarded family secret, these KitchenAid pull-apart rolls come incredibly close to recreating that nostalgic feeling of warmth and comfort, perfect for sharing with loved ones or savoring a quiet moment of self-indulgence.
Recipe Overview
- Prep Time: 1 hour 35 minutes (includes rising time)
- Cook Time: 30-35 minutes
- Total Time: 2 hours 10 minutes
- Servings: 3-6
- Yield: 6 rolls
- Dietary Type: Vegetarian
Ingredients
- 1 cup warm water, (100-110°F)
- 2 ½ teaspoons yeast
- ⅛ cup sugar
- 2 ½ tablespoons unsalted butter, melted
- 1 egg
- ¾ teaspoon salt
- 3 cups bread flour
- Additional butter for brushing
Equipment Needed
- Stand mixer with dough hook
- Measuring cups and spoons
- 9-inch round or square baking pan
- Mixing bowl
- Saran wrap
- Oven
Instructions
-
Activate the Yeast: In the bowl of your KitchenAid mixer, combine the warm water, yeast, and sugar. Let this mixture sit for about 5 minutes, or until it becomes bubbly, indicating that the yeast is active and ready to work its magic.
-
Combine Wet Ingredients: Add the melted butter, beaten egg, and salt to the yeast mixture. Mix these ingredients together until they are well combined.
-
Incorporate the Flour: Gradually add the bread flour, a little at a time, to the wet ingredients. You may need slightly more or less flour depending on the humidity and the exact measurements. Continue adding flour until a smooth dough begins to form.
-
Knead the Dough: Attach the dough hook to your KitchenAid mixer and knead the dough for an additional 5 minutes on medium speed. The dough should be smooth and slightly elastic. If the dough is too sticky, add flour, one tablespoon at a time.
-
First Rise: Place the dough in a lightly oiled bowl. Turn the dough over to coat both sides with oil. Cover the bowl tightly with saran wrap to prevent the dough from drying out. Let the dough rise in a warm place for approximately 1 hour, or until it has doubled in size and appears light and airy.
-
Shape the Rolls: Once the dough has risen, gently punch it down to release any trapped air. Divide the dough into 6 equal pieces. Roll each piece of dough into a smooth ball.
-
Second Rise: Lightly grease a 9-inch round or square baking pan. Arrange the dough balls evenly in the prepared pan, leaving a small space between each roll. Cover the pan with saran wrap and let the rolls rise for another 30 minutes. This second rise is crucial for achieving a light and fluffy texture.
-
Bake: Preheat your oven to 400°F (200°C). Place the pan of rolls in the preheated oven and bake for 30-35 minutes, or until the rolls are golden brown on top. Keep an eye on them, as oven temperatures can vary. If the tops are browning too quickly, you can loosely tent the pan with foil during the last 10 minutes of baking.
-
Butter and Rest: Remove the rolls from the oven and immediately brush the tops with additional melted butter. This will add a beautiful sheen and enhance the flavor. Let the rolls sit in the pan for about 20 minutes before transferring them to a serving dish. This allows them to cool slightly and makes them easier to pull apart.
Expert Tips & Tricks
- Temperature Matters: Using water that is too hot will kill the yeast, while water that is too cold will prevent it from activating properly. Aim for a temperature between 100-110°F (38-43°C).
- Bread Flour is Key: Bread flour has a higher protein content than all-purpose flour, which helps to create a chewier, more structured roll. While you can use all-purpose flour in a pinch, the texture will be slightly different.
- Don’t Over-Knead: Over-kneading can result in tough rolls. Trust your KitchenAid mixer to do the work, and stop kneading as soon as the dough becomes smooth and elastic.
- Warm Place to Rise: Find a warm, draft-free spot in your kitchen to let the dough rise. A slightly warm oven (turned off!) or a sunny windowsill can work well.
- Proofing: After the first rise, if the dough hasn’t doubled, it may be a sign that the yeast wasn’t good anymore. You might want to test your yeast next time to ensure a successful rise.
Serving & Storage Suggestions
These pull-apart rolls are best served warm, straight from the oven. They’re perfect alongside soups, stews, salads, or as a complement to any main course. For an extra touch of flavor, try serving them with flavored butter, such as garlic herb butter or honey butter.
To store leftover rolls, place them in an airtight container at room temperature for up to 2 days, or in the refrigerator for up to 5 days. To freeze, wrap the rolls tightly in plastic wrap and then place them in a freezer bag. They can be frozen for up to 2 months. To reheat, thaw the rolls completely and then warm them in a preheated oven at 350°F (175°C) for 5-10 minutes, or until heated through. You can also microwave them for a few seconds, but be careful not to overcook them.
Nutritional Information
| Nutrient | Amount per Serving | % Daily Value |
|---|---|---|
| Calories | 606.8 kcal | N/A |
| Calories from Fat | 113 g | N/A |
| Total Fat | 12.7 g | 19% |
| Saturated Fat | 6.8 g | 34% |
| Cholesterol | 87.4 mg | 29% |
| Sodium | 613 mg | 25% |
| Total Carbohydrate | 105.2 g | 35% |
| Dietary Fiber | 4.3 g | 17% |
| Sugars | 8.7 g | N/A |
| Protein | 16.4 g | 32% |
Note: Nutritional information is an estimate and may vary based on specific ingredients and preparation methods.
Variations & Substitutions
- Garlic Herb Rolls: Add 1-2 cloves of minced garlic and 1-2 tablespoons of chopped fresh herbs (such as rosemary, thyme, or parsley) to the dough during the kneading process.
- Cheese Rolls: Sprinkle shredded cheddar, mozzarella, or Parmesan cheese over the rolls before baking.
- Sweet Rolls: Add a cinnamon-sugar filling to the dough before shaping the rolls.
- Whole Wheat Rolls: Substitute up to half of the bread flour with whole wheat flour for a more nutritious and flavorful roll. Note that you may need to adjust the amount of water, as whole wheat flour absorbs more liquid.
FAQs (Frequently Asked Questions)
Q: Can I make the dough ahead of time?
A: Yes, you can prepare the dough up to 24 hours in advance. After the first rise, punch down the dough, wrap it tightly in plastic wrap, and refrigerate it. Let the dough come to room temperature before shaping and baking.
Q: What if I don’t have a KitchenAid mixer?
A: You can knead the dough by hand. Knead on a lightly floured surface for 8-10 minutes, or until the dough is smooth and elastic.
Q: Can I use active dry yeast instead of instant yeast?
A: Yes, but you will need to proof the active dry yeast in warm water for 5-10 minutes before adding it to the other ingredients.
Q: Why are my rolls not rising properly?
A: Make sure your yeast is fresh and active, and that the water is at the correct temperature. Also, ensure that the dough is rising in a warm, draft-free location.
Q: Can I freeze the baked rolls?
A: Yes, let the rolls cool completely, then wrap them tightly in plastic wrap and place them in a freezer bag. They can be frozen for up to 2 months. Thaw the rolls completely before reheating.
Final Thoughts
These small-batch KitchenAid pull-apart dinner rolls are more than just a recipe; they’re an invitation to create moments of connection and warmth. Whether you’re sharing them with loved ones or enjoying them as a special treat, I hope they bring a touch of homemade goodness to your table. Don’t be afraid to experiment with different variations and flavors to make them your own. And most importantly, enjoy the process of baking and the simple pleasure of sharing good food with good company. Pair these amazing rolls with a comforting bowl of tomato soup or a hearty pot roast for the ultimate cozy meal. Happy baking!