
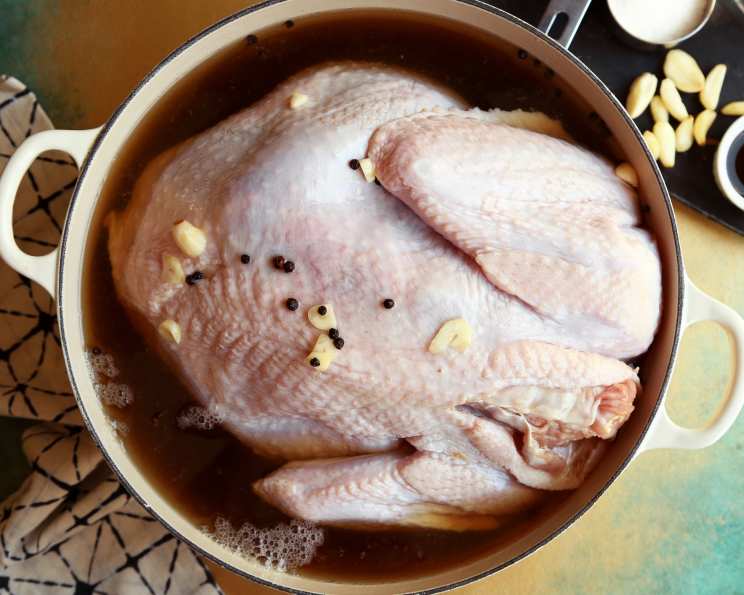
Kittencal’s Best Brown Sugar Turkey Brine: The Secret to Thanksgiving Perfection
The memory is as vivid as the aroma that filled my grandmother’s kitchen every Thanksgiving morning. I would stand on a wobbly stool, mesmerized as she carefully lowered the enormous bird into a cooler filled with a fragrant, amber liquid. “This,” she’d whisper, her eyes twinkling, “is the magic that makes it all worthwhile.” That “magic” was a brine, a secret she guarded closely—until she finally passed down her wisdom (and the recipe!) to me. While I’ve adapted it over the years, the essence remains the same: simple ingredients, meticulous technique, and the promise of the most succulent turkey you’ve ever tasted. This Brown Sugar Turkey Brine is not just a recipe; it’s a legacy.
Recipe Overview
- Prep Time: 20 minutes
- Total Time: 24 hours 20 minutes
- Yield: Approximately 32 cups of brine
- Dietary Type: Gluten-Free, Dairy-Free
Ingredients
- 32 cups warm water (2 gallons)
- 1 cup kosher salt (must use kosher salt ONLY)
- 1 1/2 cups light brown sugar, well-packed
- 2 tablespoons black peppercorns (can use 1 tablespoon coarse ground black pepper)
- 3-4 tablespoons fresh coarsely chopped garlic (or slice the cloves into thirds)
- 2 tablespoons Worcestershire sauce (optional)
- 1 whole turkey (up to 20 pounds)
Equipment Needed
- Large bucket or food-safe container (a food-safe picnic cooler works well)
- Large spoon or whisk for stirring
- Refrigerator
Instructions
- In your large bucket or food-safe container, combine the warm water, brown sugar, and kosher salt.
- Stir vigorously until the kosher salt and brown sugar are completely dissolved. Using warm water is crucial to ensure everything dissolves properly. You don’t want any gritty residue at the bottom of the container.
- Add the Worcestershire sauce (if using), black peppercorns, and chopped garlic to the mixture.
- Stir until the Worcestershire sauce is fully incorporated into the brine.
- Allow the brine to cool completely to almost room temperature before adding the turkey. This is a crucial step to prevent any premature cooking of the turkey.
- While the brine is cooling, wash the turkey thoroughly inside and out with cold running water. Remove any giblets or neck from the cavity.
- Once the brine is cooled, carefully place the turkey into the brine. Ensure the turkey is fully submerged. If the brine doesn’t quite cover the entire turkey, position it breast-side up initially and then flip it over after a few hours. The goal is to have the entire bird soaking in the flavorful solution.
- Refrigerate the turkey in the brine for 24 hours. This extended soaking period allows the brine to fully penetrate the meat, resulting in a wonderfully moist and flavorful bird.
- After 24 hours, remove the turkey from the brine.
- Rinse the turkey thoroughly under cold running water to remove any excess salt from the surface. This step is vital to prevent the turkey from being overly salty.
- Pat the turkey completely dry with paper towels, both inside and out. This will help the skin crisp up nicely during roasting.
- If you’re not preparing the turkey immediately, cover it loosely and refrigerate it until you’re ready to cook. Otherwise, proceed with your favorite turkey recipe. Kittencal suggests following her turkey recipe #199612
Expert Tips & Tricks
- Kosher Salt is Key: Do not substitute table salt for kosher salt in this brine. Kosher salt has larger crystals and a purer flavor, resulting in a better brining experience. Table salt contains iodine and anti-caking agents that can impart an off-flavor to the turkey.
- Temperature Control: Ensure the brine is completely cooled before adding the turkey. Adding the turkey to a warm brine can raise its internal temperature and potentially lead to bacterial growth.
- Submersion is Essential: If you find it challenging to keep the turkey fully submerged in the brine, try placing a heavy plate or a sealed bag filled with ice on top to weigh it down.
- Don’t Over-Brine: Brining for longer than 24 hours can result in an overly salty turkey. Stick to the recommended time for optimal results.
- Flavor Boost: While the brown sugar and garlic provide a wonderful base flavor, feel free to experiment with other aromatics. Fresh herbs like rosemary, thyme, or sage can add a delicious depth of flavor to the brine.
- Use a Food-Safe Container: It’s extremely important to use a food-safe container that’s large enough to hold the brine and the turkey completely submerged. A food-safe picnic cooler is an excellent option.
Serving & Storage Suggestions
Once cooked, carve the turkey and serve it immediately with your favorite Thanksgiving sides. Leftover turkey should be stored in an airtight container in the refrigerator for up to 3-4 days. You can also freeze cooked turkey for longer storage (up to 2-3 months).
To reheat refrigerated turkey, you can slice it and warm it gently in a pan with a little broth or gravy, or you can reheat it in the oven covered with foil to prevent it from drying out. Frozen turkey should be thawed completely in the refrigerator before reheating.
Nutritional Information
Note: Nutritional information is an estimate and will vary based on the size of the turkey and other factors.
| Nutrient | Amount per Serving (estimated) | % Daily Value (estimated) |
|---|---|---|
| Calories | 298 kcal | N/A |
| Calories from Fat | N/A | 39% |
| Total Fat | 12.9 g | 19% |
| Saturated Fat | 3.6 g | 18% |
| Cholesterol | 109 mg | 36% |
| Sodium | 3651.1 mg | 152% |
| Total Carbohydrate | 10.7 g | 3% |
| Dietary Fiber | 0.1 g | 0% |
| Sugars | 10 g | 40% |
| Protein | 32.9 g | 65% |
Variations & Substitutions
- Spicy Brine: Add a pinch of red pepper flakes or a sliced jalapeño to the brine for a touch of heat.
- Citrus Infusion: Incorporate the zest and juice of an orange or lemon for a bright, citrusy flavor.
- Maple Glaze: After brining, consider glazing the turkey with a maple syrup-based glaze for a sweet and savory finish.
- Herbaceous Brine: Add fresh rosemary, thyme, and sage to the brine for a more complex flavor profile.
- Bourbon Twist: Add ¼ to ½ cup of bourbon to the brine for a rich, caramel undertone.
FAQs (Frequently Asked Questions)
Q: Can I brine a frozen turkey?
A: No, you should always thaw a frozen turkey completely before brining. Brining a frozen turkey can result in uneven brining and potential food safety issues.
Q: Is it necessary to rinse the turkey after brining?
A: Yes, rinsing the turkey thoroughly after brining is crucial to remove excess salt from the surface and prevent the turkey from being overly salty.
Q: Can I reuse the brine?
A: No, never reuse brine. It has come into contact with raw poultry and can harbor harmful bacteria.
Q: What if I don’t have a food-safe container large enough for the turkey and brine?
A: You can use a brining bag specifically designed for turkeys. These bags are food-safe and help keep the turkey submerged in the brine. Place the bag inside a cooler or bucket for support.
Q: Can I brine a smaller turkey for less time?
A: While you can brine a smaller turkey, it’s best to stick to the recommended 24-hour brining time for optimal results. However, for a very small bird (under 12 pounds), you might reduce the brining time to 18-20 hours to avoid over-salting.
Final Thoughts
I encourage you to try this Brown Sugar Turkey Brine this Thanksgiving, or any time you’re roasting a turkey. It’s a simple yet transformative technique that will elevate your turkey to a whole new level of flavor and juiciness. Don’t be afraid to experiment with different aromatics to create a brine that perfectly suits your taste. And remember, cooking is an act of love—so pour your heart into it, and enjoy the process!