
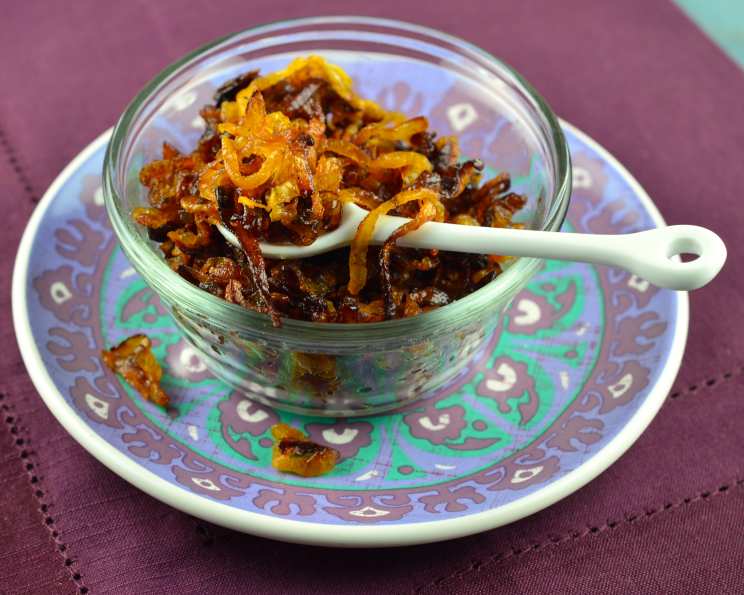
Kittencal’s Caramelized Onions: A Symphony of Sweetness
My grandmother, a woman who believed that butter was the answer to most of life’s problems (and frequently, she was right), used to make caramelized onions that would fill the entire house with their intoxicating aroma. I remember standing on a stool, mesmerized, as she stirred the slowly browning onions in her ancient cast-iron skillet, the sweet scent a promise of deliciousness to come. While her version was a closely guarded secret, Kittencal’s recipe captures the essence of that simple magic, bringing back those cherished memories with every bite.
Recipe Overview
- Prep Time: 10 minutes
- Cook Time: 25-30 minutes
- Total Time: 35-40 minutes
- Servings: Variable
- Yield: Approximately 3 onions worth of caramelized onions
- Dietary Type: Vegetarian
Ingredients
- 3 large onions, thinly sliced (preferably sweet onions like Vidalia or Walla Walla)
- 2 tablespoons butter or 2 tablespoons margarine
- 1 tablespoon oil
- 2 teaspoons brown sugar
- 1/2 teaspoon salt (or to taste)
- Fresh coarse ground black pepper (optional and to taste)
Equipment Needed
- Large skillet (cast iron preferred for even heat distribution)
- Wooden spoon or spatula
Instructions
- In a large skillet, melt the butter (or margarine) with the oil over medium-high heat. The combination of butter and oil prevents the butter from burning and adds richness.
- Add the thinly sliced onions to the skillet. It’s important that the onions are thinly sliced so they cook evenly and caramelize properly.
- Sprinkle the brown sugar evenly over the onions. The brown sugar helps to kickstart the caramelization process and adds a deeper molasses-like flavor.
- Cook, stirring with a wooden spoon or spatula, for about 20-25 minutes, or until the onions become golden brown and tender. Stir frequently to prevent sticking and ensure even browning. The onions will gradually reduce in volume and develop a rich, sweet flavor.
- Important: Depending on the size of your skillet, avoid overcrowding the pan. If you’re using a smaller skillet, it’s best to cook the onions in batches, using no more than 4 onions at a time. Overcrowding will cause the onions to steam instead of caramelizing properly.
- Add the salt and season with black pepper to taste (if using). The salt balances the sweetness and enhances the overall flavor.
- Continue to cook, stirring, for an additional 5 minutes, allowing the flavors to meld together. The onions should be a deep golden brown color and very tender.
Expert Tips & Tricks
- Choose the right onions: Sweet onions like Vidalia or Walla Walla are ideal for caramelizing due to their high sugar content. However, yellow onions can also be used, though they will have a slightly more pungent flavor.
- Low and slow is key: Caramelizing onions is a slow process that requires patience. Don’t rush it by turning up the heat too high, as this will cause the onions to burn rather than caramelize.
- Deglaze for extra flavor: For an even deeper flavor, consider deglazing the pan with a splash of balsamic vinegar or dry sherry during the last few minutes of cooking.
- Even slicing is important: Ensure your onions are sliced as uniformly as possible. This helps them to cook evenly, preventing some pieces from burning while others remain undercooked. A mandoline can be useful for achieving consistent slices.
- Adjust seasoning to taste: The amount of salt and pepper needed will vary depending on your personal preference and the type of onions you’re using. Start with the recommended amount and adjust as needed.
Serving & Storage Suggestions
Caramelized onions are incredibly versatile and can be used in a wide variety of dishes. Here are some serving suggestions:
- Burgers and sandwiches: Add a spoonful or two to your favorite burger or sandwich for a burst of sweetness and umami.
- Steaks and grilled meats: Serve as a topping for grilled steaks, chicken, or pork.
- Pizzas and flatbreads: Use as a pizza topping, either on their own or in combination with other ingredients like cheese and herbs.
- Dips and spreads: Incorporate into dips or spreads for added flavor and texture.
- Soups and stews: Stir into soups or stews to add depth and sweetness.
- Focaccia and bread: Use as a topping for focaccia or other types of bread.
To store leftover caramelized onions:
- Refrigerate: Store in an airtight container in the refrigerator for up to 5 days.
- Freeze: Caramelized onions freeze very well. Divide into small plastic containers or freezer bags and freeze for up to 3 months. Thaw in the microwave or in the refrigerator overnight before using.
Nutritional Information
Please note that these values are estimates and may vary based on specific ingredients and portion sizes.
| Nutrient | Amount per Serving | % Daily Value |
|---|---|---|
| Calories | 180 kcal | 9% |
| Total Fat | 12g | 18% |
| Saturated Fat | 6g | 30% |
| Cholesterol | 20mg | 7% |
| Sodium | 460mg | 19% |
| Total Carbohydrate | 17g | 6% |
| Dietary Fiber | 3g | 12% |
| Sugars | 9g | N/A |
| Protein | 2g | 4% |
Variations & Substitutions
- Vegan Caramelized Onions: Use olive oil or other plant-based oil instead of butter. Margarine works well too.
- Add herbs: Experiment with adding fresh or dried herbs like thyme, rosemary, or oregano during the last few minutes of cooking.
- Spice it up: For a spicy kick, add a pinch of red pepper flakes or a dash of hot sauce to the onions.
- Different sugars: Try using different types of sugar, such as maple sugar or coconut sugar, for a unique flavor profile.
- Balsamic Glaze: Reduce balsamic vinegar in a separate saucepan until syrupy, then drizzle over the finished caramelized onions.
- Garlic Lovers: Add minced garlic to the skillet along with the onions for a delicious garlic-infused flavor.
FAQs (Frequently Asked Questions)
Q: Can I use a stainless-steel skillet instead of cast iron?
A: Yes, you can use a stainless-steel skillet, but cast iron is preferred because it distributes heat more evenly, which helps prevent the onions from burning. Keep a closer eye on the onions and stir more frequently if using stainless steel.
Q: Why are my onions not caramelizing, and instead just turning brown?
A: This is likely because the heat is too high. Reduce the heat to medium or medium-low and be patient. Caramelization is a slow process that requires gentle heat.
Q: Can I make these caramelized onions ahead of time?
A: Absolutely! Caramelized onions are a great make-ahead dish. They can be stored in the refrigerator for up to 5 days or frozen for up to 3 months.
Q: How do I prevent the onions from sticking to the pan?
A: Use a non-stick skillet or ensure your skillet is well-seasoned. Stir frequently and add a little extra oil if necessary.
Q: What is the best way to thaw frozen caramelized onions?
A: The best way to thaw frozen caramelized onions is to transfer them to the refrigerator overnight. You can also thaw them in the microwave on a low setting, stirring occasionally.
Final Thoughts
Kittencal’s Caramelized Onions are a testament to the power of simple ingredients and patient cooking. The transformation of humble onions into a sweet and savory delight is a culinary magic trick that anyone can master. So, gather your ingredients, fire up your skillet, and prepare to be amazed by the depth of flavor you can achieve with just a little bit of time and effort. Don’t be afraid to experiment with variations and make this recipe your own. And most importantly, share your creations with friends and family and spread the joy of delicious food!