
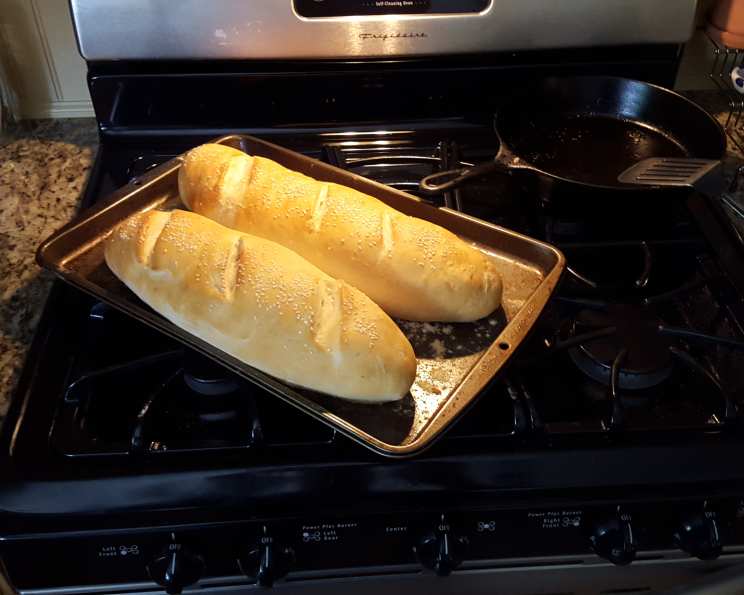
The Perfect Homemade French Bread: A KitchenAid Masterpiece
The scent of baking bread is, for me, inextricably linked to my grandmother’s kitchen. I can still picture her, flour dusting her apron, expertly shaping loaves with hands that knew exactly what they were doing. While her method was entirely by hand, passed down through generations, I’ve adapted her wisdom to the convenience of my KitchenAid stand mixer. This recipe, honed over years, captures the essence of her rustic French bread – a crisp, golden crust yielding to a soft, airy interior. It’s a taste of nostalgia, made easy.
Recipe Overview
- Prep Time: 30 minutes
- Cook Time: 30-35 minutes
- Rise Time: 1 hour 30 minutes
- Total Time: Approximately 2 hours 35 minutes
- Yield: 2 loaves
- Dietary Type: Vegetarian
Ingredients
- 2 cups warm water, divided (110 degrees F)
- 1 tablespoon active dry yeast
- ½ teaspoon active dry yeast (or use two .25-ounce packages yeast)
- 1 teaspoon sugar
- 5 ½ – 6 ½ cups bread flour (more if needed)
- 3 teaspoons salt
- 3 teaspoons sugar
- 5 tablespoons vegetable oil (or use Canola oil; DO NOT substitute butter or shortening for the oil, as it will affect the texture)
- Cornmeal, for dusting the pan
- 1 egg white, for brushing
- About 1 tablespoon sesame seeds
Equipment Needed
- Heavy-duty stand mixer with dough hook attachment
- Measuring cups and spoons
- Small bowls or cups
- Clean tea towel
- Plastic wrap
- Large, deep bowl
- Lightly floured surface
- Rolling pin
- Large jelly-roll pan
- Razor blade or small sharp knife
- Whisk
Instructions
- Begin by attaching the dough hook to your heavy-duty stand mixer.
- In a small cup or bowl, combine 1 teaspoon sugar with 1 cup of warm water (110 degrees F). Stir until the sugar is dissolved.
- Add 1 tablespoon plus ½ teaspoon active dry yeast to the sugar water. Mix gently.
- Cover the cup with a clean cloth and let the yeast proof for about 8 minutes, or until it becomes foamy. If the yeast doesn’t foam, it’s likely inactive and should be discarded. Start again with fresh yeast. This step is crucial to ensure your bread rises properly.
- Place 5 ½ cups of bread flour into the stainless steel mixing bowl of your stand mixer. Add the salt, sugar, and vegetable oil to the flour.
- Once the yeast has proofed and is foamy, add it to the mixing bowl along with the remaining 1 cup of warm water.
- Start the kneading process with the dough hook. Add more flour, a tablespoon at a time, as needed to create a soft, smooth, and semi-sticky dough. The kneading process should take about 8 minutes. Watch the dough closely, and don’t add too much flour, as this can result in a dry loaf.
- Transfer the dough onto a lightly floured surface. Cover it with a clean tea towel and let it rest for 3 minutes. This resting period is important as it allows the gluten to relax, making the dough easier to handle.
- Lightly oil a large, deep bowl.
- Gather up the dough and gently knead it into a ball. After resting, the dough should come together easily.
- Place the dough into the oiled bowl, turning it to coat all sides with the oil. Cover the bowl tightly with plastic wrap.
- Allow the dough to rise in a warm place for about 1 hour, or until it has doubled in size. The rising time may vary depending on the temperature of your kitchen.
- Once the dough has doubled, punch it down gently to release the air. Remove the dough from the bowl and place it onto a lightly floured surface.
- Divide the dough evenly into two pieces.
- Cover both pieces of dough with a clean tea towel and allow them to rest for 5 minutes. This short rest period will make shaping the loaves easier.
- Roll each piece of dough into an approximately 9 x 12-inch rectangle using a rolling pin.
- Starting at the long edge, roll up each rectangle jelly-roll fashion.
- Seal the edges and seam of each loaf by pinching them together firmly. This will prevent the loaves from splitting during baking.
- Grease a large jelly-roll pan generously and sprinkle it with about 2 tablespoons of cornmeal. The cornmeal will help prevent the loaves from sticking and add a slight textural contrast to the bottom crust.
- Place the two shaped loaves onto the prepared pan, seam-side down, spacing them apart.
- Using a razor blade or a small, sharp knife, slash each loaf 3 times diagonally. These slashes allow the bread to expand during baking and create the characteristic French bread appearance. Make sure the slashes are deep enough but not too deep.
- In a small cup, whisk the egg white until it is slightly frothy. Brush the egg white evenly over each loaf. This will give the crust a beautiful golden shine.
- Sprinkle the tops of the loaves with about 2 teaspoons of sesame seeds each. The sesame seeds add flavor and visual appeal.
- Cover the pan with a clean tea towel and allow the loaves to rise in a warm place for about 30 minutes.
- While the loaves are rising for the second time, preheat your oven to 375 degrees F (190 degrees C).
- Bake the loaves for about 30-35 minutes, or until they are golden brown. The internal temperature of the bread should reach about 200-210 degrees F (93-99 degrees C). If the loaves are browning too quickly, you can tent them loosely with aluminum foil.
- Remove the baked loaves from the oven and transfer them to a wire rack to cool completely before slicing and serving. This prevents the bread from becoming soggy.
Expert Tips & Tricks
- Temperature Matters: Make sure the water is at the correct temperature (110 degrees F). Too hot, and you’ll kill the yeast. Too cold, and it won’t activate properly.
- Kneading is Key: Don’t skimp on the kneading time. This develops the gluten, which gives the bread its structure and chewiness.
- Proofing Patience: Allow the dough to rise fully in both the first and second rise. This is essential for a light and airy loaf.
- Steam Power: For an extra-crispy crust, try adding a pan of hot water to the bottom rack of your oven during the first 10-15 minutes of baking. The steam helps to create a beautifully crackled crust. Remove the pan after 15 minutes to allow the crust to dry out.
- Dough consistency: The right dough consistency is a key factor. Add the flour gradually, until the dough is still slightly sticky but not overly wet.
- The Oven Temperature: Ensure your oven is properly preheated for optimal results.
Serving & Storage Suggestions
Serve your homemade French bread warm with a pat of butter, alongside a hearty soup, or as part of a charcuterie board. It’s also delicious toasted and topped with avocado or your favorite spreads.
To store, wrap the cooled bread tightly in plastic wrap or place it in a bread bag at room temperature. It will stay fresh for about 2-3 days. For longer storage, you can freeze the bread for up to 2-3 months. Thaw it completely before slicing and serving. To revive slightly stale bread, sprinkle it lightly with water and bake it in a preheated oven at 350 degrees F (175 degrees C) for about 5-10 minutes.
Nutritional Information
Note: These values are estimates and may vary based on specific ingredients and serving sizes.
| Nutrient | Amount per Serving | % Daily Value |
|---|---|---|
| Calories | 804 kcal | N/A |
| Total Fat | 19g | 29% |
| Saturated Fat | 2.5g | 13% |
| Cholesterol | 0mg | 0% |
| Sodium | 1753mg | 73% |
| Total Carbohydrate | 137g | 46% |
| Dietary Fiber | 5.6g | 22% |
| Sugars | 4.7g | N/A |
| Protein | 19g | 38% |
Variations & Substitutions
- Herb-Infused Bread: Add chopped fresh herbs like rosemary, thyme, or oregano to the dough for a flavorful twist.
- Garlic Bread: Brush the baked loaves with garlic butter while they are still warm.
- Whole Wheat Bread: Substitute up to half of the bread flour with whole wheat flour for a nuttier flavor and increased fiber.
- Sourdough Variation: Add 1 cup of active sourdough starter and reduce the active dry yeast to 1 teaspoon. The flavor changes dramatically!
FAQs (Frequently Asked Questions)
Q: Can I make this recipe without a stand mixer?
A: Yes, you can knead the dough by hand. It will require more effort and time (about 10-12 minutes), but it’s certainly possible.
Q: Why is my dough not rising?
A: Several factors could be at play. Ensure your yeast is fresh and properly proofed, that your water is at the correct temperature, and that your kitchen is warm enough.
Q: Can I use all-purpose flour instead of bread flour?
A: Bread flour is recommended for its higher protein content, which contributes to a chewier texture. All-purpose flour can be used, but the bread may be slightly less chewy.
Q: How do I get a really crispy crust?
A: Besides the steam trick mentioned above, ensure your oven is hot enough and don’t overbake the bread.
Q: Can I make the dough ahead of time?
A: Yes, you can refrigerate the dough after the first rise. Punch it down, wrap it well, and store it in the refrigerator for up to 24 hours. Allow it to come to room temperature before shaping and baking.
Final Thoughts
There’s something incredibly satisfying about creating your own French bread from scratch. The aroma that fills your kitchen, the anticipation as you watch the loaves rise, and the joy of that first bite into a perfectly crisp crust – it’s an experience that nourishes both body and soul. Don’t be intimidated by the process; this recipe, with the help of your KitchenAid, makes it surprisingly easy. Give it a try, and I’m confident you’ll be rewarded with the best homemade French bread you’ve ever tasted. Share your creations and feedback – happy baking!