
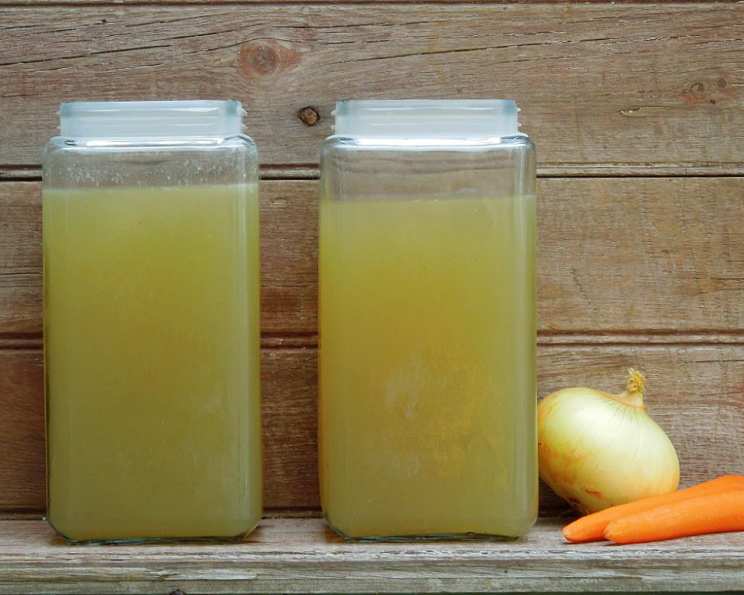
Kittencal’s Homemade Deep Rich Turkey Stock/Broth
The aroma of a slowly simmering pot of turkey stock is one of the most comforting scents I know. It instantly transports me back to my grandmother’s kitchen, where the scent of roasting turkey mingled with simmering herbs after Thanksgiving. We’d use the stock for everything from hearty soups to luxurious gravy, each spoonful a taste of home and love. That deeply flavorful stock was always the secret weapon, transforming even the simplest dishes into something special. This recipe is my attempt to recapture that magic, to create a stock that’s as rich and soul-satisfying as hers.
Recipe Overview
- Prep Time: 15 minutes
- Cook Time: 4 hours 10 minutes (includes roasting and simmering)
- Total Time: Overnight (including chilling)
- Yields: Approximately 12 cups
- Dietary Type: Gluten-Free, Dairy-Free
Ingredients
- 1 large turkey carcass (with some meat left on if possible)
- 2 medium onions, quartered
- 1 large celery rib, coarsely chopped
- 2 large carrots, peeled
- 4 quarts cold water (or use enough water to cover)
- 1 large bulb of garlic (separated into whole cloves, can omit if desired)
- 6 peppercorns
- 1 large bay leaf
- Salt (optional and to taste)
Equipment Needed
- Baking sheet
- Large stock pot
- Sieve or fine-mesh strainer
- Large bowl
- Plastic containers or freezer bags for storage
Instructions
-
Preheat your oven to 400 degrees F (200 degrees C). This roasting step is crucial for developing a deep, rich flavor in your stock.
-
Break up the turkey carcass into smaller pieces. This will allow for better browning and more efficient extraction of flavor.
-
Place the broken-down carcass pieces on a greased baking sheet, along with the quartered onions, coarsely chopped celery, and peeled carrots. A little bit of cooking spray goes a long way in preventing sticking.
-
Roast the bones and vegetables for about 40 minutes, turning them once halfway through the cooking time. This caramelization is key to the stock’s depth of flavor. You’re looking for a nice, even browning on all sides.
-
Transfer the roasted bones and vegetables to a large stock pot. Use a pot that’s big enough to comfortably hold everything without overcrowding.
-
Add the garlic cloves, peppercorns, and bay leaf to the pot. You don’t need to peel the garlic cloves, as the papery skin will contribute to the stock’s color and flavor.
-
Pour the cold water over the ingredients in the pot. Make sure the water covers the carcass and vegetables completely. If necessary, add more water to achieve this. Using cold water helps to slowly extract the flavors from the bones and vegetables.
-
Bring the water to a boil over medium-high heat. Keep a close eye on it to prevent it from boiling over.
-
Once boiling, reduce the heat to low, cover the pot, and simmer for about 3 1/2 hours. This long, slow simmering process allows the flavors to meld and deepen. The longer it simmers, the richer the stock will become.
-
After simmering, carefully strain the stock through a sieve or fine-mesh strainer set over a large bowl. This will remove all the solids, leaving you with a clear, flavorful broth.
-
Discard the solids. They’ve done their job and released all their flavor.
-
Cool the stock to room temperature. This is important for food safety before refrigerating.
-
Refrigerate the stock overnight. This allows the fat to solidify on the surface, making it easier to remove.
-
The following day, skim any excess fat from the top of the chilled broth. This step will result in a cleaner tasting, clearer stock. You can use a spoon or a fat separator for this.
-
The stock can be refrigerated for up to 3 days. For longer storage, separate it into plastic containers or freezer bags and freeze for up to 6 months. Remember to leave some headspace in the containers to allow for expansion during freezing.
Expert Tips & Tricks
- For an even richer flavor, consider adding any leftover turkey pan drippings to the stock pot. The concentrated flavors from the roasting pan will elevate the stock to another level.
- If you don’t have a whole turkey carcass, you can use turkey necks and backs, which are often available at the butcher.
- Don’t be afraid to experiment with other herbs and spices. A sprig of thyme or a few parsley stems can add a lovely aromatic note.
- If you prefer a vegetarian stock, you can use this same method with vegetable scraps instead of a turkey carcass.
- If you’re short on time, you can reduce the simmering time to 2 hours, but the longer it simmers, the more flavorful it will be.
- If you find that your stock is not as flavorful as you’d like, you can simmer it uncovered for the last hour to concentrate the flavors.
- Don’t add salt until the very end, after you’ve strained the stock. This will prevent it from becoming too salty as it simmers and reduces.
Serving & Storage Suggestions
This homemade turkey stock is incredibly versatile. Use it as a base for soups, stews, and sauces. It’s also fantastic for making gravy, braising vegetables, or cooking grains like rice and quinoa.
To thaw frozen stock, you can microwave it for a few minutes or refrigerate it overnight. Always bring the stock to a boil before using it to ensure it’s safe to consume.
Properly stored, homemade turkey stock will last for up to 3 days in the refrigerator and up to 6 months in the freezer. Be sure to label and date your containers for easy tracking.
Nutritional Information
| Nutrient | Amount per Serving (1 cup) | % Daily Value* |
|---|---|---|
| Calories | 17 kcal | 1% |
| Total Fat | 0.1 g | 0% |
| Saturated Fat | 0 g | 0% |
| Cholesterol | 0 mg | 0% |
| Sodium | 23.2 mg | 1% |
| Total Carbohydrate | 3.9 g | 1% |
| Dietary Fiber | 0.8 g | 3% |
| Sugars | 1.5 g | N/A |
| Protein | 0.5 g | 1% |
- Percent Daily Values are based on a 2000 calorie diet. Your daily values may be higher or lower depending on your calorie needs.
Variations & Substitutions
- Herb Variations: Add a sprig of rosemary, thyme, or sage for an herbal infused broth.
- Spicy Stock: Add a dried chili or a pinch of red pepper flakes for a touch of heat.
- Wine Enhancement: Deglaze the roasting pan with a half cup of dry white wine before adding the bones and vegetables to the stockpot. The wine adds another layer of complexity to the stock.
- Salt-Free Stock: Omit the salt entirely for a low-sodium option. You can always add salt to your dishes later.
- Smoked Turkey Stock: Use a smoked turkey carcass for a smoky, flavorful broth.
FAQs (Frequently Asked Questions)
Q: Can I use a rotisserie chicken carcass instead of a turkey carcass?
A: Absolutely! A rotisserie chicken carcass works wonderfully and provides a similar depth of flavor.
Q: Do I need to skim the fat from the top of the stock?
A: Skimming the fat is optional, but it will result in a clearer and lighter stock. It also helps to remove any impurities that may have risen to the surface.
Q: Can I use vegetable scraps in addition to the onions, celery, and carrots?
A: Yes, feel free to add other vegetable scraps like carrot peels, mushroom stems, and onion skins. Just avoid strong-flavored vegetables like broccoli or cabbage, which can overpower the stock.
Q: How long can I keep the stock in the freezer?
A: Properly frozen turkey stock can last for up to 6 months in the freezer. Make sure it’s stored in airtight containers or freezer bags.
Q: What if my stock doesn’t gel after refrigerating?
A: Gelling indicates a high collagen content from the bones, which is desirable but not essential. If your stock doesn’t gel, it’s still perfectly flavorful and usable.
Final Thoughts
Now you’re armed with the knowledge to create your own deeply rich turkey stock. It’s a labor of love, but the results are well worth the effort. Imagine the delicious soups, gravies, and sauces you’ll be able to create with this flavorful base. Don’t be afraid to experiment with different herbs and spices to customize the flavor to your liking. And most importantly, share your creations with friends and family. I hope this recipe brings you as much joy as it has brought me over the years. Happy cooking!