
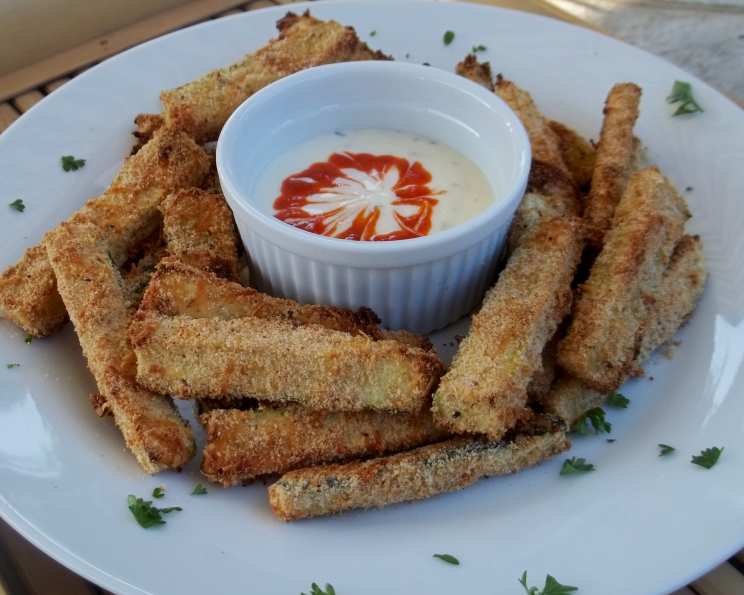
Kittencal’s Low-Fat Oven-Baked Zucchini Sticks: A Culinary Delight
My grandmother, bless her heart, had a garden that could rival a small farm. Every summer, we were inundated with zucchini. We grilled it, sauteed it, and even tried (unsuccessfully) to hide it in chocolate cake. But my fondest memory is of these crispy, oven-baked zucchini sticks. They were a family favorite, a delightful way to use up the garden bounty, and proof that even the most humble vegetable could be transformed into something truly special. The aroma of garlic and Parmesan wafting from the oven always signaled happy times.
Recipe Overview
- Prep Time: 15 minutes
- Cook Time: 20-25 minutes
- Total Time: 35-40 minutes
- Servings: 6
- Yields: Approximately 60 sticks
- Dietary Type: Vegetarian, Low-Fat
Ingredients
- 1/2 cup seasoned dry bread crumbs (panko breadcrumbs are even better)
- 1/4 cup grated Parmesan cheese
- 1/2 teaspoon garlic powder (can use 1 teaspoon if you are a garlic lover!)
- 1/4 teaspoon seasoning salt (or to taste, can use regular salt – omit if your breadcrumbs are already salted)
- 1/4 teaspoon fresh ground black pepper (or to taste)
- 1 large egg (you might need two, depending on the size of your zucchini)
- 3 medium zucchini, unpeeled and cut into approximately 3 x 1/2-inch sticks, or as desired.
Equipment Needed
- Two bowls
- Whisk or fork
- Greased baking sheet
- Nonstick cooking spray
- Measuring cups and spoons
Instructions
-
Preheat your oven to 425 degrees F (220 degrees C). This high temperature is key for getting the zucchini sticks nice and crispy without becoming soggy.
-
Prepare the breadcrumb mixture: In a medium-sized bowl, combine the seasoned dry bread crumbs, grated Parmesan cheese, garlic powder, salt, and pepper. Mix thoroughly to ensure the spices are evenly distributed. This flavorful coating is what transforms the zucchini into a truly addictive snack.
-
Prepare the egg wash: In a separate bowl, lightly beat the egg(s). You want to break up the yolk and white, but don’t over-whisk; a light beating is all that’s needed. If your zucchini sticks are not getting fully coated with one egg, crack another egg into the bowl and beat it lightly with the previous one.
-
Coat the zucchini sticks: Dip each zucchini stick into the beaten egg, making sure it’s well-coated on all sides. Allow any excess egg to drip off before transferring the stick to the breadcrumb mixture.
-
Press the zucchini sticks into the breadcrumb mixture, ensuring that the breadcrumbs adhere to all sides. Gently press the breadcrumbs onto the zucchini to help them stick. This creates a crispy, flavorful crust.
-
Arrange the zucchini sticks on a prepared baking sheet: Grease a baking sheet thoroughly and coat it with nonstick cooking spray. This prevents the zucchini sticks from sticking and ensures they brown evenly. Place the breaded zucchini sticks in a single layer on the prepared baking sheet, making sure that the coated zucchini pieces are not overlapping each other.
-
Bake the zucchini sticks: Bake in the preheated oven for 20-25 minutes, or until the zucchini sticks are lightly browned and tender. For even browning, you can turn the sticks over halfway through the baking time. The exact baking time will depend on your oven and the thickness of the zucchini sticks, so keep a close eye on them.
-
Cool Slightly and Serve: Once baked, remove the zucchini sticks from the oven and let them cool slightly on the baking sheet before serving.
Expert Tips & Tricks
- Panko Power: While the recipe calls for seasoned dry breadcrumbs, using panko breadcrumbs will yield an even crispier result. Their larger, flakier texture creates a delightful crunch.
- Cheese Please: Feel free to experiment with different types of cheese. A blend of Parmesan and Romano, or even a touch of Asiago, can add extra depth of flavor.
- Spice It Up: If you like a little heat, add a pinch of cayenne pepper to the breadcrumb mixture.
- Don’t Overcrowd: Avoid overcrowding the baking sheet. Overcrowding will steam the zucchini sticks rather than baking them, resulting in a soggy texture. Work in batches if necessary.
- Prep Ahead: You can prepare the breadcrumb mixture ahead of time and store it in an airtight container at room temperature. You can also bread the zucchini sticks ahead of time and store them in the refrigerator for up to a few hours before baking.
- Crispiness Boost: For extra crispiness, place the baking sheet under the broiler for the last minute or two of baking, keeping a very close watch to prevent burning.
- Zucchini Size Matters: Adjust baking time according to the thickness of your zucchini sticks. Thicker sticks may require a few extra minutes in the oven.
Serving & Storage Suggestions
These zucchini sticks are best served immediately while they are still warm and crispy. They make a fantastic appetizer, side dish, or even a light snack. Serve them with your favorite dipping sauce, such as marinara sauce, ranch dressing (low-fat, as Kittencal suggests!), tzatziki, or even a simple garlic aioli.
Leftovers can be stored in an airtight container in the refrigerator for up to 3 days. However, they will lose some of their crispness. To reheat, spread the zucchini sticks on a baking sheet and bake in a preheated oven at 350 degrees F (175 degrees C) for about 5-10 minutes, or until heated through. You can also reheat them in an air fryer for a few minutes to restore some of their crispness. Freezing is not recommended as it can affect the texture.
Nutritional Information
Please note that these values are estimates and may vary based on specific ingredients and portion sizes.
| Nutrient | Amount per Serving | % Daily Value |
|---|---|---|
| Calories | 86 kcal | N/A |
| Calories from Fat | 2 g | N/A |
| Total Fat | 0.3 g | 0% |
| Saturated Fat | 0.1 g | 0% |
| Cholesterol | 3.5 mg | 1% |
| Sodium | 25.9 mg | 1% |
| Total Carbohydrate | 1 g | 0% |
| Dietary Fiber | 0.1 g | 0% |
| Sugars | 0.3 g | 1% |
| Protein | 0.5 g | 1% |
Variations & Substitutions
- Gluten-Free: Use gluten-free breadcrumbs in place of regular breadcrumbs to make this recipe gluten-free.
- Dairy-Free: Omit the Parmesan cheese or use a dairy-free Parmesan alternative. You can also add nutritional yeast to the breadcrumb mixture for a cheesy flavor.
- Vegan: In addition to omitting the Parmesan cheese, you will also need to replace the egg. You can use a flax egg (1 tablespoon of ground flaxseed mixed with 3 tablespoons of water, let sit for 5 minutes) or a commercial egg replacer.
- Herbaceous Twist: Add dried herbs such as oregano, basil, or thyme to the breadcrumb mixture for a more complex flavor.
- Spicy Kick: Add a pinch of red pepper flakes or a dash of hot sauce to the egg wash for a spicy kick.
- Air Fryer Option: These zucchini sticks can also be cooked in an air fryer. Preheat the air fryer to 400 degrees F (200 degrees C) and cook for 8-10 minutes, or until golden brown and crispy, flipping halfway through.
FAQs (Frequently Asked Questions)
Q: Can I use yellow squash instead of zucchini?
A: Yes, yellow squash can be used as a substitute for zucchini in this recipe. The flavor and texture will be very similar.
Q: My zucchini sticks are soggy. What am I doing wrong?
A: Soggy zucchini sticks are usually caused by overcrowding the baking sheet or not using a high enough oven temperature. Make sure to spread the sticks in a single layer and bake at 425 degrees F (220 degrees C).
Q: Can I freeze these zucchini sticks?
A: Freezing is not recommended, as it can significantly alter the texture of the zucchini. They’re best enjoyed fresh.
Q: Can I add other vegetables to this recipe?
A: Yes, you can experiment with adding other vegetables such as bell peppers or eggplant, cut into similar-sized sticks. Adjust the baking time as needed.
Q: My breadcrumbs aren’t sticking. What should I do?
A: Ensure the zucchini sticks are well coated in the egg wash before dredging in the breadcrumb mixture. Press the breadcrumbs firmly onto the zucchini to help them adhere.
Final Thoughts
Kittencal’s Low-Fat Oven-Baked Zucchini Sticks are a testament to the fact that healthy eating doesn’t have to be boring. This recipe is simple, flavorful, and a fantastic way to make the most of summer’s bounty. So, gather your ingredients, preheat your oven, and get ready to enjoy a crispy, delicious treat that will have everyone coming back for more. Don’t be afraid to experiment with different seasonings and dipping sauces to find your perfect combination. And, of course, share your creations and feedback! Happy cooking!