
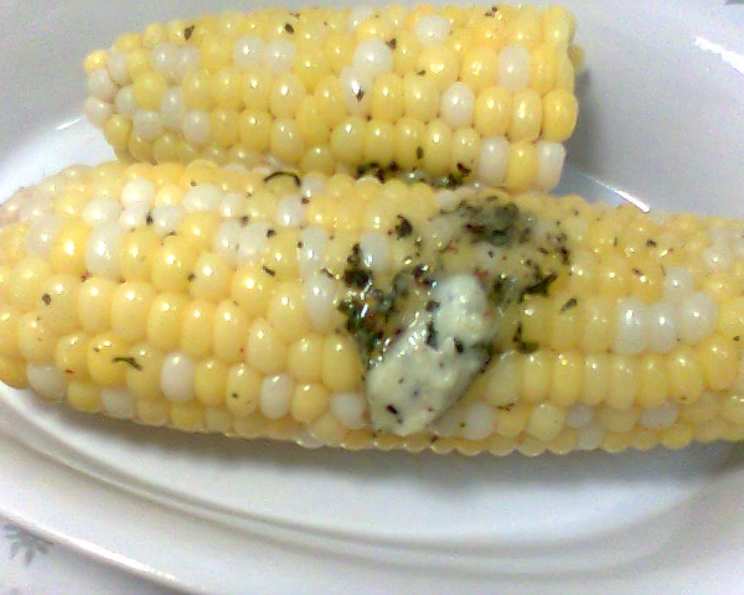
The Secret to Summer: Perfectly Frozen Corn on the Cob
I can still remember the summers of my childhood, spent running through the tall stalks of my grandfather’s cornfield. The sun beat down relentlessly, but the promise of sweet, juicy corn on the cob at dinner made it all worthwhile. He always grew more than we could possibly eat fresh, and my grandmother had a special method for freezing the extra, ensuring we could taste summer even in the depths of winter. Her corn was always incredibly crisp and flavorful, a far cry from the mushy, lackluster frozen corn I’d tried elsewhere. This recipe honors her dedication, bringing that same taste of summer to your table year-round.
Recipe Overview
- Prep Time: 30 minutes (plus time for shucking corn, if not done in advance)
- Cook Time: 3 minutes
- Total Time: Approximately 1 hour (includes cooling and wrapping)
- Servings: 10 ears of corn (can be scaled up or down)
- Yield: 10 individually frozen ears of corn
- Dietary Type: Vegetarian, Vegan, Gluten-Free, Dairy-Free
Ingredients
- 10 ears of corn on the cob, shucked and silks removed
- Water
- 2 tablespoons sugar
- Ice (lots of ice)
Equipment Needed
- Large pot
- Large bowl
- Long tongs
- Clean tea towels
- Aluminum foil
- Large freezer bag
Instructions
-
Begin by ensuring all your corn cobs are shucked and the silks are thoroughly removed. You can do this step the day before to save time; just refrigerate the shucked corn until ready to use.
-
Prepare an ice bath. In a large bowl, pour a generous amount of ice and then fill the bowl with very cold water. Set this aside near your stovetop. The ice bath is crucial for stopping the cooking process and preserving the corn’s crispness.
-
Fill a large pot a little over half full with water. The pot needs to be large enough to accommodate several cobs of corn without overcrowding.
-
Add the 2 tablespoons of sugar to the water. The sugar helps to enhance the corn’s natural sweetness.
-
Bring the water to a full boil. Make sure the water is vigorously boiling before adding the corn.
-
Carefully add as many cobs of corn as will fit into the pot without overcrowding. Overcrowding the pot will lower the water temperature too much, leading to uneven cooking.
-
Once the corn is added, bring the water back up to a FULL boil again. Cook the corn just until the cobs turn a darker yellow color. This usually takes only about 3 minutes. Keep a close eye on the corn, as you don’t want to overcook it.
-
During the 3-minute cooking time, use long tongs to turn the cobs over in the water, if necessary, to ensure even cooking on all sides.
-
As soon as the corn takes on a darker shade of yellow, immediately use your tongs to plunge the cobs into the prepared bowl of ice water. This step is critical to stop the cooking process and keep the corn crisp.
-
Allow the corn to sit in the ice water until it is completely cooled. This can take approximately 10-15 minutes.
-
Remove the cooled cobs from the ice water and place them onto a clean tea towel to drain slightly.
-
Gently dry the outside of each cob with another clean tea towel. Removing excess moisture helps prevent ice crystals from forming during freezing.
-
Wrap each cob individually in a piece of aluminum foil to prevent any freezer burn that might develop during long-term freezing. Make sure the foil is wrapped tightly around the corn.
-
Place the foil-wrapped cobs in a large freezer bag. Seal the bag tightly, removing as much air as possible to further prevent freezer burn.
-
Freeze the bag of corn until ready to use.
-
When ready to use, remove as many cobs as you wish from the freezer. Place them on the counter to thaw slightly. The corn does not have to be completely thawed before heating.
-
To heat the corn, you have two options:
- Microwave: Place 1 cob onto a microwave-safe plate and cook on high for 3-4 minutes, or until completely heated through. Turn the cob halfway through the cooking time for even heating.
- Steaming Bag: Place 1 cob of corn into a Glad Simply Cooking Microwave Steaming bag, seal, and microwave for 3 minutes. This method steams the corn and keeps it moist.
-
The corn is now ready to eat and enjoy!
Expert Tips & Tricks
- Shuck Ahead: Shucking the corn a day or two in advance saves time, especially if you’re processing a large quantity.
- Don’t Overcook: The most important tip is not to overcook the corn in the boiling water. Three minutes is usually sufficient, but watch for the color change. Overcooked corn will be mushy, even after freezing.
- Ice, Ice Baby: Use plenty of ice in the ice bath. As the corn heats up the water, the ice melts, so have extra ice on hand to replenish it.
- Double Wrap: For longer freezer storage, consider wrapping the foil-wrapped corn in plastic wrap before placing it in the freezer bag for even better protection against freezer burn.
- Label and Date: Always label your freezer bag with the contents and date to keep track of how long the corn has been stored.
Serving & Storage Suggestions
Serve the reheated corn with butter, salt, pepper, and any other desired seasonings. Leftover cooked corn can be stored in the refrigerator for up to 3 days. Wrap it tightly in plastic wrap or store it in an airtight container. To reheat refrigerated corn, microwave it for 1-2 minutes, or until heated through. While frozen corn can technically be stored indefinitely, it’s best to use it within 8-12 months for optimal quality.
Nutritional Information
(Estimated per ear of corn, without added butter or seasonings)
| Nutrient | Amount per Serving | % Daily Value |
|---|---|---|
| Calories | 132 kcal | N/A |
| Fat | 1 g | 1% |
| Saturated Fat | 0.1 g | 0% |
| Cholesterol | 0 mg | 0% |
| Sodium | 6.3 mg | 0% |
| Carbohydrates | 31.9 g | 10% |
| Fiber | 3.5 g | 14% |
| Sugars | 7.2 g | N/A |
| Protein | 4.1 g | 8% |
Variations & Substitutions
- Spice It Up: Add a pinch of cayenne pepper or a few sprigs of your favorite herbs to the boiling water for a subtle flavor infusion.
- Different Sweetener: If you don’t want to use sugar, you can substitute honey or maple syrup, but the sugar provides the best result.
- Grilled Corn: After boiling and cooling, brush the corn with oil and grill it for a smoky flavor before wrapping and freezing.
- Creamed Corn: Instead of freezing whole cobs, cut the kernels off the cooked cobs and freeze them for use in creamed corn recipes.
FAQs (Frequently Asked Questions)
Q: Why do I need to boil the corn before freezing?
A: Boiling, or blanching, the corn deactivates enzymes that cause deterioration in flavor and texture during freezing, helping to preserve the corn’s quality.
Q: Can I freeze corn without the foil wrapping?
A: While you can, the foil wrapping is highly recommended to prevent freezer burn, especially if you plan to store the corn for an extended period.
Q: What if I don’t have enough ice for the ice bath?
A: You can supplement with very cold water, but try to use as much ice as possible. The colder the water, the more effectively it stops the cooking process.
Q: How do I know if the corn is done cooking in the boiling water?
A: The kernels will change from a pale yellow to a slightly darker, more vibrant yellow color. Be careful not to overcook, as the corn will continue to cook slightly in the ice bath.
Q: Can I freeze corn kernels instead of the whole cob?
A: Absolutely! Simply cut the kernels off the cob after cooling and pack them into freezer bags. This is a great option if you plan to use the corn in soups, salads, or other dishes.
Final Thoughts
Preserving summer’s bounty is one of the most rewarding culinary endeavors. This simple method for freezing corn on the cob ensures that you can enjoy the sweet taste of summer, even when the snow is falling. I encourage you to try this recipe and experience the joy of perfectly frozen corn. Feel free to experiment with different seasonings and preparation methods, and please share your feedback and tips in the comments below. Whether you’re serving it as a side dish to a hearty barbecue or incorporating it into a comforting winter stew, this frozen corn will bring a touch of sunshine to your table.