
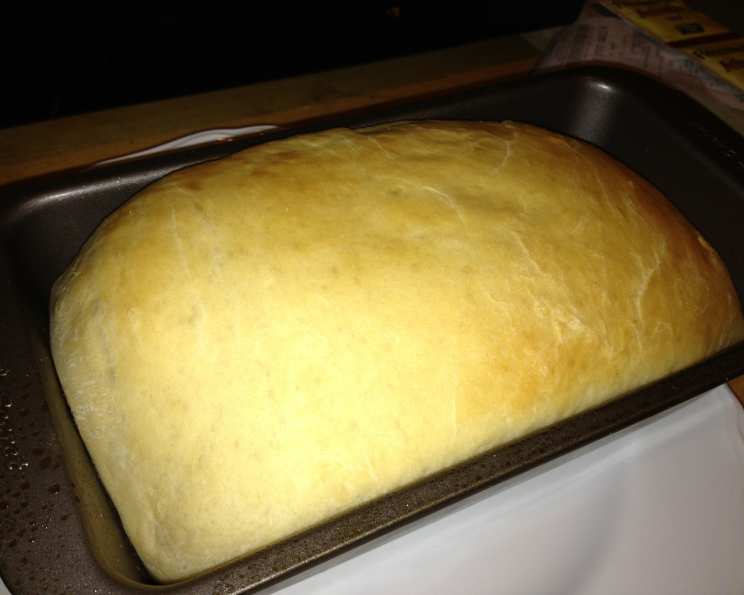
Kittencal’s Old Fashioned White Bread: A Baker’s Delight
The aroma of freshly baked bread has always been a cornerstone of my fondest childhood memories. I can still vividly recall the golden-brown crust of my grandmother’s loaves, the comforting warmth as I tore off a piece, and the subtle, yeasty tang that lingered on my tongue. Her white bread, especially, was a masterpiece of simple ingredients transformed into a comforting and satisfying staple. This recipe reminds me so much of her cherished creation.
Recipe Overview
- Prep Time: 1 hour 30 minutes
- Cook Time: 25 minutes
- Total Time: 1 hour 55 minutes (plus rising time)
- Yields: 1 (8×4-inch) loaf
- Dietary Type: Not specified
Ingredients
- ½ cup milk
- 2 tablespoons sugar
- 1 ½ teaspoons salt
- 4-6 cups white flour (or as needed) (Canadian members use all-purpose white flour, for U.S. members use white bread flour)
- 3 tablespoons shortening, room temperature (or use 3 tablespoons lard)
- 1 ¼ cups warm water
- 2 teaspoons sugar
- 1 tablespoon dry yeast
- ½ teaspoon dry yeast
Equipment Needed
- Heavy-duty stand mixer with kneader blade
- Small saucepan
- Measuring cups and spoons
- Large mixing bowl
- Plastic wrap
- Clean tea towel
- 8×4-inch bread pan
- Knife
Instructions
-
Begin by fitting your heavy-duty stand mixer with the kneader blade. This is crucial for developing the gluten and achieving that perfect texture.
-
In a small saucepan, scald the ½ cup of milk with 2 tablespoons of sugar and 1 ½ teaspoons of salt. Heat until the milk is very warm, stirring with a spoon until no sugar or salt granules remain. Set this mixture aside to cool until it is lukewarm. To speed up the cooling process, you can place it in the refrigerator for about 15-20 minutes on the top shelf, being sure to monitor it.
-
In the stainless steel mixing bowl of your stand mixer, place 4 cups of white flour and 3 tablespoons of shortening (or lard if using) along with the lukewarm milk mixture. Cover the bowl with a clean tea towel to help retain the warmth of the milk mixture.
-
In a separate cup, mix together 1 ¼ cups of warm water with 2 teaspoons of sugar. Stir with a spoon until the sugar is fully dissolved. Then, add 1 tablespoon plus ½ teaspoon of dry yeast to the water mixture. Stir gently for about 15 seconds.
-
Place a towel over the cup containing the yeast mixture and let it proof for approximately 8-10 minutes, or until it becomes foamy. This step is essential to ensure your yeast is active and will properly leaven the bread.
-
Pour the water/yeast mixture into the mixing bowl with the other ingredients.
-
Start mixing and kneading the dough using the stand mixer. Gradually add more flour as needed to create a soft, smooth dough. This process should take about 8 minutes. The amount of flour required may vary depending on the humidity and other factors, so add it slowly until the dough comes together.
-
Remove the dough from the bowl and place it on a very lightly floured surface. Cover it with a clean tea towel and let it rest for about 5-8 minutes. This allows the gluten to relax, making the dough easier to handle.
-
Gather up the dough and shape it into a ball. Place the ball in a large, well-greased bowl. Make sure the bowl is generously greased to prevent the dough from sticking.
-
Cover the bowl tightly with plastic wrap and let the dough rise in a warm place for about 1 hour. A consistently warm environment is crucial for proper rising. One technique is to turn your oven on to 200 degrees F for a couple of minutes just before starting the recipe, then turn it off. You can then use the slightly warmed oven as a perfect rising place. However, be very careful to turn the oven off!
-
Once the dough has doubled in size, punch it down to release the excess air. Place the dough on a clean surface.
-
Using your hands (not a rolling pin), gently flatten the dough into a 10 x 14-inch rectangle. This dough is quite forgiving and shapes easily, so there’s no need for a rolling pin.
-
Roll the dough up tightly, starting from one of the shorter ends. Seal the long seam by pinching it together firmly.
-
Using a knife, slice off the dough ends just enough so that the loaf will fit into your 8×4-inch bread pan. Pinch the dough ends together to seal them. You can shape these two ends into small balls and freeze them to make buns later or simply discard the dough.
-
Place the shaped loaf into a dark metal 8 x 4-inch bread pan. Dark metal pans help to ensure even baking and a nicely browned crust.
-
Cover the bread pan and let the dough rise again in a warm place for about 30-40 minutes, or until it has doubled in size.
-
Bake in a preheated 375-degree oven for about 25 minutes, or until the loaf is golden brown. A properly baked loaf should sound hollow when tapped on the bottom. If the top is browning too quickly, you can tent it with foil during the last few minutes of baking.
Expert Tips & Tricks
- Milk Powder Boost: Add 2 tablespoons of dry milk powder to the flour mixture for an even softer crumb.
- Temperature Check: Ensure the water for activating the yeast is warm, not hot, to prevent killing the yeast. Aim for around 105-115°F (40-46°C).
- Oven Spring: For a better oven spring (the rapid expansion of the dough when it first enters the oven), try placing a pan of hot water on the bottom rack of the oven during baking. This creates steam, which helps the crust stay moist longer, allowing the bread to rise fully.
- Kneading Time: Proper kneading is essential for gluten development. If kneading by hand, aim for at least 10-12 minutes.
Serving & Storage Suggestions
This Old Fashioned White Bread is incredibly versatile. Serve it warm with a pat of butter, use it for sandwiches, toast it for breakfast, or enjoy it alongside a hearty soup or stew.
To store, allow the bread to cool completely before wrapping it tightly in plastic wrap or placing it in a bread bag. At room temperature, it will stay fresh for about 2-3 days. For longer storage, you can freeze the loaf for up to 2-3 months. Thaw it completely before serving. To refresh a day-old loaf, you can lightly toast it or wrap it in foil and warm it in a low oven (300°F/150°C) for about 10-15 minutes.
Nutritional Information
| Nutrient | Amount per Serving (estimated) | % Daily Value (estimated) |
|---|---|---|
| Calories | 200 kcal | 10% |
| Total Fat | 5g | 8% |
| Saturated Fat | 2g | 10% |
| Cholesterol | 0mg | 0% |
| Sodium | 300mg | 13% |
| Total Carbohydrate | 35g | 12% |
| Dietary Fiber | 1g | 4% |
| Sugars | 4g | – |
| Protein | 5g | 10% |
Note: Nutritional information is an estimate and can vary based on specific ingredients and portion sizes.
Variations & Substitutions
- Whole Wheat Variation: Substitute up to half of the white flour with whole wheat flour for a nuttier flavor and added fiber.
- Herb-Infused: Add 1-2 tablespoons of dried herbs (such as rosemary, thyme, or oregano) to the flour mixture for a savory twist.
- Sweet Bread: Increase the sugar to 1/4 cup and add a teaspoon of vanilla extract for a sweeter loaf, perfect for French toast or bread pudding.
- Dairy-Free: Replace the milk with a plant-based alternative like almond milk or soy milk.
- Enriched Dough: For an even richer loaf, add an egg to the wet ingredients. This will create a softer, more tender crumb.
FAQs (Frequently Asked Questions)
Q: Why is my dough not rising?
A: Several factors can affect rising. Make sure your yeast is fresh and properly activated. Also, ensure the rising environment is warm, but not too hot, as extreme temperatures can inhibit yeast activity.
Q: Can I make this bread without a stand mixer?
A: Yes, you can knead the dough by hand. It will require more effort and time (about 10-12 minutes), but the results will be just as delicious.
Q: How do I know when the bread is fully baked?
A: The bread is done when it’s golden brown and sounds hollow when tapped on the bottom. An internal temperature of 200-210°F (93-99°C) is also a good indicator.
Q: Can I use rapid-rise yeast instead of active dry yeast?
A: Yes, you can substitute rapid-rise yeast. However, you may not need to proof it in water first. Follow the instructions on the yeast package.
Q: What can I do if my bread is browning too quickly?
A: If the top of the bread is browning too quickly, you can loosely tent it with aluminum foil during the last 10-15 minutes of baking.
Final Thoughts
I wholeheartedly encourage you to try this recipe for Kittencal’s Old Fashioned White Bread. It’s a simple yet deeply satisfying bread that will fill your home with a warm and comforting aroma. Don’t be afraid to experiment with variations and substitutions to create your own signature loaf. I’d love to hear about your baking experiences and any personal touches you add to this classic recipe. Pair it with a simple homemade jam or a bowl of creamy tomato soup for the ultimate comfort food experience! Happy baking!