
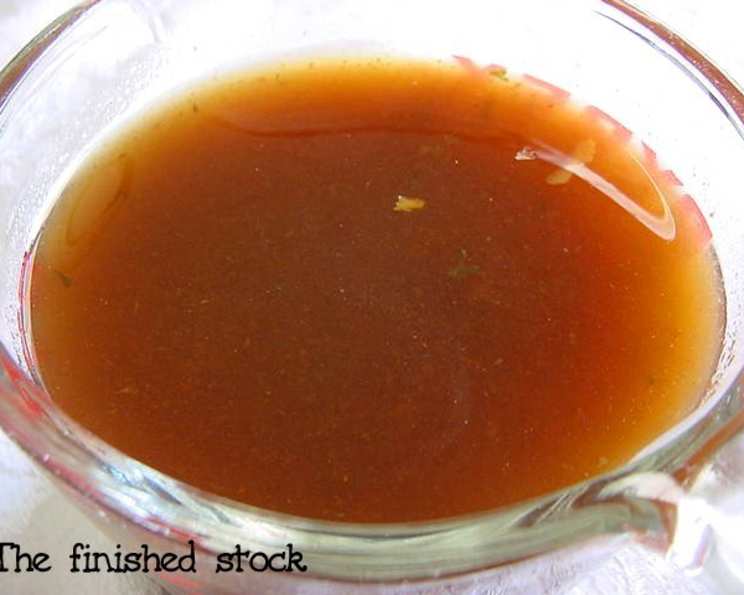
Kittencal’s Rich Homemade Beef Stock (Crock-Pot or Stove Top)
My grandmother, bless her heart, believed everything tasted better when made from scratch. While her pies were legendary, it was her homemade beef stock that truly captured my heart. I remember standing in her sun-drenched kitchen, mesmerized as she tended to a massive stockpot simmering gently on the stove, the aroma of roasted bones and earthy vegetables filling the air. That rich, dark elixir was the foundation for countless soups, stews, and gravies, each imbued with a depth of flavor I’ve been chasing ever since. This recipe, inspired by those cherished memories, brings that same soulful essence to your kitchen.
Recipe Overview
- Prep Time: 30 minutes
- Cook Time: 12-24 hours (Crock-Pot), 4-6 hours (Stove Top)
- Total Time: Up to 24 hours 30 minutes
- Servings: Varies
- Yield: Approximately 8 cups
- Dietary Type: Dairy-Free, Gluten-Free (naturally)
Ingredients
- 7-10 beef bones with marrow (or use any beef bones with a little meat left on them)
- 6 ounces tomato paste
- 2 onions, chopped (leave the skin on onions)
- 2 carrots, peeled and chopped
- 2 tablespoons dried parsley flakes (optional)
- 8-10 black peppercorns
- 2 teaspoons salt (or to taste)
- Cold water (enough to cover the bones)
Equipment Needed
- Baking sheet
- Crock-Pot (slow cooker) or large stock pot
- Strainer
- Greased baking sheet
Instructions
- Preheat your oven to 350 degrees F (175 degrees C).
- Place the beef bones on a greased baking sheet and brush liberally with tomato paste. Be generous here; the tomato paste will caramelize in the oven and contribute to the rich color and flavor of the stock.
- Bake the bones, turning once during baking, for about 25 minutes on each side, or until nicely browned. This roasting step is crucial for developing a deep, complex flavor. Don’t rush it!
- Transfer the roasted bones to your Crock-Pot or a large stock pot.
- Add the remaining ingredients: the chopped onions (don’t worry about peeling them – the skins add color and nutrients!), the peeled and chopped carrots, dried parsley flakes (if using), black peppercorns, and salt.
- Pour in enough cold water to completely cover the bones and vegetables. Using cold water helps to extract more collagen from the bones, resulting in a richer, more gelatinous stock.
- If using a Crock-Pot, cover and cook on low for 12-24 hours, or on high for 6 hours. Note that if cooked on the high setting, the stock will be lighter in color and less concentrated.
- If cooking on the stovetop, bring the mixture to a gentle simmer over medium heat, then reduce the heat to the lowest setting, cover, and simmer for 4-6 hours. Be sure to keep the heat as low as possible to avoid boiling, which can make the stock cloudy.
- Once the cooking time is complete, remove the pot from the heat (or turn off the Crock-Pot) and carefully remove the bones and vegetables with a slotted spoon.
- Place a strainer lined with cheesecloth (if desired, for a clearer stock) over a large bowl or pot. Pour the stock through the strainer to remove any solids. Discard the bones and vegetables (they’ve given all they have to offer!).
- Allow the strained stock to cool slightly, then transfer it to the refrigerator to chill completely. As the stock cools, the fat will rise to the top and solidify. This fat can be easily skimmed off and discarded (or reserved for cooking, if desired).
- Once chilled and defatted, the stock is ready to use or can be stored for later.
Expert Tips & Tricks
- Roasting the bones: Don’t skip this step! It’s essential for developing the deep, rich flavor of the stock. The Maillard reaction, which occurs during roasting, creates hundreds of flavor compounds that simply can’t be achieved by simmering raw bones.
- Don’t boil: When simmering on the stovetop, keep the heat as low as possible. Boiling will emulsify the fat into the stock, making it cloudy and less flavorful.
- Skim the scum: During the first hour or two of simmering, you may notice a layer of foam or scum forming on the surface of the stock. This is made up of impurities that are being released from the bones. Skimming this off will result in a cleaner, clearer stock.
- Save your vegetable scraps: Keep a bag in your freezer for vegetable scraps like onion skins, carrot peels, and celery ends. These can be added to the stock for extra flavor. Avoid strong-flavored vegetables like broccoli or cabbage, which can overpower the stock.
- Don’t over-salt: It’s always best to under-salt your stock, as it will become more concentrated as it simmers. You can always add more salt later when you use the stock in a recipe.
- Freeze for later: Pour cooled stock into freezer-safe containers or ziplock bags and freeze for later use. Use ice cube trays for small portions for quick additions to sauces.
Serving & Storage Suggestions
Once cooled, the fat will rise to the top and solidify. Skim off this layer of fat; it can be discarded, or saved for other cooking. The stock can be stored in the refrigerator for 4-5 days, or frozen for up to 3 months. For convenient use, consider freezing the stock in ice cube trays, then transferring the frozen cubes to a freezer bag. This allows you to easily add small amounts of stock to sauces or other dishes as needed. When ready to use frozen stock, thaw it in the refrigerator overnight, or heat it gently on the stovetop. This rich beef stock elevates any recipe calling for broth, from soups and stews to risotto and braised meats.
Nutritional Information
| Nutrient | Amount per Serving | % Daily Value |
|---|---|---|
| Calories | 35 kcal | 2% |
| Total Fat | 0.2 g | 0% |
| Saturated Fat | 0 g | 0% |
| Cholesterol | 0 mg | 0% |
| Sodium | 762 mg | 31% |
| Total Carbohydrate | 8 g | 2% |
| Dietary Fiber | 1.8 g | 7% |
| Sugars | 4.5 g | 18% |
| Protein | 1.4 g | 2% |
Note: Nutritional information is an estimate and may vary based on specific ingredients and serving sizes.
Variations & Substitutions
- Veal bones: Veal bones can be substituted for beef bones for a slightly lighter-flavored stock.
- Herb variations: Experiment with different herbs and spices to customize the flavor of your stock. Try adding a bay leaf, a sprig of thyme, or a few sprigs of rosemary.
- Vegetable variations: Add other vegetables, such as celery, parsnips, or leeks, to the stock for added flavor.
- Mushroom stock: Add dried mushrooms (such as shiitake or porcini) to the stock for a deep, earthy flavor.
FAQs (Frequently Asked Questions)
Q: Can I use bones that have already been cooked?
A: Yes, you can use leftover bones from a roast, but the flavor will be less intense than using raw bones that have been roasted specifically for stock.
Q: Do I have to skim the fat off the top of the stock?
A: Skimming the fat results in a clearer stock, but it’s primarily a matter of preference. Some people enjoy the richness that the fat adds to the stock.
Q: Can I make this in an Instant Pot?
A: Yes, you can adapt this recipe for an Instant Pot. Reduce the cooking time to about 2 hours on high pressure, followed by a natural pressure release.
Q: What if I don’t have enough bones?
A: You can still make a delicious stock with fewer bones, but the flavor will be less concentrated. Consider adding a beef bouillon cube or some beef base to boost the flavor.
Q: How do I know if my stock is done?
A: The stock is done when the bones are brittle and the meat has fallen off, and the vegetables are very soft. The liquid should have a rich, deep flavor.
Final Thoughts
Making your own beef stock might seem like a labor of love, but the incredible depth of flavor it adds to your dishes is well worth the effort. Trust me, once you taste the difference between homemade and store-bought, you’ll never go back. So, gather your ingredients, put on your apron, and prepare to create a culinary masterpiece that will elevate your cooking to a whole new level. And when you do, be sure to share your experience – and maybe even a bowl of soup – with those you love. Enjoy!