
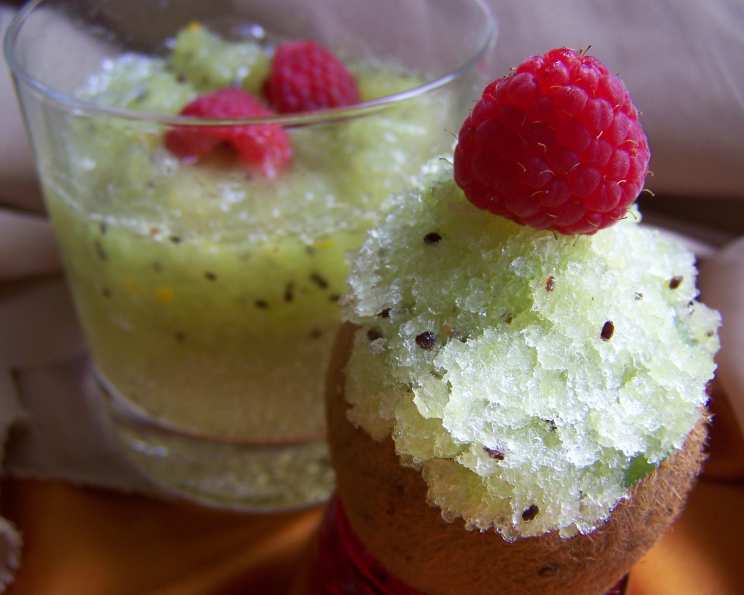
Kiwi Ice: A Taste of Sunshine Down Under
I remember being a young apprentice, sweating it out in a bustling Sydney kitchen during a scorching summer. The head chef, a gruff but kind soul named Barry, would occasionally surprise us with a batch of something cold and intensely fruity. He called it Kiwi Ice, and that first spoonful was pure bliss – a vibrant, tangy antidote to the heat and the pressure. It was more than just a dessert; it was a little taste of paradise, a reminder of the beautiful beaches and laid-back vibes that made Australia home. This recipe captures that very feeling.
Recipe Overview
- Prep Time: 10 minutes
- Freeze Time: 6 hours +
- Total Time: 6 hours 10 minutes
- Servings: 4
- Dietary Type: Vegetarian, Gluten-Free, Dairy-Free (easily made Vegan)
Ingredients
- 2 cups apple juice
- 1 tablespoon lemon juice
- 4 kiwi, peeled and sliced
- 2 tablespoons sugar (or Splenda)
- 1/2 teaspoon orange rind, grated
Equipment Needed
- Blender
- Shallow freezer-safe container
- Electric mixer (optional, but recommended)
Instructions
-
Begin by preparing your ingredients. Peel and slice the kiwi into manageable pieces for the blender. Grate the orange rind, being careful to only include the colored zest and not the bitter white pith underneath.
-
In a blender, combine the apple juice, lemon juice, and sliced kiwi. Blend until the mixture is completely smooth, ensuring no chunks of kiwi remain. This will create the base for your refreshing ice.
-
Add the sugar (or Splenda) and grated orange rind to the blended kiwi mixture. Pulse the blender a few times to gently combine the ingredients. Avoid over-blending at this stage, as you simply want the sugar to dissolve.
-
Pour the mixture into a shallow freezer-safe container. A shallow container will allow the ice to freeze more evenly and quickly.
-
Place the container in the freezer and freeze for 3 hours. This initial freezing period allows the mixture to begin solidifying.
-
After 3 hours, remove the container from the freezer. The mixture should be partially frozen.
-
Using an electric mixer, beat the partially frozen mixture on medium speed for 2 minutes. This step is crucial for breaking up the ice crystals and creating a smoother, less icy texture. If you don’t have a mixer, you can use a fork to break up the ice, but the mixer yields superior results.
-
Return the mixture to the freezer for another 3 hours (or longer). This second freezing period allows the ice to fully solidify.
-
Before serving, let the Kiwi Ice stand at room temperature for about 10 minutes. This will soften it slightly, making it easier to spoon and enjoy.
-
Spoon the Kiwi Ice into dessert bowls. Garnish with fresh mint sprigs or slices of fresh kiwi or orange for an attractive presentation.
Expert Tips & Tricks
- Achieving the Perfect Texture: The key to truly great Kiwi Ice is preventing large ice crystals from forming. The beating step after the initial freeze is vital. Don’t skip it! It introduces air and breaks down the crystals for a smoother, more pleasant texture.
- Sugar Substitutes: Feel free to experiment with different sweeteners. Splenda works well, but other options like agave nectar or honey can also be used. Be mindful that liquid sweeteners might slightly alter the final texture, making it a little softer. Adjust the quantity to taste.
- Flavor Boost: For an extra layer of flavor, try adding a tiny pinch of sea salt to the mixture before freezing. It enhances the sweetness and brings out the fruit’s natural flavors.
- Make-Ahead Tip: You can easily make this Kiwi Ice a day or two in advance. Just be sure to store it in a tightly sealed container to prevent freezer burn.
- Rescuing Overly Frozen Ice: If your Kiwi Ice freezes too hard, simply let it thaw for a longer period before serving, or pulse it in a food processor to break it up into smaller pieces.
Serving & Storage Suggestions
Serve Kiwi Ice chilled, preferably in chilled bowls or glasses. Garnish with fresh mint leaves, slices of kiwi or orange, or even a sprinkle of toasted coconut for added texture and flavor. For a more decadent treat, consider serving it with a dollop of whipped coconut cream (for a vegan option) or regular whipped cream.
Leftover Kiwi Ice should be stored in an airtight container in the freezer. It will keep well for up to a week, though the texture may slightly deteriorate over time due to ice crystal formation. If it becomes too icy, repeat the beating step with a mixer or fork. It’s best consumed within a few days for optimal flavor and texture. The Kiwi Ice is best eaten immediately after letting it stand for 10 minutes. Do not leave at room temperature for an extended period.
Nutritional Information
| Nutrient | Amount per Serving | % Daily Value |
|---|---|---|
| Calories | 130 kcal | 7% |
| Total Fat | 0.5g | 1% |
| Saturated Fat | 0.1g | 1% |
| Cholesterol | 0mg | 0% |
| Sodium | 6mg | 0% |
| Total Carbohydrate | 32.3g | 12% |
| Dietary Fiber | 2.5g | 9% |
| Sugars | 26.7g | N/A |
| Protein | 1g | 2% |
Note: Percent Daily Values are based on a 2,000 calorie diet. Sugar content is high; this dish is best as an occasional treat.
Variations & Substitutions
- Tropical Twist: Replace the apple juice with pineapple juice or mango nectar for a more tropical flavor profile. Add a pinch of ground ginger or a splash of lime juice to complement the tropical fruits.
- Berry Blast: Incorporate a handful of fresh or frozen berries (such as strawberries, blueberries, or raspberries) into the blender along with the kiwi. This will add extra antioxidants and a beautiful color to the ice.
- Vegan Option: Ensure that your sugar is vegan-friendly (some refined sugars are processed using animal bone char). The recipe is already dairy-free and easily made vegan with this one adjustment.
- Boozy Version: For an adults-only treat, add a tablespoon or two of white rum or vodka to the mixture before freezing. This will lower the freezing point slightly, resulting in a softer, slushier texture. Be careful not to add too much alcohol, as it can prevent the ice from freezing properly.
- Citrus Explosion: Substitute orange rind with lemon or lime rind for a different citrusy aroma. You can also add a small amount of orange zest for extra intensity.
FAQs (Frequently Asked Questions)
Q: Can I use frozen kiwi instead of fresh?
A: Yes, frozen kiwi works just fine! Just make sure to thaw it slightly before blending to avoid damaging your blender.
Q: How do I prevent my Kiwi Ice from becoming too hard?
A: The key is the beating step after the initial freeze. This breaks up ice crystals. Also, avoid over-freezing; consume within a few days for the best texture.
Q: Can I make this recipe without a blender?
A: While a blender is recommended for a smooth texture, you can finely mash the kiwi and mix it well with the other ingredients. The final result will be slightly chunkier.
Q: Is Splenda a suitable substitute for sugar in this recipe?
A: Yes, Splenda works well as a sugar substitute, but you can also use other alternatives like agave nectar or honey. Adjust the amount to your preferred sweetness level.
Q: Can I add other fruits to the Kiwi Ice?
A: Absolutely! Berries, mango, and pineapple are all excellent additions that complement the kiwi flavor. Experiment and find your favorite combination.
Final Thoughts
This Kiwi Ice is more than just a recipe; it’s a taste of sunshine, a burst of freshness, and a delightful reminder of simple pleasures. Whether you’re looking for a light dessert, a refreshing snack, or a taste of Down Under, this recipe is sure to please. Give it a try, and don’t be afraid to experiment with different flavors and variations. I hope it brings as much joy to your kitchen as it did to mine all those years ago. Enjoy!