
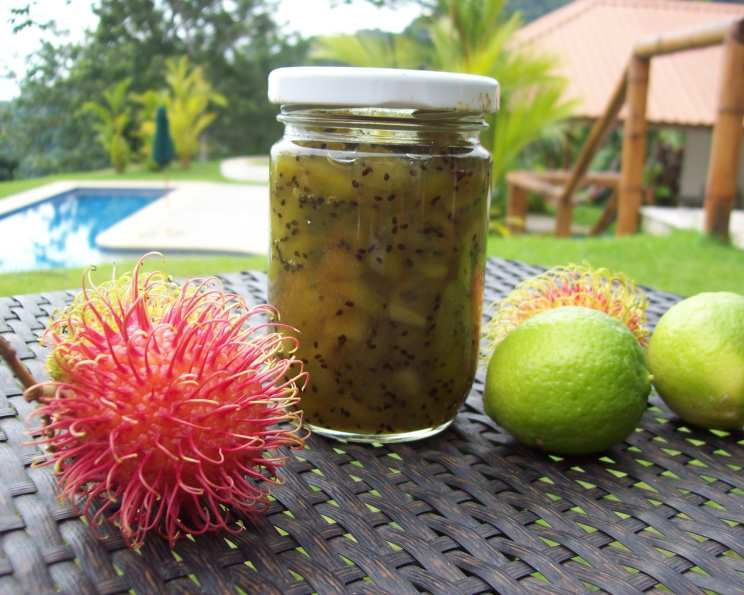
Kiwi & Lime Jam: A Zesty Burst of Sunshine
I’ll never forget the vibrant green hue of my grandmother’s kiwi vine, draped across her sun-drenched porch. As a child, I was mesmerized by the fuzzy, brown fruit, so different from the apples and berries I knew. Picking them always felt like discovering a secret treasure, and the first time I tasted my grandmother’s homemade kiwi jam, its sweet-tart flavor sparkling with lime, it was pure magic. It tasted like sunshine bottled up, a perfect memory of warm afternoons and simple pleasures. I’m so excited to share this recipe with you, and I hope it brings the same joy to your table.
Recipe Overview
- Prep Time: 15 minutes
- Cook Time: 10 minutes
- Total Time: 25 minutes
- Servings: Varies
- Yield: 1 small jar
- Dietary Type: Vegan, Gluten-Free, Dairy-Free
Ingredients
- 5 ripe kiwi fruits, peeled & chopped
- 1/2 cup granulated sugar
- 1/4 lime, juiced
- 1/8 teaspoon lime zest
Equipment Needed
- Medium saucepan
- Sterilized, air-tight jar
Instructions
- Begin by preparing the kiwi fruit. Peel the kiwi fruit, cut into quarters, and then roughly chop it. The goal is to break it down, but not puree it. You want some texture in the final jam.
- Combine the kiwi and sugar in a medium saucepan.
- Heat the kiwi fruit and sugar over low heat. This gentle warming is crucial for gradually dissolving the sugar without scorching the fruit.
- Simmer the mixture gently until the sugar dissolves completely, stirring occasionally. This will likely take around 5-7 minutes. Ensure the sugar granules are no longer visible and the mixture is starting to look syrupy.
- Add the lime juice and lime zest to the saucepan. The lime juice provides a necessary tanginess to balance the sweetness of the kiwi fruit, while the lime zest adds a burst of aromatic citrus flavor.
- Once the sugar has dissolved and the lime is incorporated, increase the heat to medium-high and bring the mixture to a rapid boil. This is where the magic happens and the jam starts to thicken.
- Boil rapidly for approximately 10 minutes, stirring frequently. Be extremely cautious during this stage, as the mixture can easily burn. Keep a close eye on the jam and adjust the heat as necessary to prevent sticking or scorching.
- After 10 minutes, check the consistency of the jam. It should have thickened slightly and be able to coat the back of a spoon. If it seems too thin, continue to boil for another minute or two, checking the consistency frequently. Remember, it will thicken further as it cools.
- Carefully spoon the hot jam into a sterilized, air-tight jar. Leave a little headroom at the top of the jar.
- Allow the jar to cool completely at room temperature before refrigerating.
Expert Tips & Tricks
- Using just-ripe kiwi fruit is essential for optimal pectin levels. Pectin is a natural setting agent, and using ripe fruit will help the jam thicken properly. If your kiwi fruit is overripe, you may need to add a commercial pectin to achieve the desired consistency.
- Sterilizing the jar is vital for preserving the jam and preventing spoilage. You can sterilize jars by boiling them in water for 10 minutes or baking them in a low oven.
- Don’t overcook the jam! Overcooked jam can become too thick and sticky. It’s better to err on the side of slightly undercooked, as it will continue to thicken as it cools.
- If you prefer a smoother jam, you can use an immersion blender to puree the kiwi fruit before cooking. However, I personally prefer the texture of the chopped kiwi fruit.
- A small pat of butter added towards the end of cooking can help reduce foam formation and create a smoother jam.
Serving & Storage Suggestions
This Kiwi & Lime Jam is incredibly versatile. Of course, it’s divine spread on hot buttered toast, scones, or English muffins. It also pairs beautifully with creamy cheeses like brie or goat cheese, and can be used as a glaze for grilled meats or poultry.
Once opened, the jam should be stored in the refrigerator. Properly stored, it will keep for up to a month. Since this recipe does not use commercial pectin or high amounts of sugar, it is best consumed within this timeframe to ensure optimal flavor and quality. While freezing is not recommended (as it can affect the texture), the jam can be kept in the refrigerator for up to two months.
Nutritional Information
| Nutrient | Amount per Serving | % Daily Value |
|---|---|---|
| Calories | 602.5 kcal | N/A |
| Calories from Fat | N/A | N/A |
| Total Fat | 1.8 g | 2% |
| Saturated Fat | 0.1 g | 0% |
| Cholesterol | 0 mg | 0% |
| Sodium | 11.7 mg | 0% |
| Total Carbohydrate | 152.3 g | 50% |
| Dietary Fiber | 10.8 g | 43% |
| Sugars | 131.1 g | N/A |
| Protein | 4 g | 8% |
Note: Nutritional information is an estimate and may vary depending on specific ingredients and portion sizes.
Variations & Substitutions
- For a spicy kick, add a pinch of red pepper flakes to the jam while it’s simmering.
- Experiment with other citrus fruits. Lemon or orange juice and zest can be used instead of lime.
- Add a splash of rum or brandy for an extra layer of flavor. Add after you’ve taken the pan off the heat.
- If you’re looking to reduce the sugar content, you can use a sugar substitute such as Stevia or Erythritol, but be aware that this may affect the setting properties of the jam. You may need to add some pectin to help the jam thicken.
- You can also use other fruit, such as apples, pears, or strawberries, in combination with the kiwi.
FAQs (Frequently Asked Questions)
Q: Why isn’t my jam setting?
A: Several factors can affect the setting of the jam, including using underripe fruit (which has less pectin), not boiling the jam long enough, or adding too much liquid. If your jam isn’t setting, you can try adding a commercial pectin or boiling it for a few more minutes.
Q: How do I know when the jam is ready?
A: The best way to test the doneness of the jam is to place a small spoonful on a chilled plate. If it sets up quickly and forms a skin, it’s ready. Remember that the jam will continue to thicken as it cools.
Q: How do I sterilize the jar?
A: You can sterilize jars by boiling them in water for 10 minutes or baking them in a low oven (around 250°F) for 20 minutes. Make sure the jars are completely dry before filling them with jam.
Q: Can I use frozen kiwi fruit?
A: While you can use frozen kiwi fruit, it may release more water during cooking and affect the consistency of the jam. If using frozen kiwi fruit, be sure to thaw it completely and drain off any excess liquid before adding it to the saucepan.
Q: How long will the jam last?
A: Properly stored in a sterilized jar in the refrigerator, the jam will last for up to a month.
Final Thoughts
I truly hope this Kiwi & Lime Jam recipe inspires you to create your own jar of sunshine. Its vibrant flavor and delightful simplicity make it a perfect addition to any breakfast table or cheese board. Don’t hesitate to experiment with variations, adding your own personal touch to this classic recipe. I would love to hear your feedback and see your creations! Perhaps you’ll even discover a new favorite way to enjoy this zesty and delicious spread. Happy jamming!