
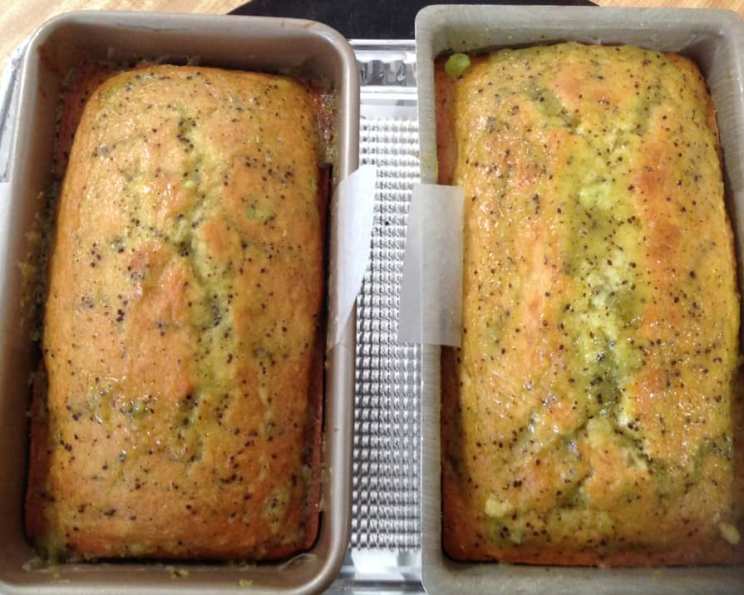
Kiwi Quick Bread: A Zesty Slice of Sunshine
There’s something magical about the aroma of freshly baked bread filling a kitchen. I vividly remember my culinary school days when a dear friend, homesick and missing the taste of her mother’s baking, brought in a vibrant green loaf. The unique, tangy-sweet scent stopped everyone in their tracks. It was Kiwi Quick Bread, and that first bite was an awakening – a delightful combination of familiar comfort and exotic flair that I’ve cherished ever since. The vibrant flecks of kiwi dotted throughout the crumb hinted at the sunny flavor within. This bread is a simple pleasure, perfect for a cozy afternoon tea or a bright start to any day.
Recipe Overview
- Prep Time: 15 minutes
- Cook Time: 55-65 minutes
- Total Time: 1 hour 10 minutes
- Servings: 10
- Yield: 1 loaf
- Dietary Type: Vegetarian
Ingredients
- 2 cups all-purpose flour
- 1 teaspoon baking powder
- 1/4 teaspoon baking soda
- 1/2 teaspoon salt
- 1/2 cup butter (softened) or 1/2 cup margarine (softened)
- 2/3 cup sugar
- 2 eggs
- 1 cup peeled mashed kiwi fruit (ripe)
Equipment Needed
- 9 x 5 x 3 inch loaf pan
- Mixing bowls
- Measuring cups and spoons
- Sifter or fine-mesh sieve
- Electric mixer or whisk
- Spatula
- Wire rack
Instructions
-
Preheat your oven to 350 degrees Fahrenheit (175 degrees Celsius). Ensure your oven rack is positioned in the center for even baking. Grease and flour a 9 x 5 x 3 inch loaf pan thoroughly. This prevents the bread from sticking and ensures easy removal after baking.
-
In a medium-sized bowl, sift together the 2 cups of all-purpose flour, 1 teaspoon of baking powder, 1/4 teaspoon of baking soda, and 1/2 teaspoon of salt. Sifting incorporates air and helps distribute the leavening agents evenly throughout the dry ingredients. This will create a lighter, more tender crumb. Set the dry ingredients aside for later use.
-
In a large mixing bowl, cream together 1/2 cup of softened butter (or softened margarine) and 2/3 cup of sugar until the mixture is light and fluffy. This step is crucial for incorporating air and creating a tender crumb. Use an electric mixer on medium speed or a sturdy whisk and some elbow grease. The mixture should be pale yellow and significantly lighter in texture.
-
Add the 2 eggs one at a time to the creamed butter and sugar mixture, beating well after each addition. This ensures that each egg is fully incorporated, contributing to the bread’s structure and richness. Avoid overmixing at this stage, as it can develop gluten and result in a tougher bread.
-
Stir in 1 cup of peeled mashed kiwi fruit. Use ripe kiwis for the best flavor and sweetness. Simply peel the kiwis and mash them with a fork or potato masher until they reach a smooth, pulp-like consistency. Gently incorporate the mashed kiwi into the wet ingredients until just combined. Be careful not to overmix, as this can toughen the bread.
-
Fold in the dry ingredients into the wet ingredients gently, stirring only until the batter is completely moistened. It’s important to avoid overmixing at this stage, as it can develop the gluten in the flour and result in a tough, dense bread. Use a spatula and gently fold the dry ingredients into the wet ingredients until just combined. A few streaks of flour are okay; they will disappear during baking.
-
Spoon the batter into the prepared loaf pan, spreading it evenly. Gently tap the pan on the counter a few times to release any trapped air bubbles.
-
Bake in the preheated oven for 55-65 minutes, or until a toothpick inserted into the center comes out clean. Start checking for doneness around the 55-minute mark. If the top of the bread is browning too quickly, you can tent it loosely with aluminum foil to prevent burning.
-
Cool the bread in the pan for 10 minutes on a wire rack. This allows the bread to set slightly and prevents it from sticking to the pan.
-
Remove the bread from the pan and continue cooling on the wire rack until completely cool before slicing and serving. Cooling the bread completely prevents it from becoming gummy when sliced.
Expert Tips & Tricks
- For a more intense kiwi flavor, try adding a tablespoon of kiwi liqueur to the batter.
- If you find your kiwi bread is browning too quickly, tent the top with foil during the last 20 minutes of baking.
- Make sure your butter is truly softened. If it’s too cold, it won’t cream properly with the sugar, resulting in a dense bread. If it’s melted, the bread may be greasy.
- Use a serrated knife to slice the bread cleanly.
- For a decorative touch, arrange thin slices of kiwi on top of the batter before baking.
Serving & Storage Suggestions
Serve this Kiwi Quick Bread sliced, plain, or with a dollop of whipped cream or a smear of cream cheese. It’s also delicious toasted with butter or jam. Store leftover bread in an airtight container at room temperature for up to 3 days. For longer storage, wrap the bread tightly in plastic wrap and freeze for up to 2 months. To reheat, thaw the bread overnight in the refrigerator and then warm it in a low oven or toaster.
Nutritional Information
| Nutrient | Amount per Serving | % Daily Value |
|---|---|---|
| Calories | 249.5 kcal | N/A |
| Calories from Fat | 94 | 38% |
| Total Fat | 10.5 g | 16% |
| Saturated Fat | 6.2 g | 30% |
| Cholesterol | 61.6 mg | 20% |
| Sodium | 280.5 mg | 11% |
| Total Carbohydrate | 35.2 g | 11% |
| Dietary Fiber | 1.2 g | 4% |
| Sugars | 15 g | N/A |
| Protein | 4.1 g | 8% |
Note: Nutritional information is an estimate and may vary based on specific ingredients and preparation methods.
Variations & Substitutions
- Gluten-Free: Substitute a gluten-free all-purpose flour blend for the regular flour. You may also need to add a binder like xanthan gum to improve the texture.
- Dairy-Free: Replace the butter with a dairy-free butter alternative or coconut oil.
- Vegan: In addition to substituting the butter, use a flax egg (1 tablespoon ground flaxseed mixed with 3 tablespoons water, let sit for 5 minutes) for each egg.
- Citrus Zest: Add the zest of one lemon or lime for a brighter flavor.
- Nuts: Incorporate 1/2 cup of chopped walnuts, pecans, or macadamia nuts into the batter.
- Spices: Add 1/2 teaspoon of ground cinnamon, nutmeg, or cardamom for a warm, spiced flavor.
FAQs (Frequently Asked Questions)
Q: Can I use frozen kiwi for this recipe?
A: Yes, you can use frozen kiwi, but make sure to thaw it completely and drain any excess liquid before mashing.
Q: How do I know when the bread is done baking?
A: Insert a toothpick into the center of the bread. If it comes out clean or with just a few moist crumbs, the bread is done.
Q: Can I make this bread ahead of time?
A: Yes, you can bake the bread a day ahead of time. Let it cool completely, then wrap it tightly in plastic wrap and store it at room temperature.
Q: What if I don’t have a 9 x 5 inch loaf pan?
A: You can use a different size loaf pan, but you may need to adjust the baking time accordingly. Keep an eye on the bread and check for doneness frequently.
Q: My bread is sinking in the middle. What did I do wrong?
A: This could be due to a few reasons, such as overmixing the batter, using old baking powder or baking soda, or not baking the bread long enough. Make sure your leavening agents are fresh and avoid overmixing.
Final Thoughts
Kiwi Quick Bread is more than just a recipe; it’s an invitation to bring a touch of the exotic into your everyday life. The vibrant flavor and moist crumb are sure to delight, whether you’re sharing it with friends and family or savoring a quiet moment alone. Don’t be afraid to experiment with variations and substitutions to make this recipe your own. I encourage you to try this recipe and experience the simple joy of homemade baking. Share your creations and any feedback you have – I’d love to hear about your Kiwi Quick Bread adventures! Perhaps pair it with a cup of green tea or a refreshing kiwi smoothie for the ultimate kiwi experience. Happy baking!