
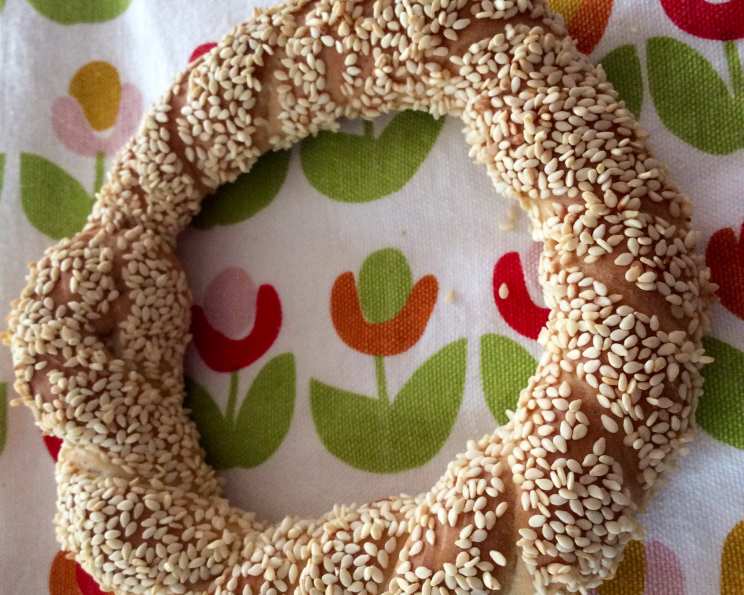
Koulóuria: Mastering the Art of Greek Sesame Bread Rings
The scent of freshly baked bread is a universal language, a comforting aroma that speaks of home and warmth. But there’s something particularly enchanting about the fragrance of koulóuria baking in the oven. I remember visiting my Yiayia (grandmother) in Athens as a child. The moment I stepped into her small apartment, the air would be thick with the nutty aroma of toasted sesame seeds and warm yeast. She’d always have a batch ready, their golden surfaces glistening, a perfect accompaniment to a strong cup of Greek coffee and hours of stories and laughter. Those koulóuria were more than just bread; they were a symbol of her love, her heritage, and the simple joys of life.
Recipe Overview
- Prep Time: 40 minutes
- Cook Time: 30 minutes
- Total Time: 1 hour 10 minutes (plus rising time)
- Servings: 8 bread rings
- Yield: 8 koulóuria
- Dietary Type: Vegetarian
Ingredients
- 4 cups all-purpose flour (or more, as needed)
- 10 ounces lukewarm water
- 1 teaspoon salt
- 3 tablespoons oil (olive oil preferred)
- 1 (1/4 ounce) envelope dry yeast
- ¾ – 1 cup sesame seeds
Equipment Needed
- Large mixing bowl
- Clean kitchen towel
- Baking tray
- Baking paper (optional)
- Wide ovenproof dish
- Plate
- Large bowl
Instructions
- In a large mixing bowl, combine the flour, lukewarm water, salt, oil, and dry yeast. Mix well to form a dough.
- Knead the dough by hand for approximately 10 minutes. If the dough is too sticky, gradually add more flour until it becomes soft but not sticky. Be careful not to add too much flour, or the koulóuria will be dry.
- Cover the bowl with a clean kitchen towel and let the dough rise in a warm place for about 30-50 minutes, or until it has doubled in size. The rising time will depend on the temperature of your kitchen.
- Meanwhile, preheat your oven to 440°F (225°C).
- Grease a baking tray or cover it with baking paper to prevent the koulóuria from sticking.
- Place a wide ovenproof dish filled with hot water on the bottom rack of the oven. The steam will help create a crispier crust and a softer interior.
- Once the dough has risen, knead it a second time to release any excess air.
- Divide the dough into 8 equal portions.
- On a lightly floured surface, roll each portion into a 13-14 inch long roll, about ¾ – 1 inch thick.
- Shape each roll into a ring by bringing the ends together and pressing them firmly to seal.
- Pour some warm water into a large bowl. Spread the sesame seeds onto a plate.
- Carefully dip each ring into the warm water to moisten it.
- Immediately transfer the dampened ring to the plate of sesame seeds and coat both sides thoroughly, pressing gently to ensure the seeds adhere.
- Place the coated rings onto the prepared baking tray, leaving some space between them.
- Let the rings rise for another 10 minutes on the baking tray. This second rise will help them become even lighter and airier.
- Bake in the preheated oven for approximately 25-35 minutes, or until the koulóuria are golden brown. Rotate the baking tray halfway through to ensure even browning.
- The koulóuria are done when they are a deep golden brown color. Remove them from the oven and let them cool completely on a wire rack before serving. This prevents them from becoming soggy.
Expert Tips & Tricks
- The Water Bath: Don’t skip the water bath in the oven! The steam it creates is crucial for achieving that signature koulóuria crust – slightly chewy on the outside, soft on the inside.
- Sesame Seed Adhesion: For maximum sesame seed coverage, lightly toast the sesame seeds in a dry pan before coating the bread rings. This enhances their flavor and helps them stick better.
- Dough Consistency: The dough should be soft and slightly tacky, but not overly sticky. Adjust the amount of flour as needed to achieve the right consistency. Remember, it’s easier to add flour than to take it away.
- Proofing: The rising time can vary depending on the temperature of your kitchen. A warm, draft-free environment is ideal for proofing the dough.
- Kneading is Key: Don’t skimp on the kneading! This develops the gluten in the flour, which gives the koulóuria their characteristic chewy texture.
Serving & Storage Suggestions
Koulóuria are best enjoyed fresh, preferably on the same day they are baked. They are delicious on their own as a quick breakfast or snack, or they can be served alongside a cup of Greek coffee or tea. They also pair well with savory dips like tzatziki or hummus.
To store leftovers, place the koulóuria in an airtight container at room temperature. They will stay fresh for up to 2-3 days. For longer storage, freeze them in a freezer-safe bag or container. Thaw them completely before reheating in a warm oven for a few minutes to restore their crispness.
Nutritional Information
| Nutrient | Amount per Serving | % Daily Value |
|---|---|---|
| Calories | 352.6 kcal | N/A |
| Calories from Fat | 112 g | 32% |
| Total Fat | 12.5 g | 19% |
| Saturated Fat | 1.8 g | 9% |
| Cholesterol | 0 mg | 0% |
| Sodium | 294.6 mg | 12% |
| Total Carbohydrate | 51.2 g | 17% |
| Dietary Fiber | 3.5 g | 13% |
| Sugars | 0.2 g | 0% |
| Protein | 9.2 g | 18% |
Note: Nutritional information is an estimate and may vary based on specific ingredients and preparation methods.
Variations & Substitutions
- Whole Wheat Koulóuria: Substitute half of the all-purpose flour with whole wheat flour for a more nutritious and rustic flavor.
- Gluten-Free Koulóuria: Use a gluten-free flour blend specifically designed for bread making. You may need to add a binder like xanthan gum to help with the texture.
- Spiced Koulóuria: Add a teaspoon of ground cinnamon or mahlab (a spice made from ground cherry pits) to the dough for a warm and aromatic twist.
- Savory Koulóuria: Incorporate ingredients like chopped olives, sun-dried tomatoes, or feta cheese into the dough for a savory version.
FAQs (Frequently Asked Questions)
Q: Why is the water bath important in this recipe?
A: The steam created by the water bath keeps the surface of the dough moist during the initial baking stages. This allows the koulóuria to expand fully and develop a crisp, slightly chewy crust.
Q: Can I use active dry yeast instead of instant dry yeast?
A: Yes, but you’ll need to proof the active dry yeast in warm water with a pinch of sugar for about 5-10 minutes before adding it to the other ingredients.
Q: My dough isn’t rising. What am I doing wrong?
A: Make sure your yeast is fresh and active. Also, ensure the dough is in a warm place, free from drafts. A slightly warm oven (turned off) can provide an ideal environment.
Q: How do I prevent the sesame seeds from falling off during baking?
A: Press the sesame seeds firmly onto the moistened bread rings. Lightly toasting the sesame seeds beforehand can also help them adhere better.
Q: Can I freeze the koulóuria dough before baking?
A: Yes, you can freeze the dough after the first rise. Thaw it completely in the refrigerator before shaping and baking as directed.
Final Thoughts
There’s a certain magic in taking simple ingredients and transforming them into something truly special. Koulóuria are a testament to that magic, a delicious embodiment of Greek culinary tradition. I encourage you to try this recipe and experience the joy of baking these delightful sesame bread rings. Whether you enjoy them with a cup of coffee, share them with loved ones, or simply savor them on your own, I hope they bring a little bit of that Greek sunshine into your day. And please, share your baking triumphs (and even your occasional mishaps!) – I’d love to hear about your Koulóuria adventures!