
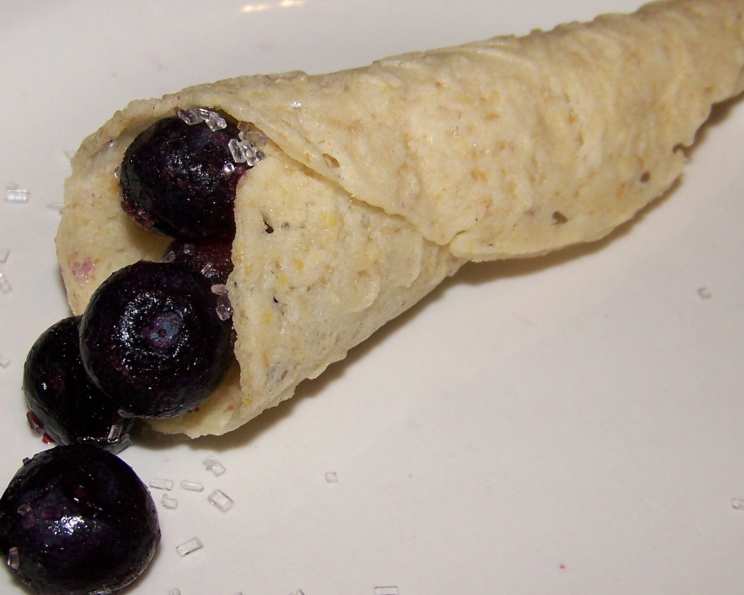
Vegan Krumkaker: A Taste of Norwegian Holiday Magic
The scent of warm cardamom and vanilla always transports me back to my grandmother’s kitchen during the holidays. Growing up, the highlight of our Christmas Eve celebrations was always the spread of traditional Norwegian cookies, and none were as captivating as the delicate, cone-shaped krumkaker. I remember being mesmerized as she skillfully rolled the still-warm cookies around a wooden dowel, creating perfect little horns. Now, I’ve recreated that magic with this vegan version, so everyone can enjoy this special treat!
Recipe Overview
- Prep Time: 30 minutes
- Cook Time: 1 hour 15 minutes
- Total Time: 1 hour 45 minutes
- Yields: 36 krumkaker
- Serves: 36
- Dietary Type: Vegan
Ingredients
- 3 tablespoons flax seeds
- 1/2 cup water
- 1 tablespoon water
- 1 cup sugar
- 1/2 cup Crisco shortening, melted
- 1/2 cup soymilk (vanilla flavored works well)
- 1 teaspoon vanilla extract
- 2 cups flour
- Canola oil cooking spray
- Optional: 1/2 teaspoon cardamom or cinnamon, or any other spice you like.
Equipment Needed
- Blender
- Mixing bowl
- Wooden spoon
- Krumkake iron (or pizzelle iron)
- Wooden krumkake pin or wooden spoon handle
- Cookie racks
Instructions
-
Begin by preparing the flax egg. In a blender, grind the flax seeds into a fine meal. This helps ensure a smooth batter and binds the ingredients together.
-
Add the 1/2 cup water and the additional 1 tablespoon water to the flax meal in the blender. Blend until well incorporated, creating a slurry with a slightly thickened consistency. Pour this mixture into a mixing bowl.
-
To the bowl containing the flax mixture, add the sugar, melted Crisco shortening, soymilk (vanilla flavored is a great option!), and vanilla extract. Mix all the ingredients together thoroughly using a wooden spoon. Ensure the sugar is well dissolved and the mixture is homogenous.
-
Gradually add the flour. Begin by adding 1 1/2 cups flour to the wet ingredients and stir until just incorporated. Now, assess the consistency of the dough. You may need to add additional flour, up to the remaining 1/2 cup, to achieve the desired texture. The goal is to create a dough that is thicker than a batter but not a stiff dough. Remember, using less flour will result in a lighter, crisper cookie, while more flour will yield a thicker cookie.
-
Allow the dough to rest while you preheat your krumkake iron. This resting period allows the flour to fully hydrate, resulting in a more tender cookie.
-
Before placing the dough on the iron for each cookie, spray the krumkake iron generously with canola oil cooking spray. This is crucial to prevent the delicate cookies from sticking and tearing. Reapply the spray as needed.
-
Once the krumkake iron is sufficiently hot, spoon approximately one tablespoon of batter onto the center of the iron to make each five-inch cookie. Be careful not to overfill, as the batter will spread as the iron closes.
-
Close the krumkake iron and cook the cookie until it is lightly golden brown and the steam escaping from the sides of the iron has significantly reduced or stopped altogether. The cooking time will vary depending on your specific iron, but it usually takes about 30-60 seconds per side.
-
Once the cookie is cooked, carefully remove it from the iron. The traditional method involves quickly rolling the hot cookie over a wooden krumkake pin to create a cone shape. If you don’t have a krumkake pin, a wooden spoon handle or a non-metal spatula can also be used to gently lift and shape the cookie into a flat circle if you don’t want to roll it.
-
Place the shaped krumkaker on cookie racks to cool completely before stacking. This allows them to crisp up fully and prevent them from becoming soggy.
-
Repeat the process with the remaining dough, spraying the iron with oil before each cookie.
-
Cooking time is approximate and depends on how quickly or slowly you can shape the krumkaker. Don’t be discouraged if your first few attempts aren’t perfect – practice makes perfect!
Expert Tips & Tricks
- Spice it up: Add 1/2 teaspoon of ground cardamom or cinnamon (or any other spice you enjoy) to the batter before adding the flour for a more complex flavor profile.
- Temperature control: Pay close attention to the temperature of your krumkake iron. If it’s too hot, the cookies will burn quickly. If it’s not hot enough, they will be pale and won’t crisp up properly.
- Shaping finesse: If you are having trouble shaping the cookies, try using thin cotton gloves to protect your hands from the heat. Work quickly, as the cookies become brittle as they cool.
- Crispy cookies: For extra crispy krumkaker, try baking them in a low oven (around 250°F / 120°C) for a few minutes after they have cooled. Watch them closely to prevent burning.
Serving & Storage Suggestions
Krumkaker are traditionally served plain, dusted with powdered sugar, or filled with whipped cream or fruit. For a vegan version, try filling them with a vegan frosting, a non-dairy whipped topping, or fresh berries. They are also delicious on their own, with a cup of coffee or tea.
Store the cooled krumkaker in an airtight tin to maintain their crispness. They will keep well at room temperature for up to a week. You can also freeze them for longer storage; simply thaw them at room temperature before serving.
Nutritional Information
| Nutrient | Amount per Serving | % Daily Value |
|---|---|---|
| Calories | 78.6 kcal | N/A |
| Calories from Fat | 30 g | 38% |
| Total Fat | 3.3 g | 5% |
| Saturated Fat | 0.8 g | 3% |
| Cholesterol | 0 mg | 0% |
| Sodium | 2.4 mg | 0% |
| Total Carbohydrate | 11.3 g | 3% |
| Dietary Fiber | 0.5 g | 1% |
| Sugars | 5.6 g | N/A |
| Protein | 1 g | 2% |
Note: Nutritional information is an estimate and may vary based on specific ingredients and preparation methods.
Variations & Substitutions
- Gluten-free: Substitute the all-purpose flour with a gluten-free blend suitable for baking.
- Different milk: Try using almond milk, oat milk, or coconut milk instead of soy milk. Be mindful of the flavor profile, as some milk alternatives have a stronger taste.
- Spice variations: Experiment with different spices such as nutmeg, ginger, or anise to create unique flavor combinations.
- Extracts: Use almond extract, lemon extract, or other flavored extracts in place of the vanilla extract.
FAQs (Frequently Asked Questions)
Q: Can I use a pizzelle iron instead of a krumkake iron?
A: Yes, this recipe is suitable for a pizzelle iron. The resulting cookies will be flat rather than cone-shaped, but the taste will be the same.
Q: How do I prevent the cookies from sticking to the iron?
A: Make sure to spray the krumkake iron generously with canola oil cooking spray before placing each cookie. Reapply as needed. A well-seasoned iron also helps prevent sticking.
Q: My krumkaker are not crispy. What am I doing wrong?
A: Ensure that your krumkake iron is hot enough. Also, avoid adding too much flour to the batter. Using less flour will result in a lighter, crisper cookie. Allow the cookies to cool completely on a wire rack to crisp up.
Q: Can I make the dough ahead of time?
A: Yes, you can make the dough ahead of time and store it in the refrigerator for up to 24 hours. Let it come to room temperature for about 30 minutes before using.
Q: What can I use to fill the krumkaker?
A: You can fill krumkaker with various options, such as vegan whipped cream, vegan frosting, fruit compote, jam, or even savory fillings like a vegan pâté.
Final Thoughts
Now it’s your turn to bring a little Norwegian holiday magic into your kitchen! Don’t be afraid to experiment with different flavors and fillings to create your own unique version of this classic cookie. Share your creations with family and friends, and let the warmth of these vegan krumkaker fill your home with joy. Happy baking!