
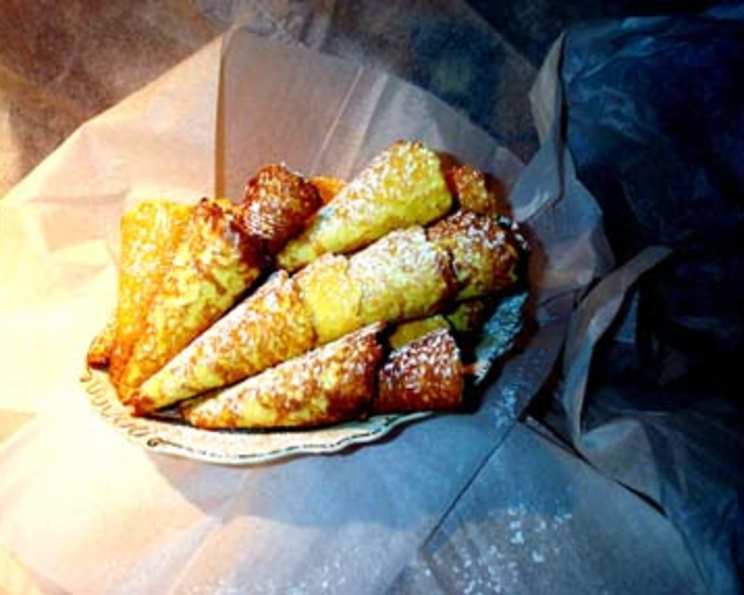
Krumkake: A Taste of Norwegian Christmas
The scent of warm butter, sugar, and a hint of cardamom instantly transports me back to my childhood Christmases. My great-aunt Ingrid, with her twinkling eyes and flour-dusted apron, would always be at the helm, expertly wielding her krumkake iron. The delicate, cone-shaped cookies, imprinted with intricate designs, were a symbol of the season, a treat we eagerly anticipated all year long. The first bite, the crispness giving way to a melt-in-your-mouth sweetness, was pure magic.
Recipe Overview
- Prep Time: 20 minutes
- Cook Time: 45 minutes
- Total Time: 1 hour 5 minutes
- Servings: 50
- Yield: Approximately 50 krumkaker
- Dietary Type: Not specified (Contains dairy and eggs)
Ingredients
- 3 eggs
- 1 cup white sugar
- 1 teaspoon real vanilla extract
- ½ cup real melted butter
- ½ cup heavy whipping cream
- 1 ½ cups white flour
- Optional: 1 teaspoon lemon extract or 1 teaspoon almond extract (for vanilla, if you prefer)
- Optional: 1 teaspoon crushed cardamom
Equipment Needed
- Krumkake iron (preheated to medium heat)
- Spoon
- Rolling tool (cone-shaped), or a clean clothespin
- Mixing bowl
- Measuring cups and spoons
Instructions
- In a mixing bowl, thoroughly mix together the eggs, white sugar, vanilla extract, melted butter, and heavy whipping cream.
- Gradually add the white flour to the wet ingredients, mixing until just combined. Be careful not to overmix. The batter should be smooth. If you are using either lemon extract, almond extract, or crushed cardamom, add them to the batter at this point and gently fold in.
- Preheat your krumkake iron to medium heat. It’s essential that the iron is properly heated before you begin. The temperature is correct when a drop of water sizzles and evaporates almost instantly.
- Carefully spoon approximately 1 tablespoon of batter onto the center of the ungreased, preheated krumkake iron.
- Close the iron and cook for about 1 minute.
- Flip the iron and cook for another 30 seconds, or until the krumkake is lightly golden brown. The cooking time may vary slightly depending on your krumkake iron, so keep a close eye on them.
- Working quickly, remove the krumkake from the iron.
- Immediately roll the warm krumkake into a cone shape using a rolling tool. If you don’t have a rolling tool, a clean clothespin can also work.
- Repeat steps 4-8 with the remaining batter. As the krumkaker cool, they will crisp up.
- Once cooled, sprinkle with powdered sugar or fill with whipped cream if desired. Ready Whip provides an easy alternative for whipped cream.
- Enjoy your delicious homemade krumkake.
Expert Tips & Tricks
- Don’t overmix the batter: Overmixing can lead to tough krumkaker. Mix until just combined.
- Keep the iron clean: Wipe the krumkake iron clean between each cookie to prevent sticking and ensure a beautiful design.
- Work quickly: Krumkaker need to be rolled while they are still warm and pliable. If they cool too much, they will become brittle and break.
- Adjust the heat: If your krumkaker are browning too quickly, reduce the heat slightly. If they are not browning enough, increase the heat.
- Practice makes perfect: The first few krumkaker might not be perfect, but don’t give up! With a little practice, you’ll be churning out beautiful cones in no time.
- Melting the Butter: Make sure your butter is melted and slightly cooled before adding it to the other ingredients. Hot butter can cook the eggs and affect the batter’s consistency.
- Even Cooking: For more even cooking, try to distribute the batter evenly on the krumkake iron. This will ensure that the entire cookie is cooked uniformly.
- Prevent Sticking: Ensure your krumkake iron is properly heated. A well-heated iron helps prevent the cookies from sticking.
Serving & Storage Suggestions
Krumkaker are best served fresh and slightly warm, either plain or dusted with powdered sugar. They are also delicious filled with whipped cream, lingonberry jam, or other fruit preserves.
To store leftover krumkaker, place them in an airtight container at room temperature. They will stay crisp for up to 3 days. For longer storage, freeze them in a single layer on a baking sheet, then transfer them to a freezer-safe bag or container. Frozen krumkaker can be stored for up to 2 months. To reheat, let them thaw at room temperature for a few minutes.
Nutritional Information
| Nutrient | Amount per Serving | % Daily Value |
|---|---|---|
| Calories | 58.5 kcal | N/A |
| Calories from Fat | 27 g | 47% |
| Total Fat | 3.1 g | 4% |
| Saturated Fat | 1.8 g | 9% |
| Cholesterol | 20.8 mg | 6% |
| Sodium | 18.3 mg | 0% |
| Total Carbohydrate | 7 g | 2% |
| Dietary Fiber | 0.1 g | 0% |
| Sugars | 4 g | 16% |
| Protein | 0.8 g | 1% |
Note: Nutritional information is an estimate and may vary based on specific ingredients and serving sizes.
Variations & Substitutions
- Gluten-Free Krumkake: Substitute the white flour with a gluten-free all-purpose flour blend.
- Dairy-Free Krumkake: Use a dairy-free butter substitute and coconut cream instead of heavy whipping cream.
- Spice Variations: Experiment with different spices, such as nutmeg, ginger, or cloves, in addition to or instead of cardamom.
- Citrus Zest: Add a teaspoon of lemon or orange zest to the batter for a bright, citrusy flavor.
- Chocolate Krumkake: Add 2 tablespoons of unsweetened cocoa powder to the batter for a chocolatey twist.
FAQs (Frequently Asked Questions)
Q: My krumkaker are sticking to the iron. What am I doing wrong?
A: Ensure your krumkake iron is properly preheated and ungreased. Also, make sure the batter is not too thin, as this can also cause sticking.
Q: My krumkaker are browning too quickly. How can I fix this?
A: Reduce the heat on your krumkake iron slightly. You may also need to shorten the cooking time.
Q: Can I make the batter ahead of time?
A: Yes, you can make the batter ahead of time and store it in the refrigerator for up to 24 hours. However, the batter may thicken slightly, so you may need to add a tablespoon or two of milk or cream to thin it out before using.
Q: My krumkaker are not crispy. What can I do?
A: Make sure you are cooking them long enough to achieve a golden-brown color. Also, allow them to cool completely on a wire rack, as they will crisp up as they cool.
Q: How do I prevent the krumkaker from breaking when I roll them?
A: Roll the krumkaker immediately after removing them from the iron, while they are still warm and pliable. If they cool too much, they will become brittle and break. If this happens, you can try warming them slightly in the oven or microwave to make them more pliable again.
Final Thoughts
Krumkake is more than just a cookie; it’s a tradition, a memory, and a taste of home. Whether you’re a seasoned baker or a novice in the kitchen, I encourage you to try this recipe and experience the joy of making these delicate Norwegian treats. Share them with your loved ones, savor the sweet, buttery flavor, and let the warmth of the season fill your heart. I’d love to hear about your krumkake adventures – feel free to share your experiences and variations in the comments below! Skål!