
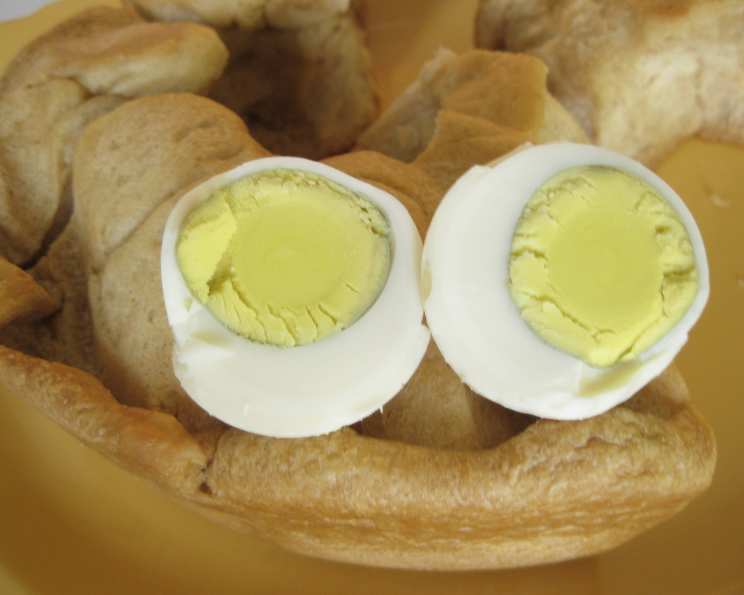
Kubaneh: A Taste of Shabbat Morning Memories
The aroma of Kubaneh instantly transports me back to my grandmother’s kitchen. Every Shabbat morning, the scent of this slow-baked, pull-apart bread would fill her home, a warm and inviting hug that promised comfort and connection. The golden crust, brushed with butter, crackled invitingly, while the soft, pillowy interior practically melted in your mouth. It wasn’t just bread; it was a symbol of family, tradition, and the simple joy of sharing a meal together. Making it now, decades later, is my way of keeping her memory alive, and sharing a little piece of that warmth with my own family.
Recipe Overview
- Prep Time: 30 minutes (plus proving time)
- Cook Time: Approximately 15 hours
- Total Time: Approximately 15 hours 30 minutes
- Servings: 8
- Yield: 1 large bread
- Dietary Type: Not specified
Ingredients
- 7 g active dry yeast
- 1/3 cup water, lukewarm
- 3 tablespoons sugar
- 3 tablespoons honey
- 1 1/2 teaspoons salt
- 180 g butter, cut into pieces
- 3/4 cup water, very hot
- 3 cups all-purpose flour
- 8 eggs, in their shells (optional)
Equipment Needed
- Mixing bowl
- Wooden spoon
- Clean, oiled bowl
- Damp cloth
- Lightly floured work surface
- Oiled rolling pin
- Deep 2-liter (8 x 8 x 2 inch) baking dish
- Greased paper or foil
- Tight-fitting lid for baking dish
- Plates for inverting bread
Instructions
-
Begin by activating the yeast. In a small bowl, sprinkle the active dry yeast over the lukewarm water. Add 1 teaspoon of the sugar to feed the yeast. Leave this mixture undisturbed for about 10 minutes, or until the yeast has become foamy, indicating that it’s active and ready to use.
-
In a large mixing bowl, combine the remaining sugar, honey, salt, half of the butter (90g), and the very hot water. Stir the mixture until the sugar and butter are completely dissolved, creating a smooth and slightly warm base for the dough.
-
Stir in the foamy yeast mixture into the butter and sugar solution. Add the flour to the bowl and mix with a wooden spoon until the dough becomes difficult to stir. This indicates that the flour is starting to hydrate and form gluten.
-
Knead the dough vigorously on a lightly floured work surface. If the dough is too sticky, add flour by tablespoons until it becomes smooth but still soft. Continue kneading for about 10 minutes until the dough is elastic and supple. Don’t be afraid to get your hands dirty! The kneading process is crucial for developing the gluten, which gives Kubaneh its characteristic pull-apart texture.
-
Place the dough in a clean, oiled bowl, turning it to coat all sides with oil. Cover the bowl with a damp cloth to prevent the dough from drying out. Let the dough rise in a warm place for approximately 1 hour, or until it has nearly doubled in volume. This first rise is important for developing the flavor and airy texture of the bread.
-
Punch down the dough to release the accumulated gases. Knead it briefly in the bowl. Then, cover the bowl again and let the dough rise a second time in a warm place for another hour. Alternatively, you can refrigerate the dough for 3 to 4 hours to allow for a slower, more flavorful rise.
-
While the dough is rising for the second time, let the remaining butter (90g) stand at room temperature until it is very soft and easily spreadable. This softened butter will be used to create the characteristic layers within the Kubaneh.
-
Generously grease a deep 2-liter (8 x 8 x 2 inch) baking dish. This will prevent the Kubaneh from sticking and ensure easy removal after baking.
-
Preheat the oven to 110°C (230°F). This low temperature, slow baking is key to achieving the unique texture of Kubaneh.
-
Divide the dough into 8 equal pieces. On a lightly oiled surface, roll out one piece of dough with a lightly oiled rolling pin into a rectangle approximately 3 mm (1/8 inch) thick.
-
Spread about 2 teaspoons of the softened butter evenly over the surface of the rectangle. Roll up the dough tightly like a jelly roll.
-
Flatten the resulting roll by tapping it gently with your knuckles to create a wider, flatter shape. Spread another 1 teaspoon of softened butter over the flattened dough.
-
Roll the flattened dough up into a spiral, and place it in the prepared baking dish with the spiral design facing up.
-
Continue with the remaining pieces of dough, placing them one next to the other in the baking dish, ensuring they are touching each other. This will help them to rise and bake together into a cohesive loaf.
-
If any softened butter remains after rolling all the dough pieces, place it in small pieces on top of the dough spirals. This will add extra richness and flavor.
-
If using them, wash the eggs and add them to the baking dish, nestled among the spirals of dough. These will bake alongside the Kubaneh and provide a delicious accompaniment.
-
Cover the dough with greased paper or foil, placing it directly on the surface of the dough. Then, cover the baking dish with a tight-fitting lid. This creates a steamy environment that helps the dough to rise and bake evenly.
-
Bake in the preheated oven for 3 hours, or until the Kubaneh is golden brown. The long, slow baking time allows the dough to develop its characteristic texture and flavor.
-
After 3 hours, remove the eggs from the baking dish. Turn the bread out onto a plate, then onto another plate, and then back into the baking dish, so that it is now upside down. This ensures even browning on all sides. Return the eggs to the baking dish.
-
Cover the dough as before, with greased paper or foil and the tight-fitting lid.
-
Reduce the oven temperature to 80-85°C (175-185°F) and bake overnight. This extended, low-temperature baking is essential for achieving the signature soft, pull-apart texture of Kubaneh.
-
Serve warm.
Expert Tips & Tricks
- For a richer flavor, use clarified butter (ghee) instead of regular butter.
- If you don’t have a tight-fitting lid for your baking dish, you can create a seal with heavy-duty aluminum foil, crimping it tightly around the edges of the dish.
- To prevent the top from browning too quickly during the overnight bake, you can tent the baking dish with aluminum foil.
- Don’t be afraid to experiment with different flours. A combination of all-purpose and bread flour can yield a slightly chewier texture.
Serving & Storage Suggestions
Kubaneh is best served warm, straight from the oven. The pull-apart texture makes it perfect for sharing with family and friends. It’s traditionally enjoyed with a simple side of grated tomatoes with zhug (a spicy Yemenite sauce), hard-boiled eggs, and olives.
Leftover Kubaneh can be stored at room temperature for up to 2 days, or in the refrigerator for up to 5 days. To reheat, wrap the Kubaneh in foil and warm it in a low oven (around 150°C/300°F) for about 15-20 minutes. You can also freeze Kubaneh for up to 2 months. Thaw it overnight in the refrigerator before reheating.
Nutritional Information
Please note that these values are estimates and may vary based on specific ingredients and preparation methods.
| Nutrient | Amount per Serving | % Daily Value |
|---|---|---|
| Calories | 450 kcal | 23% |
| Total Fat | 25g | 38% |
| Saturated Fat | 15g | 75% |
| Cholesterol | 50mg | 17% |
| Sodium | 600mg | 25% |
| Total Carbohydrate | 50g | 17% |
| Dietary Fiber | 2g | 8% |
| Sugars | 12g | |
| Protein | 7g | 14% |
Variations & Substitutions
- Vegan Kubaneh: Substitute the butter with vegan butter and omit the eggs. You can brush the top with olive oil before baking.
- Gluten-Free Kubaneh: Use a gluten-free all-purpose flour blend, but be aware that the texture may be slightly different. You may need to adjust the amount of liquid depending on the flour blend you use.
- Sweet Kubaneh: Add more sugar and spices like cinnamon or cardamom to the dough for a sweeter version.
- Savory Kubaneh: Incorporate herbs like rosemary, thyme, or oregano into the dough for a savory twist. You can also add chopped olives or sun-dried tomatoes.
FAQs (Frequently Asked Questions)
Q: Why does Kubaneh bake for so long at such a low temperature?
A: The extended, low-temperature baking is crucial for developing the unique soft, pull-apart texture and subtly sweet flavor of Kubaneh. It allows the dough to slowly cook through without browning too quickly.
Q: Can I use instant yeast instead of active dry yeast?
A: Yes, you can use instant yeast. Simply add it directly to the flour mixture without proofing it in water first. Use the same amount (7g).
Q: What if I don’t have a warm place for the dough to rise?
A: You can create a warm environment by placing the bowl in a slightly warmed oven (turned off), or in a sink filled with warm water (make sure the water doesn’t touch the bowl).
Q: How can I tell if the Kubaneh is done?
A: The Kubaneh is done when it is golden brown on top and the internal temperature reaches around 200°F (93°C). A skewer inserted into the center should come out clean.
Q: Can I make the dough ahead of time and bake it later?
A: Yes, you can prepare the dough up to the point of shaping it, then refrigerate it overnight. Allow it to come to room temperature before shaping and baking.
Final Thoughts
Kubaneh is more than just bread; it’s an experience. The process of making it, from kneading the dough to patiently waiting for it to rise, is a labor of love that culminates in a truly special dish. I encourage you to try this recipe and share it with your loved ones. Don’t be intimidated by the long baking time; the results are well worth the effort. And please, share your creations and experiences – I’d love to hear how it turns out for you! Serve it with a simple salad and a cup of strong, sweet tea for the ultimate Shabbat morning experience.