
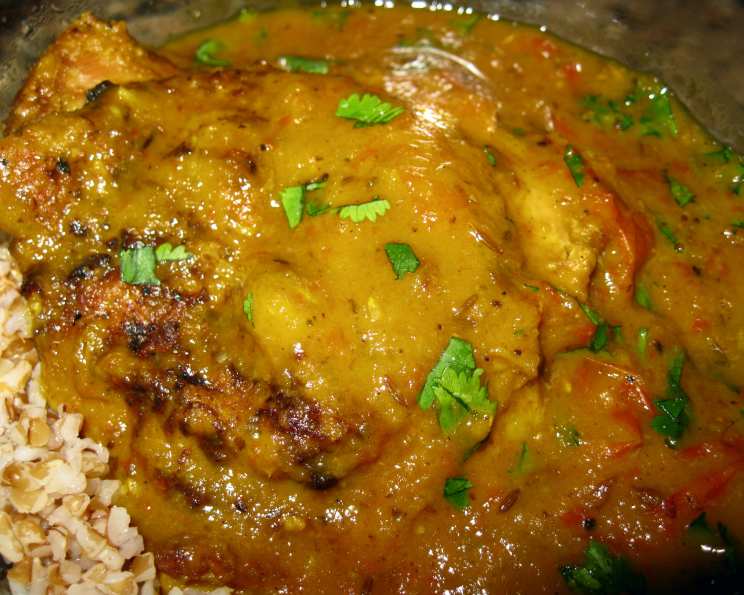
Kuku Paka: A Taste of Kenyan Sunshine
The first time I tasted Kuku Paka, I was miles away from Kenya, in a small, bustling food stall at a summer festival. The aroma of coconut, ginger, and chili hung heavy in the air, drawing me in like a moth to a flame. One bite of the tender chicken, bathed in that creamy, fragrant sauce, and I was transported. It was more than just a meal; it was a story told in flavors, a warm embrace on a cool evening, a vibrant celebration of simple ingredients transformed into something extraordinary. I knew then I had to learn to make this dish.
Recipe Overview
- Prep Time: 20 minutes
- Cook Time: 45-75 minutes
- Total Time: 1 hour 5 minutes – 1 hour 35 minutes
- Servings: 4-6
- Yield: Variable, depending on serving size
- Dietary Type: Dairy-Free (naturally)
Ingredients
- 3 lbs chicken, cut into pieces
- 1 onion, chopped
- 2-3 hot chili peppers, minced
- 2 tablespoons fresh ginger, peeled and minced
- 2 tablespoons garlic, chopped
- 1⁄4 cup oil or 1/4 cup ghee
- 1 tablespoon curry powder
- 2 teaspoons cumin seeds or 3/4 teaspoon ground cumin
- 2 cups chopped tomatoes or 2 cups tomato sauce
- 2 cups coconut milk (15-ounce can)
- Salt and pepper to taste
- 1⁄2 cup cilantro, chopped
Equipment Needed
- Food processor or blender
- Large pot or wok
- Knife and cutting board
Instructions
-
Begin by preparing the aromatic base. Add the onion, chiles, ginger, and garlic to a food processor or blender. Process until a smooth puree forms. If needed, add a little water to help it blend. This puree is the foundation of the curry’s complex flavor.
-
Heat the oil or ghee in a large pot or wok over medium flame. The choice between oil and ghee depends on your preference. Ghee will add a richer, nuttier flavor, while oil provides a more neutral base.
-
Add the onion puree, curry powder, and cumin (seeds or ground) to the heated pot. Sauté, stirring frequently, for 5 to 8 minutes, or until the puree is cooked down and fragrant. The mixture should start to deepen in color and the raw onion smell should dissipate. This step is crucial for building depth of flavor; don’t rush it.
-
Stir in the chopped tomatoes (or tomato sauce) and simmer for 3 to 4 minutes. This allows the tomatoes to break down slightly and meld with the spices, creating a cohesive sauce base.
-
Add the chicken, coconut milk, salt, and pepper to the pot. Ensure the chicken pieces are evenly coated in the sauce.
-
Reduce the heat to low and simmer, covered, until the chicken is cooked through and tender. This can take anywhere from 30 minutes to an hour, depending on the size of the chicken pieces. Check periodically and add more water as needed to prevent the sauce from drying out. The chicken is done when a thermometer inserted into the thickest part registers 165°F (74°C) and the juices run clear when pierced with a fork.
-
Taste and adjust the salt and pepper as needed. Remember that flavors intensify as the curry simmers, so it’s best to season gradually.
-
Stir in the chopped cilantro. The fresh cilantro adds a vibrant, herbaceous finish to the dish.
-
Serve hot with rice or chapatti.
Expert Tips & Tricks
- Grilling the Chicken: For an authentic, smoky flavor, grill the chicken pieces before adding them to the simmering sauce. This adds another layer of complexity to the final dish.
- Silky Smooth Sauce: Reserve some of the thick coconut cream that gathers at the top of the can of coconut milk and stir it into the sauce at the very end for extra silky and rich results.
- Spice Level Control: To control the heat level, remove the seeds from the chili peppers before mincing them, or omit the chiles entirely for a milder dish. You can also substitute a chopped sweet bell pepper for a touch of sweetness and added texture.
- Make-Ahead Tip: The curry base (without the chicken) can be made a day or two in advance and stored in the refrigerator. This allows the flavors to meld even further. Simply add the chicken and coconut milk when you’re ready to cook.
- Browning for Flavor: For a deeper, richer flavor in the curry, lightly brown the chicken pieces in the pot before adding the onion puree.
Serving & Storage Suggestions
Kuku Paka is best served hot, ideally with a fluffy bed of basmati rice or warm chapatti bread for scooping up the flavorful sauce. Garnish with extra fresh cilantro for a pop of color and freshness.
Leftovers can be stored in an airtight container in the refrigerator for up to 3 days. To reheat, gently warm on the stovetop over low heat or in the microwave. Add a splash of water or coconut milk if the sauce has thickened too much.
For longer storage, Kuku Paka can be frozen for up to 2 months. Thaw overnight in the refrigerator before reheating. Note that freezing may slightly alter the texture of the sauce.
Nutritional Information
(Estimated per serving, values are approximate and can vary based on specific ingredients used)
| Nutrient | Amount per Serving | % Daily Value |
|---|---|---|
| Calories | 478 kcal | 24% |
| Total Fat | 30g | 46% |
| Saturated Fat | 18g | 90% |
| Cholesterol | 128mg | 43% |
| Sodium | 253mg | 11% |
| Total Carbohydrate | 22g | 7% |
| Dietary Fiber | 2g | 8% |
| Sugars | 18g | — |
| Protein | 33g | 66% |
Variations & Substitutions
- Chicken Alternatives: Feel free to use boneless, skinless chicken breasts or thighs instead of bone-in pieces. Adjust cooking time accordingly.
- Vegetarian Kuku Paka: Substitute the chicken with chickpeas, potatoes, or paneer for a vegetarian option. Add the vegetables or paneer towards the end of the cooking time to prevent them from becoming overcooked.
- Potato Addition: For a heartier dish, add cooked potatoes, cut into chunks, to the curry towards the end of the simmering time.
- Coconut Milk Substitute: While coconut milk is essential for the authentic flavor, you can experiment with cashew cream for a richer, creamier alternative, or a light vegetable broth for a lighter option.
- Regional Variations: Adapt the spice blend to your preference. Add a pinch of garam masala for a warmer flavor, or a touch of turmeric for added color and earthy notes.
FAQs (Frequently Asked Questions)
Q: Can I make this curry in a slow cooker?
A: Yes, you can! Sauté the onion puree and spices as directed, then transfer everything to a slow cooker. Cook on low for 6-8 hours or on high for 3-4 hours, until the chicken is tender.
Q: What is the best way to mince chili peppers without burning my skin?
A: Wear gloves or wash your hands thoroughly with soap and water immediately after handling chili peppers. Avoid touching your face, especially your eyes, until you’ve washed your hands.
Q: Can I use dried spices instead of fresh ginger and garlic?
A: While fresh is best, you can substitute with 1 teaspoon of ground ginger and 1 teaspoon of garlic powder for every tablespoon of fresh. Keep in mind the flavor will be slightly different.
Q: My curry is too thin. How can I thicken it?
A: Simmer the curry uncovered for a longer period of time to allow the sauce to reduce naturally. Alternatively, you can mix a teaspoon of cornstarch with a tablespoon of cold water and stir it into the curry during the last few minutes of cooking.
Q: What kind of rice pairs best with Kuku Paka?
A: Basmati rice is a classic choice, offering a light and fluffy texture that complements the rich curry. You can also use jasmine rice or brown rice for a nuttier flavor.
Final Thoughts
Kuku Paka is more than just a recipe; it’s an invitation to explore the vibrant flavors of Kenya. Don’t be afraid to experiment with the spices and ingredients to create a dish that suits your own taste. Whether you’re a seasoned cook or a beginner in the kitchen, this curry is sure to impress your family and friends. So gather your ingredients, turn up the music, and embark on a culinary adventure! We encourage you to share your experiences and modifications with us; your feedback is invaluable. Consider pairing this delightful dish with a refreshing mango salsa or a crisp Kenyan Tusker beer for a truly immersive experience.