
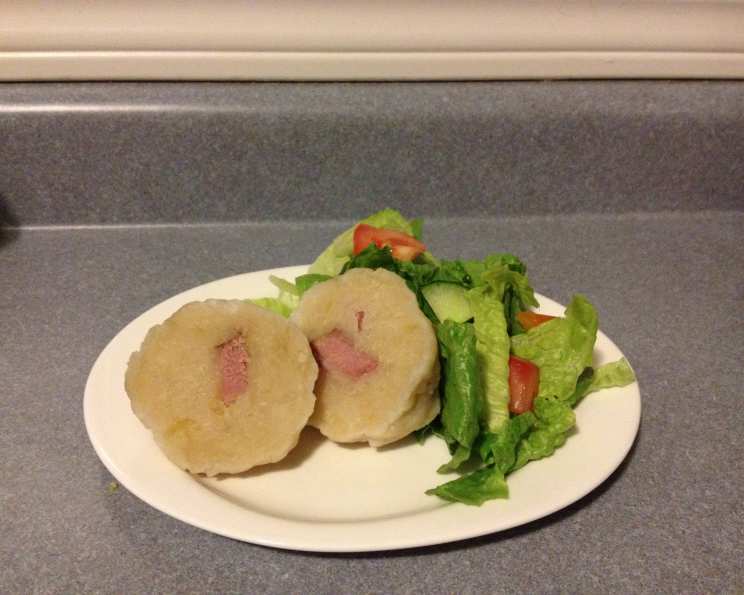
Kumla: A Taste of Norwegian Comfort
My fondest childhood memories often revolve around the aromas wafting from my grandmother’s kitchen, especially during the holidays. The scent of simmering ham, mingling with the earthy aroma of potatoes, always signaled that a big batch of her famous Kumla was in the making. We kids would hover around, eagerly anticipating those hefty, savory dumplings, each bite a warm embrace of tradition and love. Now, years later, I continue to make Kumla, not just as a delicious meal, but as a way to honor her and relive those cherished moments with my own family.
Recipe Overview
Here’s a quick look at what you can expect from this hearty recipe:
- Prep Time: 30 minutes
- Cook Time: 1 hour 30 minutes
- Total Time: 2 hours
- Servings: 4-6
- Yield: About 6-8 dumplings
- Dietary Type: Not Vegetarian
Ingredients
Here’s what you’ll need to create this comforting dish:
- 1 beef bone or 1 turkey wing
- ¾ lb beef or ¾ lb turkey
- 1 tablespoon salt (for the stock)
- 4 cups grated potatoes, approximately
- 1 tablespoon salt (for the potatoes)
- 4-5 cups flour
Equipment Needed
- Large stock pot
- Cheese grater
- Large bowl
- Slotted spoon
Instructions
Follow these steps to create delicious, authentic Kumla:
-
Prepare the stock: In a large stock pot, combine the beef bone or turkey wing (or both!), the beef or turkey, and 1 tablespoon of salt. Add enough water to completely cover the ingredients. Bring the mixture to a boil, then reduce the heat to low and let it simmer gently for at least 30 minutes. This creates a flavorful broth that will infuse the dumplings with savory goodness.
-
Grate the potatoes: While the stock simmers, peel the potatoes and grate them using a cheese grater. You should have approximately 4 cups of grated potatoes.
-
Combine potatoes, salt, and flour: Place the grated potatoes in a large bowl. Add 1 tablespoon of salt to the grated potatoes. Using your hands, gradually mix in the flour. Continue adding flour until the mixture forms a firm dough that is no longer sticky. The amount of flour needed may vary slightly depending on the moisture content of the potatoes, but you’ll likely need a little more than 4 cups. The dough should be firm enough to hold its shape when formed into balls.
-
Form the dumplings: Take handfuls of the potato dough and form them into balls about the size of your fist.
-
Add meat to the center (Optional): The original recipe doesn’t specifically mention adding meat to the center of each ball. My Grandmother would use leftover cooked ham from Christmas. Create a small indentation in the center of each ball and push a small piece of cooked beef or turkey into the center. This adds an extra burst of flavor to the center of each dumpling. Gently reform the ball to seal the meat inside.
-
Remove the bone from the stock: Carefully remove the beef bone or turkey wing from the simmering stock using a slotted spoon. You can shred the cooked beef or turkey from the bones and set it aside to add back into the soup later if desired.
-
Add the dumplings to the boiling stock: Gently drop the potato dumplings into the boiling stock, being careful not to overcrowd the pot. Ensure the dumplings don’t stick to the bottom of the pot by stirring gently with a wooden spoon or slotted spoon.
-
Simmer the dumplings: Reduce the heat to low and let the dumplings simmer gently in the stock for at least 1 hour. The simmering time allows the dumplings to cook through completely and absorb the flavorful broth. Occasionally, stir the dumplings gently to prevent them from sticking to the bottom of the pot.
-
Check for doneness: To check if the dumplings are done, remove one from the pot using a slotted spoon and cut it in half. The inside should be cooked through and the texture should be soft and slightly chewy. If the dumpling is still doughy in the center, continue simmering for another 15-20 minutes and check again.
-
Serve: Once the dumplings are cooked through, remove them from the stock pot with a slotted spoon and transfer them to a serving dish. Serve immediately while they are hot.
Expert Tips & Tricks
- Potato Variety: Use starchy potatoes, such as Russets or Yukon Golds, for the best texture. Waxy potatoes can result in a gummy dumpling.
- Stock Flavor: For a richer stock, roast the beef bones or turkey wings in the oven at 400°F (200°C) for 30 minutes before adding them to the pot.
- Prevent Sticking: To prevent the dumplings from sticking to the bottom of the pot, add a tablespoon of oil to the water along with the bones and salt.
- Adjust Flour: The amount of flour you need will depend on the moisture content of your potatoes. Start with 4 cups and add more, a little at a time, until the dough comes together.
- Make Ahead: The dough can be made ahead of time and stored in the refrigerator for up to 24 hours.
Serving & Storage Suggestions
Kumla is traditionally served hot, straight from the pot. It’s delicious on its own, but it’s also wonderful with a dollop of butter or margarine, a spoonful of sour cream, or a sprinkle of salt.
Leftovers: Store leftover Kumla in an airtight container in the refrigerator for up to 3 days.
Reheating: To reheat, gently simmer the dumplings in a small amount of broth or water until heated through. You can also microwave them, but be careful not to overcook them.
Many people enjoy Kumla for breakfast as well, especially leftovers. Serve with syrup or jam.
Nutritional Information
Here’s an estimate of the nutritional content per serving:
| Nutrient | Amount per Serving | % Daily Value |
|---|---|---|
| Calories | 550 kcal | 28% |
| Total Fat | 15g | 23% |
| Saturated Fat | 5g | 25% |
| Cholesterol | 50mg | 17% |
| Sodium | 1200mg | 50% |
| Total Carbs | 80g | 27% |
| Dietary Fiber | 5g | 20% |
| Sugars | 3g | – |
| Protein | 25g | 50% |
Please note that these values are approximate and can vary depending on the specific ingredients used.
Variations & Substitutions
- Vegetarian Kumla: For a vegetarian version, omit the beef bones and beef or turkey. Use vegetable broth instead of meat stock. Consider adding chopped vegetables like carrots, celery, and onions to the dough for extra flavor.
- Gluten-Free Kumla: Substitute the all-purpose flour with a gluten-free all-purpose flour blend. You may need to adjust the amount of flour depending on the blend you use.
- Flavor Boost: Add herbs like thyme, rosemary, or parsley to the dough for a more complex flavor profile.
- Different Protein: Try adding cooked sausage or bacon to the center of the dumplings for a different protein option.
FAQs (Frequently Asked Questions)
Q: Can I use pre-grated potatoes?
A: While you can use pre-grated potatoes, freshly grated potatoes will give you the best texture and flavor. Pre-grated potatoes often contain preservatives and can be drier, which can affect the dumpling’s consistency.
Q: How do I prevent the dumplings from falling apart while cooking?
A: Make sure the dough is firm enough before forming the dumplings. If the dough is too sticky, add more flour, a tablespoon at a time, until it comes together. Also, be gentle when adding the dumplings to the boiling stock and avoid stirring them too vigorously.
Q: Can I freeze Kumla?
A: Yes, Kumla freezes well. Allow the cooked dumplings to cool completely, then place them in a freezer-safe container or bag. Freeze for up to 2 months. To reheat, simmer the frozen dumplings in broth or water until heated through.
Q: My Kumla turned out gummy. What did I do wrong?
A: Gummy Kumla is usually caused by using too much flour or using the wrong type of potatoes. Stick to starchy potatoes like Russets or Yukon Golds, and be careful not to overwork the dough.
Q: Can I make Kumla in a slow cooker?
A: Yes, you can make Kumla in a slow cooker. Prepare the stock as directed and add the dumplings. Cook on low for 4-6 hours, or until the dumplings are cooked through.
Final Thoughts
Kumla is more than just a recipe; it’s a connection to heritage, a symbol of family, and a bowlful of pure comfort. Don’t be intimidated by the process – it’s a rewarding experience that will fill your kitchen with heartwarming aromas and your belly with deliciousness. Gather your ingredients, follow the steps, and create your own memories with this timeless Norwegian classic. I encourage you to try this recipe and share your results with me. Enjoy!