
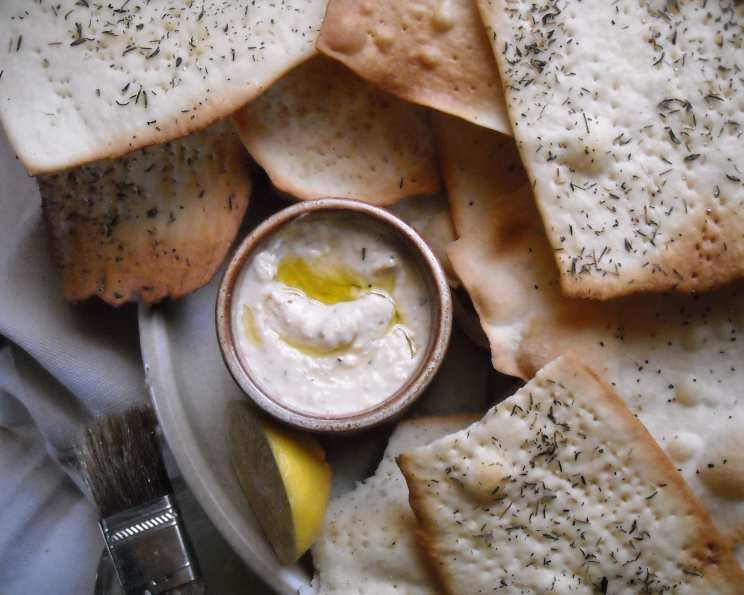
The Irresistible Allure of Homemade Lavash Bread
I still remember the first time I encountered lavash bread, not in a restaurant, but at a roadside picnic during a family trip through Armenia. My grandmother, with flour dusting her apron, unfurled a sheet of this impossibly thin bread, almost translucent in the sunlight. She layered it with fresh herbs, creamy cheese, and grilled vegetables, creating a wrap that was simple, yet bursting with flavor. That moment sparked a lifelong fascination with this versatile and delicious flatbread. Now, I find myself constantly experimenting with lavash, using it as a base for pizzas, a crispy chip alternative, or simply enjoying it warm from the oven with a drizzle of olive oil.
Recipe Overview
- Prep Time: 2 hours 5 minutes
- Cook Time: 5-6 minutes
- Total Time: 2 hours 11 minutes
- Yields: 8 breads
- Dietary Type: Vegetarian
Ingredients
- 2 ¼ teaspoons yeast
- 1 ¼ cups warm water
- ¼ cup plain yogurt (or substitute with water)
- 1 teaspoon salt
- 2 cups all-purpose flour
- 2 cups whole wheat flour (or any combination of flours)
- Toasted sesame seeds or poppy seeds (for topping)
Equipment Needed
- Large bowl
- Measuring cups and spoons
- Floured surface
- Greased bowl
- Baking sheet
- Rolling pin
Instructions
- In a large bowl, sprinkle the yeast into the warm water. Stir until the yeast is completely dissolved. Give it a minute or two to bloom – you should see some frothing.
- Add the salt and yogurt to the yeast mixture. If you prefer not to use yogurt, simply substitute it with an equivalent amount of water. The yogurt adds a slight tang and helps with the texture.
- In a separate bowl, combine the all-purpose flour and whole wheat flour. Remember, you can use any combination of flours you like, such as spelt or rye, to customize the flavor and texture.
- Gradually add the flour mixture to the wet ingredients, mixing until a stiff dough forms.
- Turn the dough out onto a lightly floured surface and knead until it becomes smooth and elastic. This process should take about 8 to 10 minutes. Proper kneading is crucial for developing the gluten, which gives the lavash its structure.
- Shape the dough into a ball.
- Place the dough ball in a greased bowl, turning it to coat the top with oil. This prevents the dough from drying out during the rising process.
- Cover the bowl with a clean kitchen towel or plastic wrap and let the dough rise in a warm place until it has doubled in bulk. This typically takes about 1 ½ hours. The rising time may vary depending on the temperature of your environment.
- Punch down the risen dough to release the air. This helps to redistribute the yeast and create a more even texture.
- Let the dough rise again until doubled, which should take about 30 minutes.
- Divide the dough into 8 equal pieces. Alternatively, if you prefer one large sheet of lavash, you can skip this step.
- Roll each piece of dough out on a lightly floured surface into a very thin circle, approximately 9 inches in diameter. The thinner the dough, the crispier the lavash will be. For a single large sheet, roll out the entire dough as thinly as possible.
- Brush the top of each lavash circle with a small amount of olive oil. This helps the seeds adhere and adds a touch of flavor.
- Sprinkle the oiled surface with toasted sesame seeds or poppy seeds. You can also experiment with other toppings, such as za’atar, dried herbs, or flaky sea salt.
- Place the lavash circles onto a baking sheet. You may need to work in batches depending on the size of your baking sheet.
- Bake in a preheated oven at 400°F (200°C) for 5 to 6 minutes, or until the bread appears dry, lightly browned, and blistered. Keep a close eye on the lavash as it bakes, as it can burn quickly.
- Remove from the oven and let cool slightly before serving. The lavash will crisp up further as it cools.
Expert Tips & Tricks
- For extra crispy lavash, try docking the dough (piercing it with a fork) before baking. This prevents large air bubbles from forming.
- If your dough is too sticky to roll out easily, chill it in the refrigerator for about 15 minutes.
- To add more flavor, try incorporating herbs like rosemary or thyme directly into the dough.
- Use a pizza stone for an even crispier texture. Preheat the stone in the oven before baking the lavash.
- Don’t overcrowd the baking sheet. Bake in batches to ensure even cooking.
Serving & Storage Suggestions
Serve your homemade lavash bread warm or at room temperature. It’s fantastic as a wrap for sandwiches, a base for flatbread pizzas, or simply enjoyed with dips like hummus or baba ghanoush. For a delicious appetizer, break the lavash into shards and serve with cheese and olives.
To store, allow the lavash to cool completely. Store in an airtight container at room temperature for up to 3 days. To keep it crisp, avoid storing it in a humid environment. You can also freeze lavash for up to 2 months. Wrap it tightly in plastic wrap and then place it in a freezer bag. To reheat, thaw at room temperature and then warm in a low oven for a few minutes to restore crispness.
Nutritional Information
| Nutrient | Amount per Serving | % Daily Value |
|---|---|---|
| Calories | 223.4 kcal | N/A |
| Calories from Fat | 10 g | 5% |
| Total Fat | 1.2 g | 1% |
| Saturated Fat | 0.3 g | 1% |
| Cholesterol | 1 mg | 0% |
| Sodium | 297.6 mg | 12% |
| Total Carbohydrate | 46.4 g | 15% |
| Dietary Fiber | 4.7 g | 18% |
| Sugars | 0.6 g | 2% |
| Protein | 8 g | 16% |
Note: Nutritional information is an estimate and may vary based on specific ingredients and portion sizes.
Variations & Substitutions
- Gluten-Free Lavash: Use a gluten-free flour blend specifically designed for bread making. You may need to adjust the amount of liquid to achieve the correct dough consistency.
- Spiced Lavash: Add a pinch of chili flakes, cumin, or smoked paprika to the dough for a spicy kick.
- Herbaceous Lavash: Incorporate finely chopped fresh herbs like rosemary, thyme, or oregano into the dough for a fragrant twist.
- Sweet Lavash: For a dessert version, add a tablespoon of sugar and a teaspoon of cinnamon to the dough. Serve with fruit and cream cheese.
- Vegan Lavash: Substitute the yogurt with water or a plant-based yogurt alternative.
FAQs (Frequently Asked Questions)
Q: Can I make the dough in a bread machine?
A: Yes, you can use the dough cycle on your bread machine to prepare the dough. Simply add the ingredients to the bread machine according to the manufacturer’s instructions.
Q: How thin should I roll out the dough?
A: The thinner, the better! Aim for a translucent consistency so the lavash becomes delightfully crisp.
Q: Can I use only all-purpose flour or only whole wheat flour?
A: Yes, you can. However, using a combination of both flours provides a better balance of texture and flavor.
Q: How do I prevent the lavash from burning in the oven?
A: Keep a close eye on the lavash while it bakes. The baking time is short, and it can burn quickly.
Q: What if I don’t have sesame or poppy seeds?
A: You can use other toppings, such as za’atar, dried herbs, flaky sea salt, or even everything bagel seasoning.
Final Thoughts
Making your own lavash bread is a rewarding experience that opens up a world of culinary possibilities. From simple snacks to elegant appetizers, this versatile flatbread is sure to impress. So, gather your ingredients, preheat your oven, and embark on a lavash-making adventure. Don’t hesitate to experiment with different flavors and toppings to create your own signature version. And most importantly, share your creations with friends and family! I encourage you to give this recipe a try and let me know what you think! Perhaps you’ll serve it alongside a flavorful roasted red pepper dip, or use it to make mini naan pizzas with your kids. The possibilities are endless.