
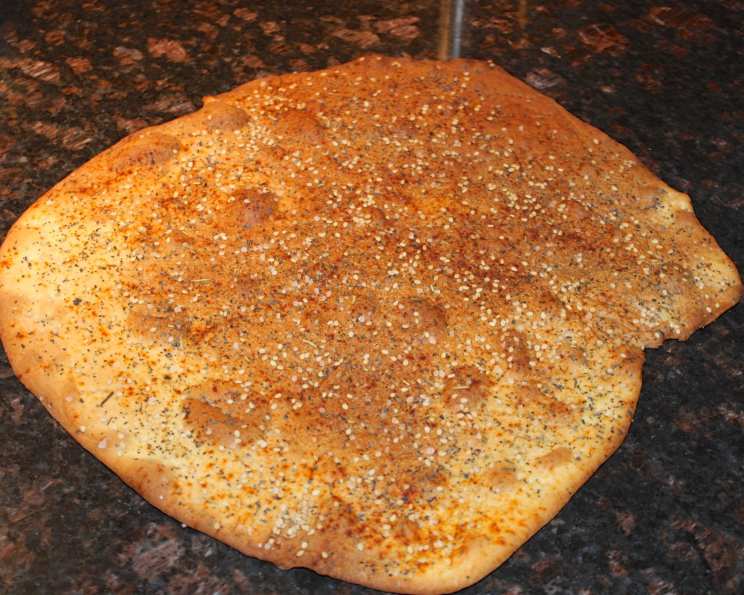
Lavash Crackers: A Thin and Crispy Delight
I remember my first attempt at making lavash – it was a complete disaster! The dough was too thick, the crackers were uneven, and they tasted more like cardboard than the delicate, crispy delights I’d enjoyed at my favorite Middle Eastern restaurant. Determined to master this seemingly simple flatbread, I embarked on a journey of experimentation. Now, years later, I can confidently say that I’ve perfected a recipe that consistently yields thin, crispy lavash crackers perfect for snacking or serving alongside dips and spreads.
Recipe Overview
- Prep Time: 30 minutes
- Cook Time: 9 minutes
- Total Time: 2 hours 10 minutes
- Servings: Varies (Yields approximately 2 large flatbreads)
- Dietary Type: Vegan (naturally)
Ingredients
- 192 g bread flour (1 1/2 cup)
- 3 g table salt (1/2 teaspoon)
- 2 g instant yeast (1/2 teaspoon)
- 21 g honey (1 tablespoon)
- 14 g vegetable oil (1 tablespoon)
- 76 g water (1/3 cup)
- Optional toppings: Sesame seeds, poppy seeds, sea salt, Italian seasonings, paprika
Equipment Needed
- Medium mixing bowl
- 2-cup measuring cup
- Lightly floured surface
- Rolling pin
- Half-size baking sheet (approximately 12″ x 16″)
- Parchment paper or silpat pad
- Spray bottle (for water) or pastry brush (for egg/milk wash)
- Fork
Instructions
-
In a medium bowl, combine the bread flour, salt, instant yeast, honey, vegetable oil, and water. Mix for about one minute, or until all ingredients are uniformly distributed. The dough will be fairly stiff at this stage.
-
Place the dough into a lightly oiled 2-cup measuring cup. This helps you gauge how much it’s rising. Cover the measuring cup with plastic wrap or a damp towel and let it rest for 10 minutes. This allows the gluten to start relaxing, making it easier to knead.
-
Turn the dough out onto a lightly floured surface. It will be a stiff dough, so be prepared to put some muscle into it. Knead the dough for 5 minutes, until it becomes smoother and more elastic.
-
Place the kneaded dough back into the oiled measuring cup, cover it again, and let it rest for 20 minutes.
-
After the 20-minute rest, remove the dough from the cup. Stretch it into a rectangle as large as possible without tearing. Then, perform a letter-style fold: fold the top third of the rectangle down to the middle, and the bottom third up to meet it. Repeat this process from the sides as well, folding one side toward the center and then the other. This helps develop gluten strength and creates layers.
-
Return the folded dough to the measuring cup, cover, and let it rest for another 20 minutes.
-
Repeat the stretch and fold process one more time. Place the dough back into the cup, cover, and let it rest in a warm place until it has doubled in volume. This bulk fermentation may take anywhere from an hour to an hour and 20 minutes, depending on the warmth of your environment.
-
Preheat your oven to 350°F (175°C). If you have a baking stone, you can use it for this recipe for an extra-crispy crust, but it’s not essential. Place the stone in the oven while it preheats.
-
Once the dough has doubled, gently deflate it and divide it into 2 equal halves.
-
On a lightly floured surface, roll one half of the dough out as thinly as possible until it resists further rolling. Don’t be afraid to use a little extra flour to prevent sticking. Repeat this process with the other half of the dough.
-
Return to the first piece of dough and continue to roll it out until each piece is a 12″ x 15″ rectangle or a 15″ diameter circle. The thinner you roll it, the crispier your lavash crackers will be. Lift the doughs occasionally and return to the surface and re-flour lightly as needed to prevent tearing.
-
Cover each sheet of dough with a thin, slightly damp towel or lightly oiled plastic wrap to prevent them from drying out. Let them rest for 5 minutes. This relaxes the gluten and makes them easier to handle.
-
Lift one piece of dough and carefully place it onto a half-size baking sheet that has been lined with parchment paper or a silpat pad. The parchment or silpat will prevent sticking and make it easier to remove the crackers after baking.
-
Lightly spray the dough with water. This helps the toppings adhere. Alternatively, you can use an egg wash or milk wash for a richer flavor and a slightly browner crust. Sprinkle your desired toppings (such as sesame seeds, poppy seeds, sea salt, Italian seasonings, and/or paprika) evenly over the dough. Lightly press or roll the toppings into the dough to ensure they stick during baking.
-
Using a fork, press holes into the dough. This prevents excessive bubbling during baking, which can result in unevenly cooked crackers.
-
Bake for 4 minutes. Then, rotate the pan (or pans) and bake for an additional 5 minutes, or until the crackers are uniformly lightly browned and crispy. Keep a close eye on them, as they can burn quickly.
-
Remove the baked lavash crackers from the oven and let them cool completely on the pan, on the counter, or on a wire rack. They will crisp up further as they cool.
Expert Tips & Tricks
- For the thinnest lavash, use a pasta machine to roll out the dough.
- If the dough is too elastic and keeps shrinking back as you roll it, let it rest for a few more minutes before continuing.
- Don’t overcrowd the baking sheet. Bake the crackers in batches if necessary to ensure even cooking.
- Experiment with different toppings! Try using grated cheese, chopped herbs, garlic powder, or even a sprinkle of chili flakes for a spicy kick.
- If your oven tends to bake unevenly, rotate the baking sheet more frequently during baking.
Serving & Storage Suggestions
Serve these lavash crackers as a snack on their own, or pair them with your favorite dips, spreads, or cheeses. They’re also a delicious addition to a charcuterie board.
Store cooled lavash crackers in an airtight container at room temperature. They will stay crispy for up to a week. If they start to soften, you can re-crisp them in a low oven (around 250°F/120°C) for a few minutes. Freezing is not recommended, as it can affect the texture.
Nutritional Information
| Nutrient | Amount per Serving (approx. 1/2 flatbread) | % Daily Value* |
|---|---|---|
| Calories | 534 kcal | N/A |
| Total Fat | 8g | 12% |
| Saturated Fat | 1g | 5% |
| Cholesterol | 0mg | 0% |
| Sodium | 586mg | 24% |
| Total Carbohydrate | 101g | 33% |
| Dietary Fiber | 4g | 14% |
| Sugars | 9g | N/A |
| Protein | 13g | 25% |
*Percent Daily Values are based on a 2,000 calorie diet.
Variations & Substitutions
- Gluten-free lavash: Substitute the bread flour with a gluten-free all-purpose flour blend. You may need to adjust the amount of water depending on the blend you use.
- Whole wheat lavash: Replace half of the bread flour with whole wheat flour for a nuttier flavor and added fiber.
- Herb and garlic lavash: Add 1-2 cloves of minced garlic and a tablespoon of chopped fresh herbs (such as rosemary, thyme, or oregano) to the dough.
- Spicy lavash: Add a pinch of red pepper flakes or a dash of cayenne pepper to the dough.
FAQs (Frequently Asked Questions)
Q: Can I use active dry yeast instead of instant yeast?
A: Yes, you can. Use the same amount (2g), but activate it first by dissolving it in the warm water with the honey for about 5-10 minutes until foamy.
Q: My dough is too sticky to roll out. What should I do?
A: Add a little more flour to the surface and to your rolling pin. Be careful not to add too much, as this can make the crackers tough.
Q: How can I prevent the crackers from burning?
A: Keep a close eye on them during baking and adjust the baking time as needed. If they start to brown too quickly, lower the oven temperature slightly or cover them loosely with foil.
Q: Can I make the dough ahead of time?
A: Yes, you can prepare the dough up to the point of dividing it. Wrap it tightly in plastic wrap and refrigerate it for up to 24 hours. Let it come to room temperature before rolling it out.
Q: What’s the best way to eat these lavash crackers?
A: They are fantastic with hummus, baba ghanoush, tzatziki, or any other dip you enjoy! They also make a great base for mini pizzas or can be crumbled over salads for added crunch.
Final Thoughts
These homemade lavash crackers are surprisingly easy to make, and they’re so much tastier than the store-bought variety. Don’t be intimidated by the multiple rests; they are crucial for developing the flavor and texture of the dough. So gather your ingredients, preheat your oven, and get ready to enjoy a batch of these crispy, flavorful delights. I hope you love this recipe as much as I do. Don’t hesitate to experiment with different toppings and flavors to create your own signature lavash crackers! Let me know how it turns out!