
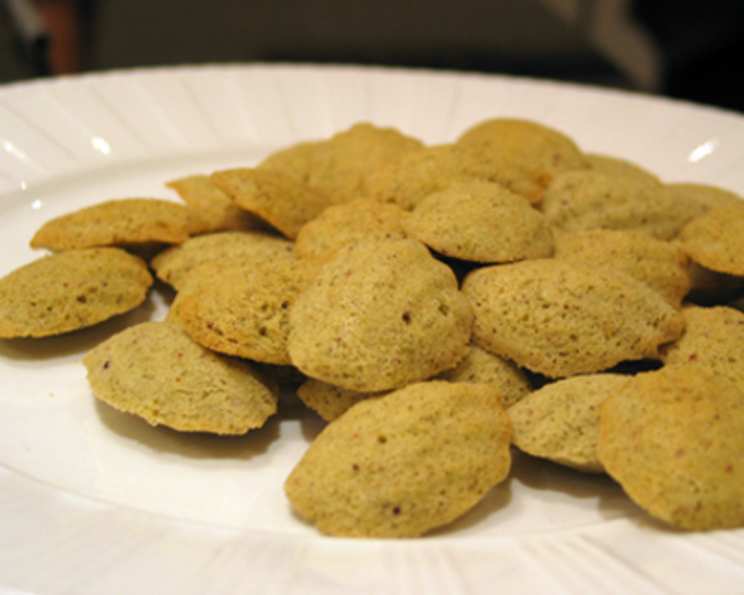
Lavender Madeleines: A Taste of Provence in Every Bite
I’ll never forget the first time I tasted a lavender madeleine. It was at a small patisserie tucked away on a sun-drenched street in Aix-en-Provence. The delicate aroma of lavender hung in the air, mingling with the buttery scent of freshly baked pastries. One bite, and I was transported. The soft, cakey texture, the subtle floral notes – it was a moment of pure culinary bliss that I’ve been chasing ever since. Now, I’m so glad to bring the essence of Provence to my kitchen and to share it with you.
Recipe Overview
- Prep Time: 15 minutes
- Cook Time: 8-10 minutes
- Total Time: Approximately 25 minutes
- Yields: Varies depending on pan size (approximately 24 madeleines)
- Dietary Type: Not specified, but can be adapted to gluten-free (see variations)
Ingredients
- ¾ cup granulated sugar
- 5 tablespoons fresh lavender flowers
- ¾ cup unsalted butter, melted and cooled
- 2 large eggs, at room temperature
- ½ teaspoon vanilla extract
- 1 cup all-purpose flour
- Confectioners’ sugar, for dusting (optional)
Equipment Needed
- Food processor
- Large mixing bowl
- Wire whisk
- Rubber spatula
- Madeleine pan(s)
- Non-stick cooking spray
- Wire rack
Instructions
-
Grind the lavender sugar: In a food processor, combine the granulated sugar and fresh lavender flowers. Process until the lavender is finely ground and evenly distributed throughout the sugar. The sugar will take on a beautiful, fragrant aroma. The finer the grind, the more evenly the lavender flavor will infuse the madeleines.
-
Preheat the oven: Preheat your oven to 400 degrees Fahrenheit (200 degrees Celsius). It’s crucial to have a properly heated oven to ensure the madeleines develop their signature hump.
-
Whisk the wet ingredients: In a large bowl, using a wire whisk, combine the eggs, lavender sugar mixture, and vanilla extract. Whisk vigorously until the mixture becomes light and fluffy, incorporating plenty of air. This step is essential for achieving the desired airy texture.
-
Incorporate the butter: Gradually whisk in the melted and cooled butter. Continue whisking until the butter is fully incorporated and the mixture is smooth and homogenous. Be sure the butter isn’t too hot, or it could cook the eggs.
-
Fold in the flour: Using a rubber spatula, gently fold in the flour. Be careful not to overmix; overmixing can develop the gluten in the flour, resulting in tough madeleines. Fold just until the flour disappears. A few streaks of flour are okay.
-
Prepare the Madeleine pans: Generously spray your Madeleine pans with non-stick cooking spray. Ensure every nook and cranny is coated to prevent the madeleines from sticking. You can also dust the sprayed pan with flour for extra insurance.
-
Fill the Madeleine molds: Spoon a scant tablespoon of batter into each madeleine mold, leaving the batter mounded in the center. This creates the characteristic “humped” appearance of classic madeleines. Be careful not to overfill the molds, as the batter will spread during baking.
-
Bake the Madeleines: Bake in the preheated oven for 8 to 10 minutes, or until the madeleines are golden brown around the edges. Keep a close eye on them, as baking times may vary depending on your oven. They are done when a toothpick inserted into the center comes out clean.
-
Cool and store: Immediately remove the madeleines from the pan and allow them to cool on a wire rack. This prevents them from steaming in the pan and becoming soggy.
-
Dust and Serve: Dust with confectioners’ sugar just before serving, if desired. The confectioners’ sugar adds a touch of sweetness and visual appeal.
Expert Tips & Tricks
- Chill the batter: For even better results, chill the batter in the refrigerator for at least 30 minutes before baking. This allows the gluten to relax, resulting in more tender madeleines. Some bakers even prefer to chill the batter overnight for a more pronounced hump.
- Brown Butter: To amplify the nutty flavor, try using brown butter (beurre noisette) instead of regular melted butter. Be sure to let it cool slightly before incorporating it into the batter.
- Don’t overbake: Overbaking will result in dry, crumbly madeleines. Check for doneness frequently during the last few minutes of baking. The edges should be golden brown, and a toothpick inserted into the center should come out clean.
- Tap the pan: Before baking, gently tap the filled Madeleine pan on the counter to release any trapped air bubbles. This will help ensure a smooth, even surface.
- Use a piping bag: For neater and more consistent filling of the Madeleine molds, use a piping bag or a Ziploc bag with a corner snipped off.
Serving & Storage Suggestions
These Lavender Madeleines are delightful served warm or at room temperature. They pair beautifully with a cup of tea or coffee, or as a light dessert after a meal. For a touch of elegance, arrange them on a platter and dust them with confectioners’ sugar just before serving. Store leftover madeleines in an airtight container at room temperature for up to 2 days, or in the refrigerator for up to 5 days. They can also be frozen for longer storage. To reheat frozen madeleines, thaw them at room temperature and then warm them briefly in a low oven or microwave.
Nutritional Information
(Estimated, per madeleine, based on recipe yield)
| Nutrient | Amount per Serving | % Daily Value |
|---|---|---|
| Calories | 85 kcal | 4% |
| Total Fat | 5g | 6% |
| Saturated Fat | 3g | 15% |
| Cholesterol | 25mg | 8% |
| Sodium | 5mg | 0% |
| Total Carbohydrate | 8g | 3% |
| Dietary Fiber | 0g | 0% |
| Sugars | 5g | |
| Protein | 1g | 2% |
Variations & Substitutions
- Gluten-Free: Substitute the all-purpose flour with a gluten-free all-purpose flour blend. Be sure to choose a blend that contains xanthan gum for structure.
- Lemon-Lavender: Add the zest of one lemon to the batter for a bright, citrusy twist.
- Honey-Lavender: Replace some of the granulated sugar with honey for a deeper, more complex flavor.
- Earl Grey Lavender: Infuse the melted butter with Earl Grey tea leaves for a sophisticated and aromatic flavor combination. Simply steep the tea leaves in the hot butter for a few minutes, then strain before using.
- Vegan: Replace the butter with a vegan butter substitute, the eggs with flax eggs (1 tbsp ground flaxseed mixed with 3 tbsp water per egg, let sit for 5 minutes to thicken).
FAQs (Frequently Asked Questions)
Q: What makes madeleines have a hump?
A: The characteristic hump is caused by a combination of factors, including the temperature of the oven, the chilling of the batter, and the reaction of the ingredients. The cold batter hitting the hot oven creates a burst of steam, causing the center to rise rapidly.
Q: Can I use dried lavender instead of fresh?
A: Fresh lavender is preferred for its brighter, more aromatic flavor. If using dried lavender, use about half the amount and ensure it is culinary grade.
Q: How do I prevent my madeleines from sticking to the pan?
A: Generously spray your Madeleine pans with non-stick cooking spray, ensuring every nook and cranny is coated. You can also dust the sprayed pan with flour for extra insurance.
Q: Can I make the batter ahead of time?
A: Yes, the batter can be made ahead of time and stored in the refrigerator for up to 24 hours. This will actually improve the texture of the madeleines.
Q: Why are my madeleines dry?
A: Overbaking is the most common cause of dry madeleines. Be sure to check for doneness frequently during the last few minutes of baking and remove them from the oven as soon as they are golden brown and a toothpick inserted into the center comes out clean.
Final Thoughts
I hope this recipe inspires you to create your own little taste of Provence. The subtle floral aroma of lavender transforms these classic cookies into something truly special. Don’t be afraid to experiment with variations and find your perfect flavor combination. Whether you’re enjoying them with a cup of tea or sharing them with friends, these Lavender Madeleines are sure to bring a touch of elegance and delight to any occasion. So, go ahead, preheat your oven, and let the aroma of lavender fill your kitchen! I’m excited to hear your feedback and see your beautiful creations. Bon appétit!