
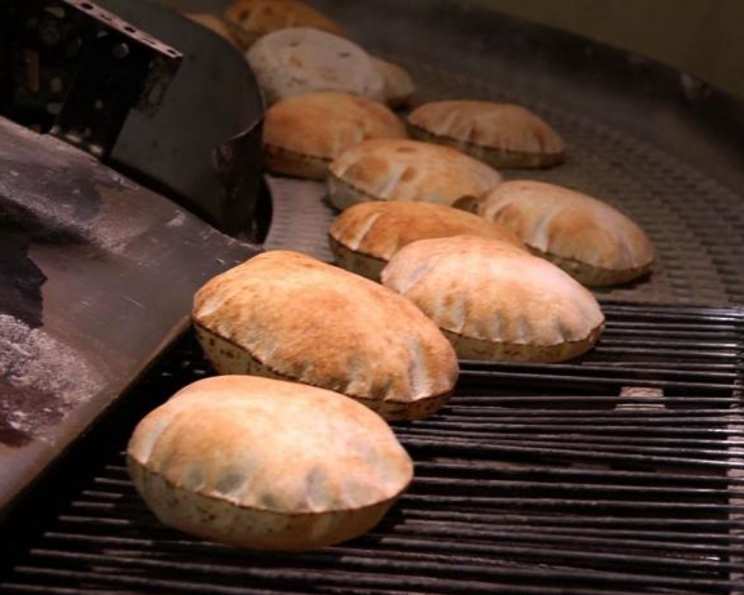
Homemade Lebanese Pita Bread: A Taste of Tradition
The scent of warm pita, fresh from the oven, always transports me back to my childhood summers. My grandmother, a master baker in her own right, would spend hours in her sun-drenched kitchen, the rhythmic thud of her rolling pin a comforting soundtrack to my days. She’d let me ‘help’, which mostly involved dusting my face with flour and sneaking bites of the dough, but even then, the magic of transforming simple ingredients into something so satisfying was clear. These weren’t just pockets of bread; they were vessels of love, meant to be shared with family and friends around a bustling table.
Recipe Overview
- Prep Time: 30 minutes
- Cook Time: 5 minutes
- Total Time: 2 hours 5 minutes
- Servings: 10-12 pitas
- Yield: 10-12 pitas
- Dietary Type: Vegan
Ingredients
- 3 cups all-purpose flour, plus more for dusting
- 1/4 ounce package active dry yeast
- 1 1/4 teaspoons kosher salt
- 1 teaspoon granulated sugar
- 1 1/2 cups lukewarm water
- Olive oil, for drizzling
Equipment Needed
- Large mixing bowl
- Measuring cups and spoons
- Clean kitchen towel
- Rolling pin
- Baking sheet or pizza stone
- Oven
Instructions
- In a large mixing bowl, sift together the flour, yeast, salt, and sugar. Sifting ensures that there are no lumps in the flour, creating a smoother dough.
- Make a well in the center of the dry ingredients. This allows the lukewarm water to be gradually incorporated.
- Pour in the lukewarm water. Begin to mix by hand on a lightly floured work surface until the dough begins to come together, forming a shaggy mass.
- Knead the dough vigorously for 10 to 15 minutes until it becomes smooth and elastic. A well-kneaded dough will bounce back slightly when you gently push into it. This develops the gluten, resulting in the signature pita texture.
- Drizzle the dough with olive oil. This prevents the dough from drying out and adds a subtle richness to the flavor.
- Place the dough in a warm spot, covered with a damp towel. The warmth encourages the yeast to activate, resulting in a faster rise. Let the dough rise until it has doubled in size. This process can take anywhere from 30 minutes to 1 1/2 hours, depending on the ambient temperature. A warmer environment will expedite the rising process.
- Preheat the oven to 500 degrees F (260 degrees C). Place a baking sheet or pizza stone in the oven to heat up as well. A hot baking surface is crucial for achieving the characteristic pita puff.
- Once the dough has doubled, gently punch it down to release the air. Turn the dough out onto a lightly floured surface.
- Divide the dough into 10 to 12 equal pieces.
- Roll each piece into a ball, then flatten each ball using a rolling pin to form a circle approximately 6-8 inches in diameter. Ensure the work surface is well-floured to prevent sticking. Aim for a uniform thickness, about 1/8 inch.
- Place 3 to 4 flattened pitas (depending on the size of your baking sheet) onto the preheated baking sheet in the oven.
- Immediately close the oven door to trap the steam.
- Bake until the pitas have puffed up dramatically, approximately 5 minutes. Keep a close eye on them, as they can burn quickly at this high temperature.
- Remove the baked pitas from the oven and serve immediately. The pitas will deflate slightly as they cool, creating the perfect pocket for fillings.
Expert Tips & Tricks
- Temperature is key: Ensure your water is lukewarm (around 105-115°F/40-46°C) to activate the yeast properly. Too hot, and you’ll kill the yeast; too cold, and it won’t activate.
- Kneading matters: Don’t skimp on the kneading! This is what develops the gluten and gives your pita its chewy texture. If you have a stand mixer, you can use the dough hook attachment for kneading.
- Hot, hot, hot: The high oven temperature is essential for creating that perfect pita puff. Make sure your oven is fully preheated before baking.
- Stream is your friend: The steam created by the high heat is what causes the pita to puff up. Closing the oven door quickly after placing the pitas on the baking sheet helps to trap that steam.
- Dough Consistency: If your dough seems too wet and sticky even after kneading, gradually add flour, 1 tablespoon at a time, until you achieve the correct consistency. Conversely, if it’s too dry, add a small amount of water, 1 teaspoon at a time.
Serving & Storage Suggestions
Serve your freshly baked pita bread warm, straight from the oven. They are fantastic for scooping up hummus, baba ghanoush, or labneh, and they also make excellent sandwiches or wraps. Leftover pita can be stored in an airtight container at room temperature for up to 2 days, in the refrigerator for up to a week, or in the freezer for up to 2 months. To reheat, lightly toast or warm in a dry skillet or microwave. For frozen pita, thaw completely before reheating.
Nutritional Information
| Nutrient | Amount per Serving | % Daily Value |
|---|---|---|
| Calories | 117 kcal | N/A |
| Calories from Fat | 3 g | 3% |
| Total Fat | 0.3 g | 0% |
| Saturated Fat | 0.1 g | 0% |
| Cholesterol | 0 mg | 0% |
| Sodium | 244.1 mg | 10% |
| Total Carbohydrate | 24.4 g | 8% |
| Dietary Fiber | 1 g | 4% |
| Sugars | 0.4 g | 1% |
| Protein | 3.5 g | 6% |
Note: Nutritional information is an estimate and can vary depending on specific ingredients and portion sizes.
Variations & Substitutions
- Whole Wheat Pita: Substitute up to half of the all-purpose flour with whole wheat flour for a nuttier flavor and added fiber.
- Gluten-Free Pita: Use a gluten-free all-purpose flour blend specifically designed for baking bread, and follow the package instructions for best results. You may need to add a binder like xanthan gum to help with the texture.
- Herb-Infused Pita: Add chopped fresh herbs, such as rosemary, thyme, or oregano, to the dough during the kneading process for a fragrant twist.
- Spiced Pita: Incorporate spices like cumin, coriander, or chili powder for a more complex flavor profile.
FAQs (Frequently Asked Questions)
Q: Why isn’t my pita puffing up in the oven?
A: The most common reason is that the oven isn’t hot enough, or the baking sheet wasn’t preheated. Make sure your oven is at 500°F and the baking sheet is scorching hot before adding the pita. Another reason could be that your dough wasn’t kneaded enough, so ensure it is smooth and elastic.
Q: Can I make the dough ahead of time?
A: Yes, you can prepare the dough up to 24 hours in advance. After the first rise, punch down the dough, wrap it tightly in plastic wrap, and refrigerate. When ready to bake, let the dough come to room temperature for about 30 minutes before rolling and baking.
Q: What can I do if my pita bread is too hard?
A: If your pita bread becomes hard, try lightly spritzing it with water and reheating it in a warm oven or microwave. The moisture will help to soften the bread. Also, avoid overbaking the pita in the first place.
Q: Can I use instant yeast instead of active dry yeast?
A: Yes, you can use instant yeast. You don’t need to activate it in water first. Just add it directly to the dry ingredients.
Q: How do I prevent the dough from sticking while rolling?
A: Generously flour your work surface and rolling pin. You may need to add more flour as you roll to prevent sticking. Also, make sure your dough isn’t too wet.
Final Thoughts
There’s something truly special about making your own pita bread. The satisfaction of transforming simple ingredients into warm, fluffy pockets of deliciousness is unparalleled. So, roll up your sleeves, dust off your rolling pin, and give this recipe a try. I am confident that you will enjoy the process and the incredible flavor of homemade Lebanese pita. Don’t hesitate to adjust the recipe to your preferences, share your creations with loved ones, and savor every warm, delightful bite. Consider serving it with a homemade hummus and a refreshing cucumber-tomato salad for a complete Mediterranean feast!