
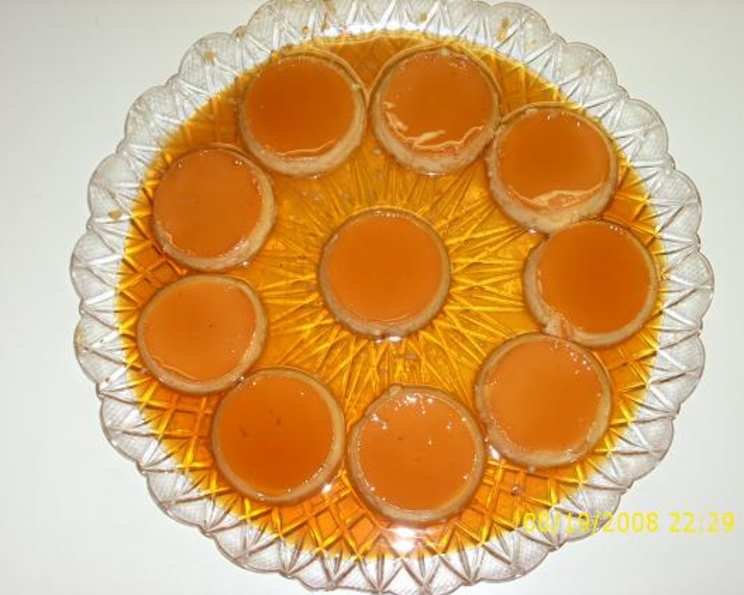
Leche Flan: A Silky Caramel Dream
The scent of caramel simmering on the stovetop always transports me back to my grandmother’s kitchen. I remember standing on a stool, mesmerized as she transformed humble sugar and water into liquid gold, the foundation for her legendary Leche Flan. Its velvety custard, infused with the delicate tang of lemon, was the highlight of every family gathering, a testament to her love and culinary artistry. This recipe, while inspired by many, aims to capture that same sense of comforting indulgence, a slice of pure happiness on a plate.
Recipe Overview
- Prep Time: 20 minutes
- Cook Time: 45-60 minutes
- Total Time: 1 hour 30 minutes (including chilling)
- Servings: Varies depending on pan size (approximately 8-12)
- Yield: Varies depending on pan size
- Dietary Type: Not specified (contains dairy and eggs)
Ingredients
For the Custard:
- 10 eggs
- 1 (14 ounce) can condensed milk
- 1 (12 fluid ounce) can evaporated milk
- ½ cup sugar
- 2 teaspoons lemon juice (or 1 tsp vanilla extract or almond extract)
For the Caramel:
- 1 cup sugar
- 1 ½ cups water
Equipment Needed
- Electric mixer
- Whisk
- Iron pan (or heavy-bottomed saucepan)
- Mesh strainer
- Mixing bowls
- Pans/moulds (loaf pans, muffin pans, 9-inch round pan, or any heat-safe containers)
- Large cookie sheet
- Aluminum foil
- Toothpick
Instructions
-
Preheat your oven to 350 degrees F (175 degrees C). Prepare your chosen pans or moulds.
-
In a large mixing bowl, beat the eggs with an electric mixer until light and frothy. Set aside and allow the bubbles to mostly dissipate. This step is crucial for a smooth custard texture. Letting the mixture sit allows the larger bubbles to settle, preventing a cakey result.
-
Add the condensed milk, evaporated milk, sugar, and lemon juice (or vanilla/almond extract) to the beaten eggs.
-
Gently stir the mixture with a whisk by hand, using a single direction to avoid creating more bubbles. Continue stirring until the sugar is completely dissolved. This step is critical; undissolved sugar can lead to a grainy texture.
-
Strain the mixture through a mesh strainer into another bowl. This step removes any lumpy egg whites or remaining solids, resulting in an ultra-smooth and creamy custard.
-
Prepare the Caramel: In an iron pan (or heavy-bottomed saucepan) over high heat, melt the 1 cup of sugar.
-
Continuously monitor the sugar as it melts. It will first turn clear, then amber, and eventually a dark golden brown.
-
When most of the sugar is burnt (dark golden brown in color), carefully add 1 cup of water to the caramelized sugar. Be cautious, as the mixture will bubble vigorously.
-
Stir constantly until all of the caramelized sugar is dissolved into the water. The resulting caramel will be slightly bitter and have a brittle consistency.
-
Add the remaining ½ cup water to the caramel and simmer for about 1 minute. This helps to smooth out the caramel and create a more fluid consistency.
-
Immediately pour the prepared caramel into the bottom of your pans/moulds, dividing it evenly. Work quickly, as the caramel will begin to set as it cools.
-
Gently pour the strained custard mixture over the caramel in the prepared pans/moulds. The custard layer should be no more than 1 inch thick to ensure even cooking. Thicker layers may result in an unevenly cooked center.
-
Cover the pans/moulds tightly with aluminum foil. This prevents a skin from forming on the surface of the custard during baking and helps to maintain a moist environment.
-
Prepare a water bath: Place the pans/moulds in a large cookie sheet and add about an inch of water to the sheet. The water bath helps to cook the custard gently and evenly, preventing it from curdling.
-
Bake in the preheated oven for 45-60 minutes, depending on the size of your pans/moulds. Check the water level in the water bath every 20 minutes and add about ½ – 1 cup of water as needed to maintain the level.
-
Check for doneness: Insert a toothpick into the center of the custard. If the toothpick comes out clean (or when the center is firm to the touch), the custard is cooked.
-
Cool the Leche Flan completely at room temperature before chilling in the refrigerator.
-
Chill the Leche Flan for at least 2 hours, or preferably overnight, to allow it to fully set and develop its flavor.
-
To unmold, run a thin knife around the edge of each pan/mould to loosen the custard.
-
Place a serving dish over the pan/mould and carefully flip the Leche Flan onto the dish, allowing the caramel to drizzle over the custard.
-
Serve chilled and enjoy!
Expert Tips & Tricks
-
Bubble Control: The key to a smooth Leche Flan is minimizing bubbles. Gentle whisking and straining are crucial. If you see bubbles on the surface after pouring the custard into the molds, use a kitchen torch to gently pop them.
-
Caramel Consistency: The caramel should be dark amber, almost burnt, for the best flavor. Don’t be afraid to let it get dark! Adding water to the deeply caramelized sugar creates a rich, slightly bitter counterpoint to the sweetness of the custard.
-
Water Bath Temperature: Ensure the water in the water bath is warm, not boiling. Boiling water can cause the custard to cook too quickly and unevenly.
-
Extracts: While lemon juice adds a lovely tang, experimenting with different extracts like vanilla, almond, or even orange can create unique flavor profiles.
Serving & Storage Suggestions
Serve Leche Flan chilled, allowing the caramel to cascade down the sides. A sprig of mint or a few fresh berries can add a touch of elegance to the presentation.
Leftover Leche Flan should be stored in an airtight container in the refrigerator. It will keep for up to 3-4 days. It’s best not to freeze Leche Flan, as freezing can alter the texture of the custard.
Nutritional Information
| Nutrient | Amount per Serving (estimated) | % Daily Value (estimated) |
|---|---|---|
| Calories | 250-350 kcal | 13-18% |
| Total Fat | 10-15g | 15-23% |
| Saturated Fat | 5-8g | 25-40% |
| Cholesterol | 150-200mg | 50-67% |
| Sodium | 80-120mg | 3-5% |
| Total Carbohydrate | 30-40g | 10-13% |
| Sugars | 25-35g | N/A |
| Protein | 8-12g | 16-24% |
Nutritional information is an estimate and may vary based on specific ingredients and serving size.
Variations & Substitutions
- Creamier Flan: Adding 2-4 egg yolks to the custard mixture will result in a richer, creamier texture.
- Coconut Leche Flan: Substitute the evaporated milk with coconut milk for a tropical twist.
- Citrus Zest: Enhance the lemon flavor by adding grated lemon zest to the custard mixture.
- Coffee Infusion: Add a tablespoon of instant coffee to the custard mixture for a mocha-flavored flan.
- Dulce de Leche: Use dulce de leche instead of caramel for an even sweeter treat.
FAQs (Frequently Asked Questions)
Q: Why is my Leche Flan cakey and not smooth?
A: The most common reason for a cakey Leche Flan is over-mixing the custard, which introduces too much air. Gentle whisking and straining are essential.
Q: How do I prevent my caramel from burning?
A: Keep a close eye on the sugar as it melts and remove it from the heat as soon as it reaches a dark amber color. Adding water immediately will stop the cooking process.
Q: Can I make Leche Flan without a water bath?
A: While a water bath is highly recommended for a smooth, even texture, you can bake it without one. Reduce the oven temperature by 25 degrees and check for doneness frequently.
Q: How long does Leche Flan need to chill?
A: Ideally, Leche Flan should chill for at least 2 hours, or preferably overnight, to allow it to fully set and develop its flavor.
Q: Can I use different types of pans/moulds?
A: Yes, you can use any heat-safe containers you prefer, such as ramekins, muffin tins, or loaf pans. Adjust the baking time accordingly, checking for doneness frequently.
Final Thoughts
Now, armed with this recipe and my grandmother’s secret ingredient (a whole lot of love!), I encourage you to embark on your own Leche Flan adventure. Don’t be intimidated by the steps; each one is designed to bring you closer to that perfect, silky bite. Share your creations with loved ones, experiment with different flavors, and most importantly, enjoy the process. And if you happen to discover any new twists or techniques along the way, please share them with me. Happy cooking!