
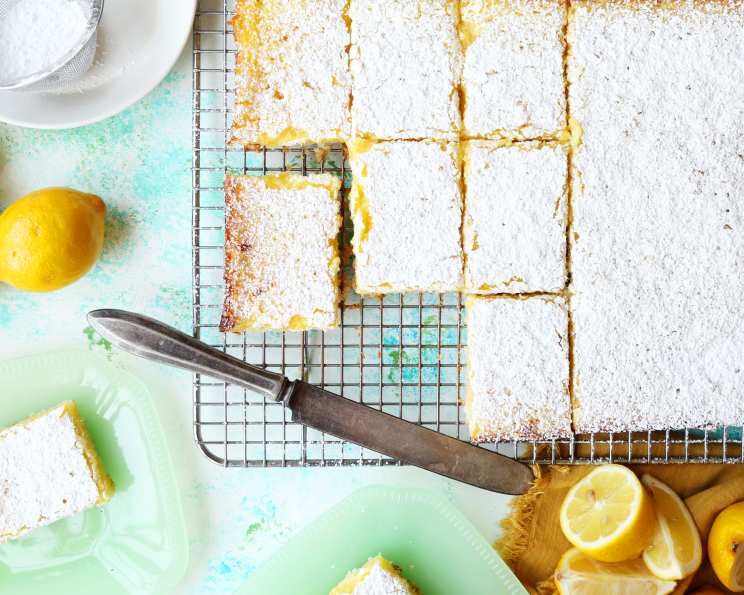
Luscious Lemon Bars: A Burst of Sunshine in Every Bite
There’s something inherently comforting about lemon bars. For me, they instantly transport me back to my grandmother’s sun-drenched kitchen, where the air always smelled of citrus and freshly baked goods. I remember watching her effortlessly whip up a batch, the bright yellow filling a promise of tangy sweetness to come. The first bite, with its crumbly crust and zesty, creamy center, was pure bliss – a taste of sunshine on a cloudy day.
Recipe Overview
- Prep Time: 20 minutes
- Cook Time: 50 minutes
- Total Time: 1 hour 10 minutes
- Yields: 12 bars
- Serves: 8-12
Ingredients
For the Crust:
- 2 cups sifted flour
- 1/2 cup powdered sugar
- 1 cup butter, cold and cubed
For the Filling:
- 4 large eggs, beaten
- 2 cups white sugar
- 1/3 cup lemon juice, freshly squeezed
- 1/4 cup flour
- 1/2 teaspoon baking powder
- 1/2 teaspoon fresh lemon rind (optional, but highly recommended!)
Equipment Needed
- 13 x 9 x 2-inch baking pan
- Mixing bowls
- Electric mixer or whisk
- Sifter
- Measuring cups and spoons
- Parchment paper (optional, for easy removal)
Instructions
-
Preheat your oven to 350°F (175°C).
-
Prepare the crust: In a large mixing bowl, combine the sifted flour and powdered sugar.
-
Cut in the butter: Add the cold, cubed butter to the flour mixture. Using your fingertips or a pastry blender, work the butter into the flour and sugar until the mixture resembles coarse crumbs. The goal is to avoid overworking the gluten, so handle it gently.
-
Form the dough: Mix with your hands until the mixture clings together, forming a dough. It should be firm but not dry. If it’s too dry, add a teaspoon of ice water at a time until it comes together.
-
Press the crust: Press the dough evenly into the bottom of the 13 x 9 x 2-inch baking pan. You can use your fingers, the back of a spoon, or a measuring cup to ensure it’s compacted and even.
-
Bake the crust: Bake the crust in the preheated oven for 20-25 minutes, or until it is lightly browned. Watch it carefully, as ovens can vary. You want it golden, but not burnt.
-
Cool the crust: Remove the crust from the oven and let it cool completely. This is crucial for preventing the filling from seeping into the crust and creating a soggy bottom.
-
Prepare the filling: While the crust is cooling, prepare the filling. In a large mixing bowl, beat together the eggs, white sugar, and lemon juice until well combined. An electric mixer makes this easier, but a whisk works just as well.
-
Sift dry ingredients: In a separate bowl, sift together the flour and baking powder. This helps to ensure a smooth, lump-free filling.
-
Combine wet and dry ingredients: Gradually stir the sifted flour mixture into the egg mixture, mixing until just combined. Be careful not to overmix, as this can develop the gluten and make the filling tough.
-
Add lemon rind (optional): If using, stir in the fresh lemon rind. The lemon rind adds a bright, fragrant boost to the flavor.
-
Pour filling over crust: Once the crust is completely cooled, pour the lemon filling evenly over the baked crust.
-
Bake the bars: Return the pan to the oven and bake for 25 minutes, or until the filling is set. The filling should be firm to the touch and slightly golden on top. A slight jiggle in the center is okay, as it will continue to set as it cools.
-
Cool completely: Remove the bars from the oven and let them cool completely in the pan before cutting. This is important for both texture and ease of cutting.
-
Dust with powdered sugar: Once the bars are cooled, sprinkle them generously with powdered sugar. This adds a touch of sweetness and a beautiful finishing touch.
-
Cut into bars: Cut the bars into 12 squares or rectangles using a sharp knife. For clean cuts, you can wipe the knife clean between each cut.
Expert Tips & Tricks
- Zest for Maximum Flavor: Don’t skip the lemon zest! It contains essential oils that pack a huge lemony punch. Be sure to zest before you juice the lemons.
- Room Temperature Eggs: Using room temperature eggs in the filling helps them incorporate more easily and creates a smoother texture.
- Prevent a Soggy Crust: Cooling the crust completely before adding the filling is essential to preventing a soggy bottom. You can even chill the crust in the refrigerator for 30 minutes to further firm it up.
- Even Baking: To ensure even baking, rotate the pan halfway through the baking time.
- Clean Cuts: For perfectly clean cuts, chill the bars in the refrigerator for 30 minutes before cutting.
Serving & Storage Suggestions
Serve the lemon bars chilled or at room temperature. They are delicious on their own, or paired with a scoop of vanilla ice cream or a dollop of whipped cream.
To store, keep the bars in an airtight container at room temperature for up to 2 days, or in the refrigerator for up to 5 days. For longer storage, you can freeze the bars for up to 2 months. To freeze, cut the bars into individual portions and wrap them tightly in plastic wrap, then place them in a freezer-safe container. Thaw in the refrigerator before serving.
Nutritional Information
| Nutrient | Amount per Serving | % Daily Value |
|---|---|---|
| Calories | 592.2 kcal | N/A |
| Calories from Fat | 231 g | 39% |
| Total Fat | 25.8 g | 39% |
| Saturated Fat | 15.4 g | 77% |
| Cholesterol | 154 mg | 51% |
| Sodium | 262.2 mg | 10% |
| Total Carbohydrate | 85.3 g | 28% |
| Dietary Fiber | 1 g | 3% |
| Sugars | 57.7 g | N/A |
| Protein | 7 g | 14% |
Variations & Substitutions
- Gluten-Free Lemon Bars: Substitute the all-purpose flour in the crust with a gluten-free flour blend.
- Lime Bars: Replace the lemon juice and zest with lime juice and zest for a tangy twist.
- Orange Bars: Use orange juice and zest instead of lemon for a sweeter, more floral flavor.
- Coconut Lemon Bars: Add 1/2 cup of shredded coconut to the crust for a tropical twist.
- Vegan Lemon Bars: There are many online recipes for vegan lemon bars that substitute eggs and butter with plant-based alternatives.
FAQs (Frequently Asked Questions)
Q: Why is my lemon bar filling runny?
A: This is often caused by not baking the bars long enough, or by overmixing the filling. Be sure to bake the bars until the filling is set and only slightly jiggly, and avoid overmixing.
Q: Can I use bottled lemon juice?
A: Freshly squeezed lemon juice is always recommended for the best flavor, but bottled lemon juice can be used in a pinch.
Q: How do I prevent the crust from sticking to the pan?
A: Grease the baking pan well with butter or cooking spray, or line the pan with parchment paper.
Q: My crust is too hard. What did I do wrong?
A: Overworking the dough can lead to a tough crust. Be gentle when mixing the crust ingredients and avoid overbaking.
Q: Can I make these bars ahead of time?
A: Yes, lemon bars can be made a day or two in advance. Store them in the refrigerator until ready to serve.
Final Thoughts
These Luscious Lemon Bars are a delightful treat that’s perfect for any occasion. Their bright, tangy flavor and tender texture are sure to please everyone. Don’t be afraid to experiment with variations and substitutions to create your own signature lemon bar. And most importantly, enjoy the process and the delicious results!