
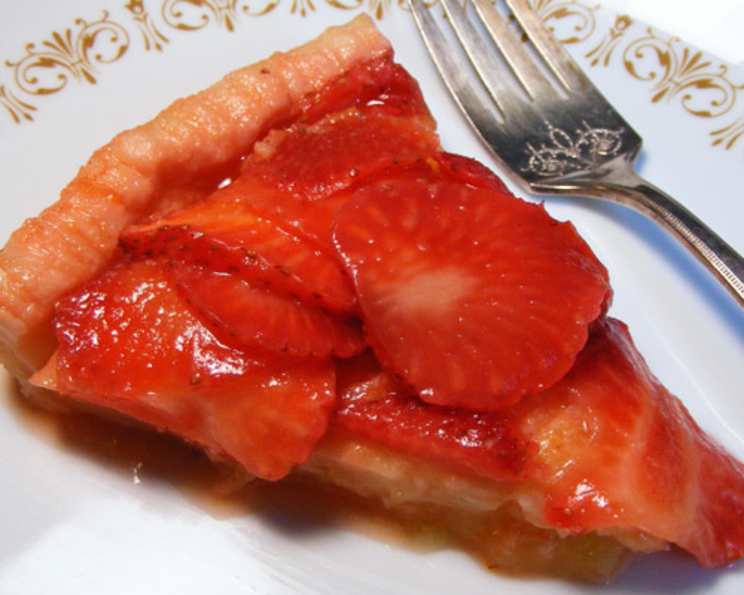
Luscious Lemon Fruit Tart: A Burst of Sunshine
The first time I tasted a lemon fruit tart was at a small patisserie in Paris. The bright, tangy filling, the buttery crust, and the jewel-toned fruit arranged with artistic flair—it was pure magic. I remember thinking, “This is what sunshine tastes like!” That single bite ignited a passion for creating desserts that are both beautiful and bursting with flavor, and this recipe is my homage to that perfect Parisian tart.
Recipe Overview
- Prep Time: 30 minutes
- Cook Time: 30 minutes
- Total Time: 1 hour
- Servings: 12
- Yield: 1 tart
- Dietary Type: Vegetarian
Ingredients
- For the Crust:
- 1 cup pastry dough (use your favorite recipe) or 1 pie crust (use your favorite recipe)
- For the Filling:
- 2 large eggs
- ¾ cup sugar
- 6 tablespoons fresh lemon juice, strained
- 4 tablespoons unsalted butter, melted
- 2 teaspoons lemon zest
- For the Glaze & Topping:
- 3 tablespoons apricot jam, strained
- 2 cups fresh fruit, sliced (such as blueberries, strawberries, raspberries, peaches, or a combination)
Equipment Needed
- 9-inch tart (quiche) pan with removable bottom
- Rolling pin (if making crust from scratch)
- Small bowl
- Whisk
- Cooling rack
- Large bowl
Instructions
- Prepare the Oven and Tart Pan: Position rack in lower third of oven, preheat to 375 degrees F (190 degrees C).
- Prepare the Crust: Roll pastry dough to fit a 9-inch tart (quiche) pan with removable bottom. Press the dough into the pan and trim any overhang. A fork can be used to dock the crust, preventing it from puffing up during baking.
- Bake the Crust: Bake in preheated oven for 10-12 minutes, or until the surface of the dough no longer looks raw or shiny. This par-baking step ensures a crisp, sturdy crust that won’t get soggy from the filling.
- Cool the Crust: Remove from oven and place on a cooling rack while preparing the filling.
- Whisk the Eggs: Place eggs in a small bowl and whisk to combine thoroughly.
- Add Sugar: Pour in the sugar and whisk until the mixture is smooth and slightly thickened. This step helps to dissolve the sugar and create a smooth filling.
- Incorporate Lemon Juice: Add the strained lemon juice and whisk again until well combined. Straining the juice removes any pulp or seeds, resulting in a silky filling.
- Add Melted Butter and Zest: Add the cooled melted butter and lemon zest, and blend well to combine all ingredients. Make sure the butter is cooled, or you risk scrambling the eggs. The lemon zest intensifies the lemon flavor and adds a delightful aroma.
- Pour Filling into Crust: Pour the lemon filling into the partially baked pastry shell, ensuring it’s evenly distributed.
- Bake the Tart: Return the tart to the 375-degree F (190 degrees C) oven and bake for 16-18 minutes longer, or until the crust is golden and the filling is set. The filling should bubble gently towards the end of baking, indicating it’s almost done.
- Cool the Tart: Remove the tart from the oven and cool on a rack for 10 minutes.
- Release and Cool Completely: Carefully release the metal rim of the tart pan and finish cooling the tart to room temperature on the cooling rack. Cooling is essential for the filling to set properly.
- Prepare the Glaze: Heat the apricot jam in a small saucepan or microwave until just melted but not bubbly hot. Straining the jam will ensure the glaze is smooth and glossy.
- Glaze the Fruit: Pour the melted apricot jam into a large bowl and gently toss with the fresh sliced fruit. This glaze adds shine and enhances the fruit’s natural sweetness.
- Arrange Fruit on Tart: Spread the glazed fruit evenly over the cooled lemon tart. Arrange the fruit attractively, considering color and texture.
- Serve: Best served the same day to enjoy the crust’s crispness and the fruit’s freshness.
Expert Tips & Tricks
- Blind Baking: For an extra-crisp crust, blind bake it completely before adding the filling. This involves lining the crust with parchment paper, filling it with pie weights or dried beans, and baking until golden brown. Remove the weights and parchment paper for the last few minutes of baking.
- Lemon Zest: When zesting lemons, be sure to only zest the yellow part of the peel, avoiding the white pith, which can be bitter.
- Filling Consistency: The lemon filling should be slightly wobbly when removed from the oven. It will firm up as it cools.
- Fruit Arrangement: Get creative with your fruit arrangement! Consider arranging the fruit in concentric circles, rows, or even a floral pattern.
- Make-Ahead Tip: The crust can be baked a day in advance and stored at room temperature in an airtight container.
Serving & Storage Suggestions
This luscious lemon fruit tart is best served at room temperature to allow the flavors to fully develop. It’s a perfect dessert for a spring brunch, summer picnic, or any special occasion. For an extra touch of elegance, serve with a dollop of whipped cream or a scoop of vanilla ice cream.
Leftovers should be stored in the refrigerator in an airtight container. The tart will last for up to 2-3 days, but the crust may soften over time. While freezing is not recommended, you can refrigerate the unfilled baked tart shell for up to 3 days.
Nutritional Information
Note: Nutritional information is an estimate and may vary based on specific ingredients and portion sizes.
| Nutrient | Amount per Serving | % Daily Value |
|---|---|---|
| Calories | 250 kcal | 13% |
| Total Fat | 12g | 18% |
| Saturated Fat | 7g | 35% |
| Cholesterol | 75mg | 25% |
| Sodium | 50mg | 2% |
| Total Carbohydrate | 35g | 12% |
| Dietary Fiber | 1g | 4% |
| Sugars | 25g | – |
| Protein | 3g | 6% |
Variations & Substitutions
- Gluten-Free Crust: Use a gluten-free pastry dough recipe or a store-bought gluten-free pie crust.
- Lime Tart: Substitute lime juice and lime zest for the lemon juice and zest.
- Other Fruits: Get creative with your fruit toppings! Try kiwi, mango, or star fruit for a tropical twist.
- Berry Medley: Use a combination of blueberries, raspberries, blackberries, and strawberries for a vibrant and flavorful tart.
- Dairy-Free: For a dairy-free version, use a vegan butter substitute in the crust and filling.
FAQs (Frequently Asked Questions)
Q: Can I use store-bought pie crust for this recipe?
A: Absolutely! Store-bought pie crust can be a convenient time-saver. Just make sure to use a good-quality crust for the best results.
Q: How do I prevent the crust from shrinking during baking?
A: Docking the crust with a fork before baking and using pie weights or dried beans during the par-baking process can help prevent shrinking.
Q: Can I make the filling ahead of time?
A: It’s best to make the filling just before baking to ensure the freshest flavor and best texture.
Q: How do I know when the filling is done baking?
A: The filling should be set around the edges but still slightly wobbly in the center. It will continue to set as it cools.
Q: What can I use instead of apricot jam for the glaze?
A: Other fruit jams like peach, raspberry, or even orange marmalade can be used as a substitute.
Final Thoughts
I hope this recipe inspires you to create your own stunning lemon fruit tart. Whether you stick to the classic recipe or experiment with different fruits and variations, I’m confident that you’ll create a dessert that is as beautiful as it is delicious. Don’t be afraid to get creative and have fun in the kitchen! I’d love to hear how your tart turns out, so please share your feedback and photos. Consider pairing this tart with a light and refreshing glass of Prosecco or a cup of Earl Grey tea for a truly delightful experience. Happy baking!