
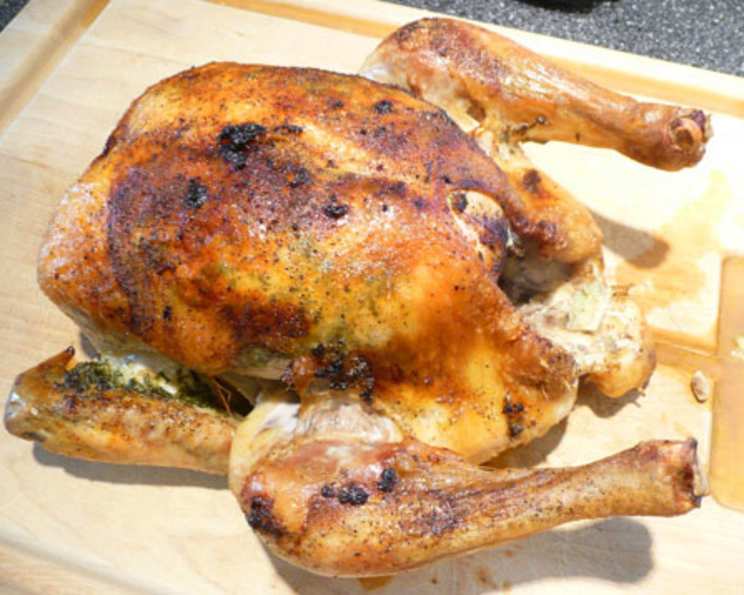
Lemon & Thyme Butter-Basted Roast Chicken (Gluten-Free)
The scent of roast chicken is, for me, the purest form of culinary nostalgia. I remember Sunday afternoons spent perched on a stool in my grandmother’s kitchen, watching her meticulously prepare the bird. The golden skin, the savory aroma of herbs, and the promise of a perfectly juicy interior – it was a symphony of comfort and love. This Lemon & Thyme Butter-Basted Roast Chicken is my attempt to recreate that magic, with a bright, herbaceous twist that elevates it beyond the ordinary. It’s a dish that’s both simple enough for a weeknight meal and impressive enough for a special occasion.
Recipe Overview
- Prep Time: 15 minutes
- Cook Time: 1 hour 30 minutes
- Total Time: 1 hour 45 minutes
- Servings: 4
- Yield: 1 roast chicken
- Dietary Type: Gluten-Free
Ingredients
- 50g butter, softened
- 1 bunch fresh thyme or 1 bunch lemon thyme, leaves picked, stalks reserved, plus extra to serve
- 4 garlic cloves, 1 mashed, the other 3 left whole but squashed
- 2 lemons, halved
- 1 chicken, about 1.5kg (number 15 chicken)
- 2 carrots, roughly chopped
- 1 onion, roughly chopped
- 2 bay leaves
Equipment Needed
- Small bowl
- Roasting tin
Instructions
-
Preheat your oven to 200°C/180°C fan/gas mark 6. Make sure your oven rack is positioned in the middle of the oven.
-
In a small bowl, prepare the herb butter. Mash the softened butter with one-third of the thyme leaves, the mashed garlic, and the juice of half a lemon. Season generously with salt and pepper. Set the bowl aside.
-
Gently loosen the chicken skin from the breast meat with your hand, creating a pocket between the skin and the breast. This is where you’ll tuck the flavorful herb butter.
-
Push most of the butter mixture into the space created under the chicken skin, spreading it evenly over the breast. Rub the remaining butter all over the outside of the chicken. Ensure the entire surface is coated for optimal flavor and browning.
-
Stuff the chicken cavity with the remaining lemon halves, the remaining thyme leaves and stalks, and the squashed garlic cloves. This will infuse the chicken with aromatic steam as it roasts.
-
Scatter the chopped carrots, onion, and bay leaves over the base of a small roasting tin. These vegetables will act as a natural roasting rack, preventing the chicken from sticking and adding depth to the pan juices.
-
Sit the chicken on top of the vegetables in the roasting tin, breast-side up.
-
Roast on the middle shelf of the preheated oven for 1 hour 30 minutes. After about 40 minutes, baste the chicken with the buttery juices that have accumulated in the bottom of the roasting tin. Basting regularly ensures a moist and flavorful bird.
-
To check for doneness, pierce the thickest part of the chicken thigh with a sharp knife or skewer. If the juices run clear, the chicken is cooked through. Alternatively, use a meat thermometer to ensure the internal temperature reaches 74°C (165°F).
-
When the chicken is dark golden with crispy skin and the juices run clear, remove it from the oven. Let it rest in the tin for 5 minutes before transferring it to a serving platter.
-
Use a pair of tongs to pull the lemons, garlic, and thyme out of the chicken cavity and into the roasting tin. These aromatics have imparted their flavor and should be removed before serving.
-
Lift the chicken up, allowing any accumulated juices to drip back into the roasting tin.
-
Transfer the chicken to a serving platter and let it rest for at least another 15 minutes before carving. This allows the juices to redistribute, resulting in a more tender and flavorful chicken.
-
Optional: You can use the pan juices to make a delicious gravy, if desired. Simply strain the juices, skim off any excess fat, and thicken with a slurry of cornstarch or flour.
Expert Tips & Tricks
-
Achieving Crispy Skin: For extra crispy skin, pat the chicken dry with paper towels before applying the butter mixture. This removes excess moisture, allowing the skin to crisp up beautifully in the oven.
-
Preventing Dryness: Basting is crucial for preventing the chicken from drying out. If you notice the chicken browning too quickly, tent it loosely with foil to prevent burning.
-
Make-Ahead Prep: The herb butter can be made up to 2 days in advance and stored in the refrigerator. This saves time on the day you plan to roast the chicken.
-
Adjusting Cooking Time: Cooking times may vary depending on your oven. Always use a meat thermometer to ensure the chicken is cooked to a safe internal temperature.
Serving & Storage Suggestions
Serve the Lemon & Thyme Butter-Basted Roast Chicken whole on a platter garnished with fresh thyme sprigs and lemon wedges. Carve it at the table for a dramatic presentation. Pair it with roasted vegetables, mashed potatoes, or a simple green salad for a complete meal.
Leftover roast chicken can be stored in an airtight container in the refrigerator for up to 3-4 days. For longer storage, shred the chicken and freeze it for up to 2-3 months. Reheat leftovers in the oven or microwave until heated through.
Do not leave cooked chicken at room temperature for more than 2 hours.
Nutritional Information
| Nutrient | Amount per Serving | % Daily Value |
|---|---|---|
| Calories | 369 kcal | N/A |
| Fat | 27.4g | 42% |
| Saturated Fat | 11.3g | 56% |
| Cholesterol | 111.8mg | 37% |
| Sodium | 191.3mg | 7% |
| Carbohydrate | 9.2g | 3% |
| Fiber | 2.2g | 8% |
| Sugars | 3.4g | N/A |
| Protein | 22.3g | 44% |
Note: Nutritional information is an estimate and may vary based on specific ingredients and portion sizes.
Variations & Substitutions
- Herb Variations: Experiment with different herbs, such as rosemary, sage, or oregano, to create your own signature flavor profile.
- Citrus Variations: Substitute oranges or grapefruits for the lemons for a different citrusy twist.
- Spicy Kick: Add a pinch of red pepper flakes to the herb butter for a touch of heat.
- Wine Infusion: Add a splash of white wine to the roasting pan to create a richer, more flavorful gravy.
FAQs (Frequently Asked Questions)
Q: How do I prevent the chicken breast from drying out?
A: Basting the chicken regularly with the pan juices is essential for keeping the breast meat moist. You can also tent the chicken with foil if it starts to brown too quickly.
Q: Can I use dried thyme instead of fresh thyme?
A: While fresh thyme provides the best flavor, you can substitute dried thyme in a pinch. Use about 1 teaspoon of dried thyme for every tablespoon of fresh thyme.
Q: How do I know when the chicken is fully cooked?
A: The best way to ensure the chicken is fully cooked is to use a meat thermometer. Insert the thermometer into the thickest part of the thigh, avoiding the bone. The internal temperature should reach 74°C (165°F).
Q: Can I make gravy from the pan juices?
A: Absolutely! The pan juices are full of flavor and make a delicious gravy. Simply strain the juices, skim off any excess fat, and thicken with a slurry of cornstarch or flour.
Q: Can I prepare the chicken ahead of time?
A: You can prepare the herb butter up to 2 days in advance and store it in the refrigerator. You can also stuff the chicken with the aromatics and vegetables a few hours before roasting. However, it’s best to roast the chicken fresh for optimal results.
Final Thoughts
I hope this Lemon & Thyme Butter-Basted Roast Chicken becomes a staple in your kitchen, bringing warmth and flavor to your table. It’s a dish that’s both comforting and elegant, perfect for sharing with loved ones. Don’t be afraid to experiment with different herbs and spices to create your own unique twist. And most importantly, enjoy the process of cooking and savoring this delicious meal. Consider serving it with a crisp Sauvignon Blanc or a light-bodied Pinot Noir to complement the bright flavors of the chicken. Now, go forth and roast!