
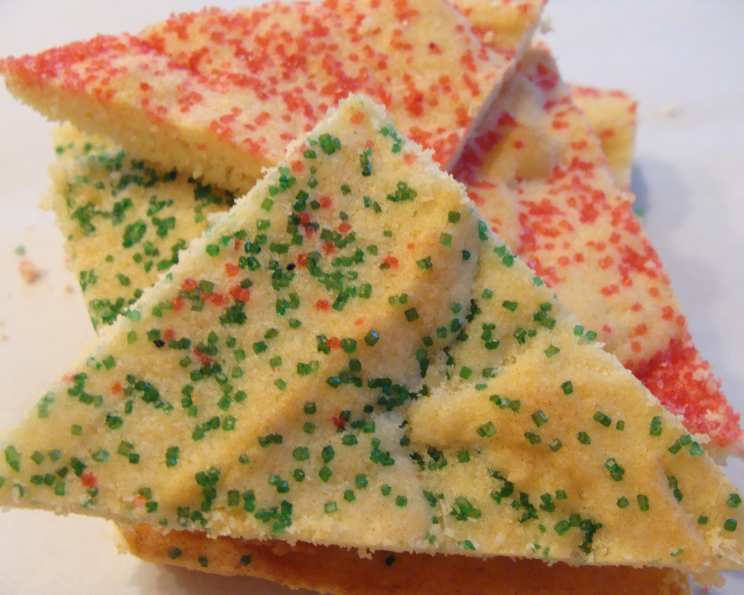
Libby’s So Easy Sugar Cookies: A Slice of Nostalgia
The scent of almond extract always transports me back to my grandmother’s kitchen. It was a haven of warmth and love, and during the holidays, the aroma was amplified tenfold by the countless cookies she baked. These weren’t fancy, intricately decorated masterpieces, but simple, honest sugar cookies, the kind that practically melted in your mouth. They were made with love, shared with everyone, and always, always, disappeared in minutes. And now, years later, making these cookies brings her right back to my heart.
Recipe Overview
- Prep Time: 10 minutes
- Cook Time: 10-12 minutes
- Total Time: 20-22 minutes
- Servings: Varies (approximately 24 squares)
- Yield: 1 (15×10 inch) pan
- Dietary Type: Vegetarian
Ingredients
- ¾ cup sugar
- ⅓ cup butter, softened
- ⅓ cup oil
- 1 tablespoon milk
- 1-2 teaspoons almond extract or 1-2 teaspoons vanilla extract
- 1 egg
- 1 ½ cups flour
- 1 ½ teaspoons baking powder
- ¼ teaspoon salt
- 1 tablespoon sugar (colored sugars optional)
Equipment Needed
- Large bowl
- Mixer (handheld or stand)
- 15×10 inch baking pan
- Measuring cups and spoons
Instructions
-
Begin by preheating your oven to 375ºF (190°C). This ensures even baking and prevents the cookies from spreading too thin.
-
In a large bowl, cream together ¾ cup sugar, ⅓ cup softened butter, ⅓ cup oil, 1 tablespoon milk, and 1-2 teaspoons of either almond extract or vanilla extract (depending on your preference) along with 1 egg. Beat the mixture until it becomes light and fluffy. This step is crucial for incorporating air into the dough, resulting in a tender cookie. Make sure your butter is softened but not melted; it should yield to gentle pressure.
-
In the same bowl, gradually stir in 1 ½ cups flour, 1 ½ teaspoons baking powder, and ¼ teaspoon salt. Blend everything together thoroughly until a smooth dough forms. Be careful not to overmix, as this can develop the gluten in the flour, leading to tough cookies.
-
Take the prepared dough and spread it evenly in an ungreased 15×10 inch baking pan. Using your fingers or a spatula, ensure the dough reaches all corners of the pan for uniform thickness.
-
Sprinkle 1 tablespoon of sugar evenly over the top of the dough. For a festive touch, consider using colored sugars.
-
Bake in the preheated oven for 10 to 12 minutes, or until the edges are lightly golden brown. Keep a close eye on them during the last few minutes of baking to prevent burning. A toothpick inserted into the center should come out clean.
-
Once baked, remove the pan from the oven and let the cookies cool for 5 minutes before cutting them into squares. This allows them to firm up slightly, making them easier to handle.
Expert Tips & Tricks
- Room Temperature Matters: Ensure your butter and egg are at room temperature. This helps them emulsify properly with the sugar and oil, creating a smoother batter and a more tender cookie.
- Extract Power: Don’t be afraid to experiment with extracts! Almond extract provides a distinct, slightly nutty flavor, while vanilla is a classic choice. You can also try lemon, orange, or even a hint of maple.
- Even Baking: To ensure even baking, rotate the pan halfway through the baking time. This helps to compensate for any hot spots in your oven.
- Cutting Perfection: For clean, even squares, use a sharp knife or pizza cutter. You can also use cookie cutters to create fun shapes if desired.
- Dough Consistency: If the dough seems too sticky to spread, lightly flour your hands or the spatula to prevent it from sticking.
Serving & Storage Suggestions
Serve these sugar cookies warm or at room temperature with a glass of cold milk or a cup of hot coffee or tea. They’re perfect for snacking, desserts, or as a sweet treat for any occasion.
Store leftover cookies in an airtight container at room temperature for up to 3-4 days. For longer storage, you can freeze them for up to 2 months. Thaw them at room temperature before serving. To prevent them from sticking together when freezing, place a sheet of parchment paper between layers.
Nutritional Information
(Estimated, based on a serving size of one square)
| Nutrient | Amount per Serving | % Daily Value |
|---|---|---|
| Calories | 259 kcal | N/A |
| Total Fat | 14.1 g | 21% |
| Saturated Fat | 5 g | 25% |
| Cholesterol | 35.1 mg | 11% |
| Sodium | 175 mg | 7% |
| Total Carbohydrate | 30.9 g | 10% |
| Dietary Fiber | 0.5 g | 2% |
| Sugars | 16.4 g | N/A |
| Protein | 2.7 g | 5% |
Variations & Substitutions
- Gluten-Free: Substitute the all-purpose flour with a gluten-free blend. Be sure to choose a blend that contains xanthan gum for binding.
- Dairy-Free: Replace the butter with a dairy-free butter alternative or margarine. Ensure it’s softened for proper creaming. Substitute the milk with almond milk, soy milk, or oat milk.
- Spice It Up: Add a dash of cinnamon, nutmeg, or cardamom to the dough for a warm, spiced flavor.
- Citrus Zest: Incorporate the zest of a lemon, orange, or lime for a refreshing citrusy twist.
- Chocolate Chip: Fold in ½ cup of mini chocolate chips into the dough before spreading it in the pan.
- Icing: After the cookies have cooled completely, frost them with your favorite icing and decorate with sprinkles or other toppings.
FAQs (Frequently Asked Questions)
Q: Can I use shortening instead of butter and oil?
A: Yes, you can substitute shortening for both the butter and oil. Use 2/3 cup of shortening in place of the 1/3 cup butter and 1/3 cup oil. The texture may be slightly different, but the taste will be similar.
Q: My dough is too sticky to spread. What should I do?
A: Lightly flour your hands or the spatula to prevent the dough from sticking. You can also chill the dough in the refrigerator for about 15-20 minutes to make it easier to handle.
Q: Can I make the dough ahead of time?
A: Yes, you can prepare the dough ahead of time and store it in the refrigerator for up to 24 hours. Let it come to room temperature slightly before spreading it in the pan.
Q: How do I prevent the cookies from burning?
A: Keep a close eye on the cookies during the last few minutes of baking. If they start to brown too quickly, lower the oven temperature slightly or cover the pan loosely with foil.
Q: Can I freeze these cookies after they’re baked?
A: Yes, you can freeze the baked cookies for up to 2 months. Let them cool completely before freezing and store them in an airtight container or freezer bag.
Final Thoughts
These simple sugar cookies are more than just a recipe; they’re a connection to the past, a taste of home, and a reminder of the joy of sharing food with loved ones. I encourage you to try this recipe and create your own memories. Don’t be afraid to experiment with variations and make them your own. Pair them with a scoop of vanilla ice cream or a steaming mug of hot chocolate for an extra special treat. And most importantly, share them with someone you care about. Happy baking!