
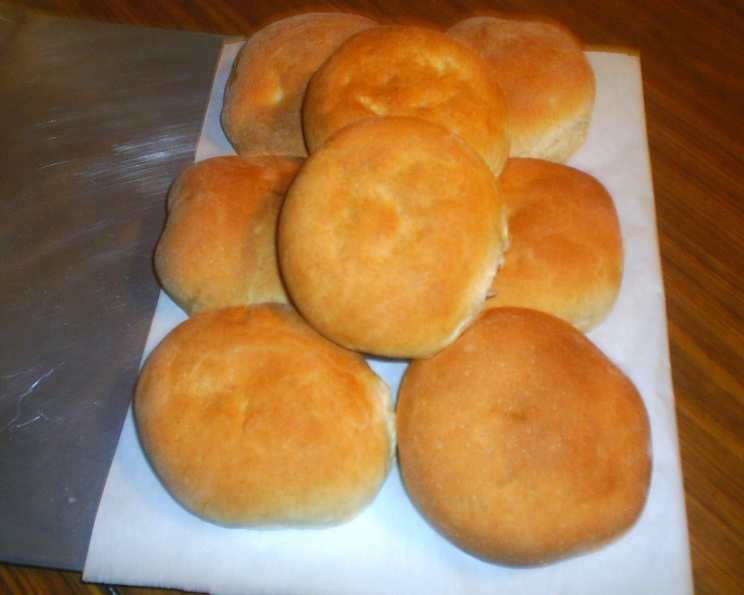
Light Wheat Hamburger Buns: A Baker’s Delight
The scent of baking bread… it’s a time machine, isn’t it? For me, it always takes me back to my grandmother’s kitchen. She was a master baker, and her hamburger buns were legendary. There was nothing quite like sinking your teeth into a juicy burger nestled in one of her soft, slightly sweet, and subtly wheaty buns. While she used a classic white flour, I’ve always experimented with incorporating more whole wheat into my baking, and these light wheat hamburger buns are my homage to her legacy. They capture that same comforting essence while sneaking in a bit more nutritional goodness.
Recipe Overview
- Prep Time: 20 minutes
- Cook Time: 15 minutes
- Total Time: 1 hour 35 minutes (plus rising time)
- Servings: 8
- Yield: 8 hamburger buns
- Dietary Type: Vegetarian
Ingredients
- 1 cup water
- 2 tablespoons olive oil
- 130 g whole wheat flour
- 260 g bread flour
- 1⁄4 cup sugar
- 1 teaspoon salt
- 1 tablespoon yeast
Equipment Needed
- Stand mixer with dough hook (optional but recommended)
- Large mixing bowl
- Measuring cups and spoons (or a kitchen scale for precise measurements)
- Baking sheet
- Parchment paper (optional)
- Wire cooling rack
Instructions
-
Begin by gently heating the water to around 110 degrees Fahrenheit (43 degrees Celsius). This is crucial for activating the yeast without killing it. If you don’t have a thermometer, aim for comfortably warm to the touch, like bathwater.
-
In a large mixing bowl, or the bowl of your stand mixer, combine the whole wheat flour, bread flour, sugar, salt, and yeast. Whisk these dry ingredients together thoroughly to ensure even distribution.
-
Add the warmed water and olive oil to the dry ingredients.
-
Mix the ingredients until a dough begins to form. It should be somewhat shaggy at first.
-
Let the dough rest for 5 minutes. This allows the flours to fully hydrate, making kneading easier.
-
If using a stand mixer, attach the dough hook. Knead the dough on medium speed for 3 minutes. If kneading by hand, turn the dough out onto a lightly floured surface and knead vigorously for the same amount of time.
-
Allow the dough to rest for another 5 minutes. This second rest helps the gluten relax.
-
Knead the dough again for another 3 minutes, either in the stand mixer or by hand. The dough should now be smooth and elastic. It shouldn’t be overly sticky, but it should be soft and pliable.
-
Lightly oil a large bowl. Place the dough in the oiled bowl, turning it to coat all sides. This prevents the dough from drying out as it rises.
-
Cover the bowl with plastic wrap or a clean kitchen towel. Place it in a warm place and let it rise until it has doubled in size. This can take about 1 hour, but the exact time will depend on the temperature of your environment. Be patient, and let the dough fully proof; this develops the flavor and texture of the buns.
-
Once the dough has doubled, gently punch it down to release the air.
-
Divide the dough into 8 equal pieces.
-
Shape each piece into a ball. To do this, gently roll out to flatten each piece and then bring 2 opposite ends together and then bring the other 2 ends together, shaping into a ball. This method helps to create a smooth, round bun.
-
Place the shaped buns, seam side down, on a baking sheet that has been lightly oiled or lined with parchment paper. Leaving some space between each bun allows them to expand during the final proof.
-
Cover the baking sheet with plastic wrap, being careful not to let the plastic wrap touch the buns. You can lightly spray the underside of the plastic wrap with oil to prevent sticking.
-
Let the buns rise again until they are quite puffy. This second rise is crucial for achieving a light and airy texture. This can take another 30-45 minutes, depending on the room temperature.
-
Preheat your oven to 375 degrees Fahrenheit (190 degrees Celsius).
-
Bake the buns in the preheated oven for about 15 minutes, or until they are golden brown on top. Keep a close eye on them, as ovens can vary.
-
Remove the buns from the oven and transfer them to a wire rack to cool completely. This prevents them from becoming soggy.
Expert Tips & Tricks
- For a softer bun: Adding a tablespoon of milk powder to the dry ingredients can contribute to a softer crumb.
- Egg Wash: For a shinier crust, brush the tops of the buns with an egg wash (1 egg beaten with 1 tablespoon of water) before baking.
- Sesame Seeds: Sprinkle sesame seeds, poppy seeds, or everything bagel seasoning on top of the buns before baking for added flavor and visual appeal.
- Don’t overmix: Overmixing develops too much gluten, resulting in tougher buns. Mix until just combined.
- Room Temperature Matters: The warmer your room, the faster the dough will rise. Adjust rising times accordingly. If your kitchen is cold, you can place the dough in a slightly warmed oven (turned off!) to encourage rising.
Serving & Storage Suggestions
These light wheat hamburger buns are, of course, perfect for burgers! But don’t stop there. They also make excellent sandwich rolls for everything from grilled chicken to deli meats. Serve them warm or at room temperature.
- Storage: Store cooled buns in an airtight container at room temperature for up to 2 days.
- Refrigeration: For longer storage, keep them in the refrigerator for up to a week.
- Freezing: Freeze the buns for up to 3 months. Wrap them individually in plastic wrap and then place them in a freezer bag for best results. Thaw at room temperature before using.
- Reheating: To reheat, wrap the buns in foil and warm them in a low oven (300 degrees Fahrenheit) for about 5-10 minutes. You can also briefly microwave them, but be careful not to overcook them, or they will become tough.
Nutritional Information
| Nutrient | Amount per Serving | % Daily Value |
|---|---|---|
| Calories | 261 kcal | 13% |
| Total Fat | 4.1g | 6% |
| Saturated Fat | 0.6g | 2% |
| Cholesterol | 0mg | 0% |
| Sodium | 293.7mg | 12% |
| Total Carbohydrate | 49.6g | 16% |
| Dietary Fiber | 3.4g | 13% |
| Sugars | 6.4g | 25% |
| Protein | 7g | 13% |
Variations & Substitutions
- Spelt Flour: Replace some of the bread flour with spelt flour for a slightly nuttier flavor.
- Honey: Substitute honey for sugar for a more complex sweetness.
- Herbs: Add dried herbs like rosemary or thyme to the dough for a savory twist. About 1-2 teaspoons should be sufficient.
- Garlic: Mix in some minced garlic for garlic hamburger buns.
- Vegan: Ensure the sugar used is vegan-friendly, as some processed sugars may use bone char.
FAQs (Frequently Asked Questions)
Q: Why is my dough not rising?
A: The most common reason is that your yeast is inactive, either because it’s old or the water was too hot, killing the yeast. Make sure your yeast is fresh and the water is lukewarm (around 110°F).
Q: Can I use all whole wheat flour?
A: While you can, the buns will be denser and have a stronger whole wheat flavor. This recipe is designed to balance the lightness of bread flour with the nutrition of whole wheat.
Q: How do I prevent the plastic wrap from sticking to the buns during the second rise?
A: Lightly spray the underside of the plastic wrap with cooking oil spray before covering the buns.
Q: Can I make the dough ahead of time?
A: Yes, you can prepare the dough through step 9, then refrigerate it overnight. Allow it to come to room temperature for about an hour before continuing with the recipe.
Q: What if I don’t have a stand mixer?
A: You can absolutely make these buns by hand! Just be prepared to knead the dough for a longer period (about 8-10 minutes in total) to develop the gluten properly.
Final Thoughts
Baking these light wheat hamburger buns is more than just following a recipe; it’s an act of love, a connection to tradition, and a way to elevate your everyday meals. Don’t be intimidated by the process; baking is a journey, and even imperfections can be delicious. So, gather your ingredients, preheat your oven, and fill your kitchen with the irresistible aroma of homemade bread. I encourage you to try this recipe, experiment with variations, and most importantly, share your creations with loved ones. They’ll taste the love in every bite!