
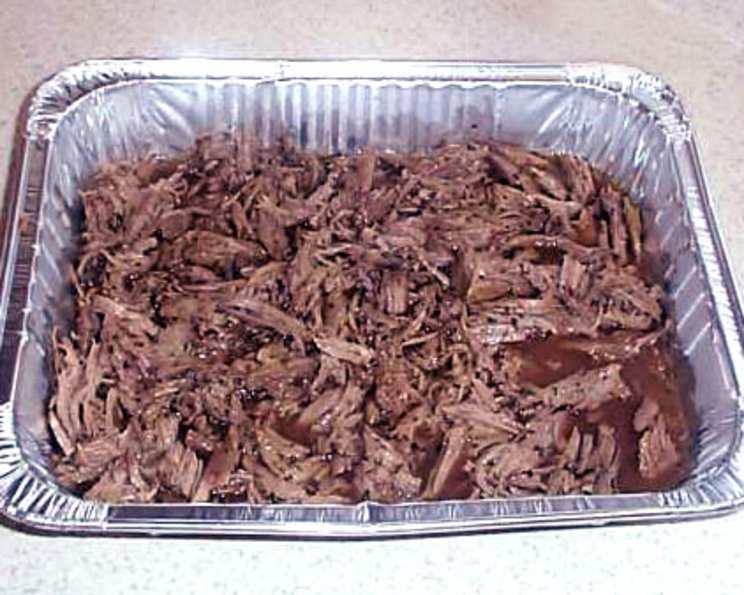
Lil’ John’s Oven Deep Pit
The first time I tasted this “deep pit” shredded beef, I was at a family reunion in Texas. The air was thick with humidity and the sounds of laughter, kids running wild, and sizzling meats. My cousin John, the self-proclaimed grill master, emerged from the kitchen with a platter piled high with the most tender, flavorful beef I’d ever encountered. The aroma alone was intoxicating – a smoky, savory symphony that had everyone reaching for a plate. Little did I know this “deep pit” magic was not from a traditional pit at all, but rather, the brilliant simplicity of a home oven! That day, I knew I needed to replicate the magic.
Recipe Overview
- Prep Time: 20 minutes
- Cook Time: 12 hours
- Total Time: 12 hours 20 minutes
- Servings: 10-30
- Yield: Varies depending on the size of the roast
- Dietary Type: Varies depending on serving choices (can be gluten-free, dairy-free with proper sides)
Ingredients
- 8-10 lbs boneless beef chuck roast
- 1-2 cups soy sauce
- ½ teaspoon salt
- 1 teaspoon fresh ground black pepper
- 1 tablespoon Lawry’s Seasoned Salt
- 2 tablespoons garlic powder
- 2 tablespoons onion powder
- 2 tablespoons barbecue seasoning mix (I use Pappy’s Seasoning Mix)
- 2 tablespoons Old Bay Seasoning
Equipment Needed
- Large roasting pan or sheet pan
- Heavy duty aluminum foil
- Butcher’s string
- Large brown paper shopping bag
- Large mixing bowl
- Spatula
- Two forks
- Deep container
Instructions
-
Gather your materials. You’ll need a large roasting pan or sheet pan, heavy-duty aluminum foil, butcher’s string, and a large brown paper shopping bag. These items ensure the meat is properly contained and cooked to perfection.
-
Prepare the foil. Tear off three sheets of heavy-duty aluminum foil large enough to completely cover and seal the beef chuck roast. Overlap is key here, providing ample protection during the long cooking process.
-
Marinate the meat. Place the boneless beef chuck roast in a large mixing bowl. Pour soy sauce over the meat, ensuring it’s generously coated on all sides. The soy sauce acts as both a marinade and a tenderizer.
-
Season generously. In a separate small bowl, mix together the dry seasonings: salt, fresh ground black pepper, Lawry’s Seasoned Salt, garlic powder, onion powder, barbecue seasoning mix, and Old Bay Seasoning.
-
Apply the rub. Transfer the marinated beef chuck roast onto the prepared sheets of aluminum foil. Generously rub the mixed dry seasonings all over the top and sides of the meat, ensuring an even coating. Don’t be shy – this is where a lot of the flavor comes from!
-
First Foil Layer: Bring the first sheet of foil sides up and fold them together tightly, creating a secure seal. Be extremely careful not to let any of the liquid escape during this process. Then, fold up the ends of the foil to create a fully sealed packet, preventing any leaks.
-
Second and Third Foil Layers: Repeat the folding and sealing process with the remaining two sheets of foil, one at a time. This multiple layering is crucial for trapping the moisture and steam, resulting in incredibly tender and flavorful beef.
-
Encase in Paper. Carefully place the fully wrapped meat package into the bottom of the large brown paper shopping bag. Fold the top of the bag snugly over the meat package to create a tight seal.
-
Secure the Bag. Using the butcher’s string, tie the folded bag securely, ensuring the package remains tightly sealed during the cooking process.
-
Refrigerate (Optional). I like to refrigerate the packaged meat for 1-2 hours before cooking. This allows the flavors to further meld and penetrate the meat. However, if you’re short on time, you can proceed directly to cooking.
-
Preheat the Oven. When you’re ready to cook, preheat your oven to 225°F (107°C). This low and slow cooking method is what transforms the tough chuck roast into incredibly tender, fall-apart shredded beef.
-
Slow Cook. Place the meat package (still in the foil and paper bag) in the roasting pan or sheet pan and cook for 12 hours. It’s a long time, but the aroma that fills your house will be well worth the wait!
-
Rest. After 12 hours, carefully remove the packaged meat from the oven and let it rest for at least 10 minutes. This allows the juices to redistribute throughout the meat, resulting in a more flavorful and tender final product.
-
Shred the Beef. Remove the paper bag and carefully (it’s hot!) open the foil. Using a spatula, lift the meat out of the foil and place it into a deep container. At this point, the meat should be incredibly tender and easily falling apart. Be sure to retain all of the accumulated juices.
-
Shred and Mix. Using two forks, thoroughly shred the beef into bite-sized pieces. Pour the reserved juices over the shredded meat and stir well to ensure everything is evenly moistened and infused with flavor.
-
Serve. Serve the shredded beef with your favorite accompaniments, such as sour cream and salsa. Enjoy!
Expert Tips & Tricks
- Don’t skip the resting period! It’s tempting to dive right in, but allowing the meat to rest is essential for retaining moisture and maximizing flavor.
- Use high-quality barbecue seasoning. The quality of your seasoning mix will greatly impact the final flavor of the dish. Experiment with different blends to find your favorite.
- For a smokier flavor, add a teaspoon of liquid smoke to the soy sauce marinade.
- If you are using a leaner cut of beef, add a tablespoon of olive oil or beef tallow to the soy sauce to help keep the meat moist.
Serving & Storage Suggestions
This shredded beef is incredibly versatile. Serve it in tacos, burritos, sandwiches, on top of nachos, or as a main course with sides like coleslaw, potato salad, or beans. For a classic Texas twist, serve it with pickled onions and jalapenos.
Leftovers can be stored in an airtight container in the refrigerator for up to 3-4 days. Reheat gently in a skillet or in the microwave. You can also freeze the shredded beef for longer storage (up to 2-3 months). Thaw overnight in the refrigerator before reheating.
Nutritional Information
| Nutrient | Amount per Serving | % Daily Value |
|---|---|---|
| Calories | 953.5 kcal | N/A |
| Calories from Fat | 639 g | 67% |
| Total Fat | 71.1 g | 109% |
| Saturated Fat | 28.8 g | 143% |
| Cholesterol | 250.4 mg | 83% |
| Sodium | 1940.4 mg | 80% |
| Total Carbohydrate | 4.1 g | 1% |
| Dietary Fiber | 0.5 g | 2% |
| Sugars | 1.4 g | 5% |
| Protein | 70.2 g | 140% |
Note: Nutritional information is an estimate and may vary based on specific ingredients and portion sizes.
Variations & Substitutions
- Spicy Kick: Add a pinch of cayenne pepper or a dash of your favorite hot sauce to the seasoning mix for a spicy kick.
- Different Cuts of Beef: While chuck roast is ideal, you can also use brisket or round roast. Adjust cooking time accordingly.
- Asian-Inspired: Substitute the barbecue seasoning with a blend of ginger, sesame oil, and rice wine vinegar for an Asian-inspired twist.
- Healthier Option: Use low-sodium soy sauce and reduce the amount of seasoned salt to lower the sodium content.
FAQs (Frequently Asked Questions)
Q: Can I use a different cut of beef?
A: Yes, while chuck roast is ideal for its fat content and tender texture after slow cooking, you can also use brisket or round roast. Adjust the cooking time as needed, checking for tenderness.
Q: Can I cook this in a slow cooker instead of the oven?
A: Yes, you can adapt this recipe for a slow cooker. Follow the same preparation steps, but cook on low for 8-10 hours or on high for 4-6 hours, until the meat is easily shredded.
Q: Is it really necessary to wrap the meat in foil and then a paper bag?
A: Yes, the multiple layers of wrapping are crucial for trapping moisture and creating a steamy environment, which helps to tenderize the meat and infuse it with flavor. The paper bag also helps to prevent the foil from tearing.
Q: Can I make this ahead of time?
A: Absolutely! This dish is perfect for making ahead. The flavors actually deepen and improve overnight. Simply shred the beef, store it in the refrigerator, and reheat when ready to serve.
Q: What if my oven runs hot?
A: Ovens can vary in temperature accuracy. If your oven tends to run hot, you may want to reduce the cooking temperature by 25 degrees or check the meat for tenderness an hour or two early.
Final Thoughts
So, ditch the idea of needing a fancy smoker or backyard deep pit! With a little patience and this easy oven method, you can create incredibly tender and flavorful shredded beef that will impress your family and friends. Don’t be afraid to experiment with different seasoning blends and serving suggestions to make it your own. And most importantly, don’t forget to share the love (and the leftovers, if there are any!) with those you care about. Now go forth and conquer the “deep pit”…in your oven!