
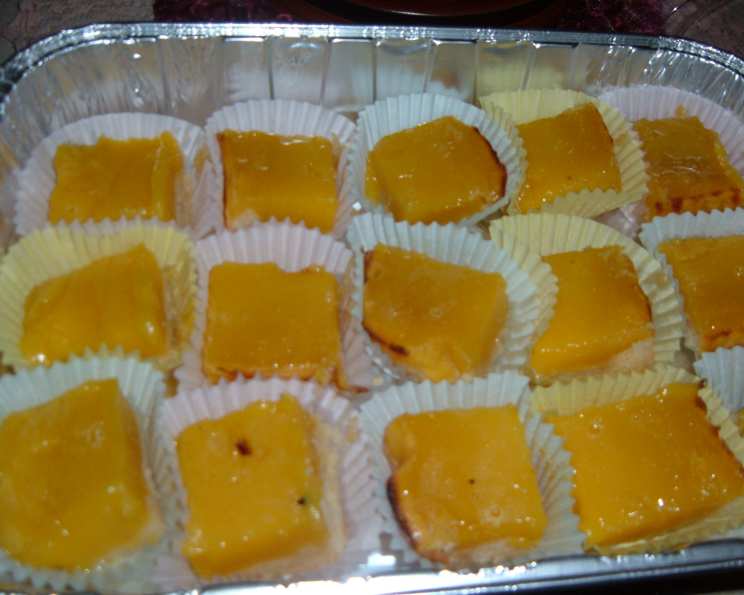
Lilikoi Bars: A Taste of Paradise
The first time I tasted lilikoi, I was standing on a sun-drenched porch in Hana, Maui, the air thick with the scent of plumeria. A neighbor had handed me a handful of the wrinkled, purple fruit, and the explosion of tart, tropical sweetness was unlike anything I’d ever experienced. It tasted like sunshine bottled up. These Lilikoi Bars capture that same bright, vibrant flavor, transforming it into a buttery, crumbly delight that instantly transports you to a tropical paradise.
Recipe Overview
- Prep Time: 30 minutes
- Cook Time: 45 minutes
- Total Time: 1 hour 15 minutes
- Yields: 24 pieces
- Dietary Type: Not specified (contains gluten and dairy)
Ingredients
For the Crust:
- ½ lb (2 sticks) unsalted butter, room temperature
- ½ cup granulated sugar
- 2 cups flour
- ¼ teaspoon kosher salt
For the Filling:
- 6 large eggs, room temperature
- 3 cups granulated sugar
- 1 tablespoon grated lemon zest (from 2-3 lemons)
- 1 cup lilikoi juice, freshly squeezed or frozen (thawed)
- 1 cup flour
- Powdered sugar, for dusting
Optional Glaze:
- ¼ cup water
- ½ cup granulated sugar
- ¼ cup lilikoi fruit juice (from about 6 lilikoi)
- Juice of ¼ lemon
Equipment Needed
- 9 x 13 inch baking sheet
- Electric mixer
- Whisk
- Saucepan (for glaze, optional)
- Cupcake pan & liners (optional)
Instructions
- Preheat your oven to 350 degrees Fahrenheit (175 degrees Celsius).
- Cream together the butter and sugar: In a mixing bowl, using an electric mixer, cream together the softened butter and granulated sugar until the mixture is light and fluffy. This process incorporates air, creating a tender crust.
- Combine dry ingredients: In a separate bowl, combine the flour and kosher salt.
- Incorporate dry into wet: With the mixer on low speed, gradually add the flour mixture to the butter mixture until just combined. Be careful not to overmix, as this can develop the gluten in the flour and result in a tough crust.
- Form and chill the crust: Dump the dough onto a well-floured board. Gather the dough into a ball. Flatten the dough with your hands to fit into a 9 x 13 inch baking sheet. Press evenly into the bottom of the pan. Chill the crust in the refrigerator for 30 minutes. This chilling step helps to relax the gluten and prevents the crust from shrinking during baking.
- Bake the crust: Bake the chilled crust for 15-20 minutes, or until lightly browned. Keep a close eye on it – you want it golden, not burnt. Once baked, cool the crust completely before adding the filling.
- Prepare the filling: In a large bowl, whisk together the eggs, granulated sugar, lemon zest, lilikoi juice, and flour. Make sure the ingredients are well combined and the mixture is smooth. The lemon zest enhances the lilikoi’s natural tang.
- Assemble and bake the bars: Pour the lilikoi filling evenly over the cooled crust. Bake for 25 to 30 minutes, or until the filling is set. The filling should be firm to the touch and no longer jiggly.
- Cool and cut: Cool the lilikoi bars to room temperature before cutting them into squares or triangles. Dust generously with powdered sugar before serving.
- Prepare the optional glaze (if using): In a saucepan, boil the water and granulated sugar over medium heat for 5 minutes.
- Add juice to the glaze: Add the lilikoi fruit juice and lemon juice and continue to boil for a further 3 minutes. The mixture will boil rapidly and expand, so be sure to use a sufficiently large saucepan.
- Cool the glaze: Remove from heat and allow to cool. As it cools, the glaze will transform into a thick and sugary passion fruit syrup.
- Drizzle and serve: Once the glaze has cooled completely, drizzle it evenly over the lilikoi bars.
Expert Tips & Tricks
- For a richer crust, use European-style butter, which has a higher fat content.
- If you can’t find fresh lilikoi, frozen lilikoi pulp or juice works well. Be sure to thaw it completely before using.
- To prevent the crust from puffing up during baking, you can dock it with a fork (poke holes) before chilling and baking.
- If the crust edges start to brown too quickly while baking the filled bars, you can cover them with foil.
- Don’t overbake the bars, or the filling will become tough. A slight jiggle in the center is okay; it will continue to set as it cools.
- For clean cuts, use a sharp knife and wipe it clean between each cut.
Serving & Storage Suggestions
These Lilikoi Bars are best served at room temperature. Dust generously with powdered sugar just before serving. They are a perfect treat to enjoy with a cup of coffee or tea.
Store leftover lilikoi bars in an airtight container at room temperature for up to 2 days, or in the refrigerator for up to 5 days. For longer storage, you can freeze them for up to 2 months. Thaw overnight in the refrigerator before serving. They can be served chilled or at room temperature.
Nutritional Information
| Nutrient | Amount per Serving | % Daily Value |
|---|---|---|
| Calories | 255.6 kcal | N/A |
| Calories from Fat | 81 g | 32% |
| Total Fat | 9 g | 13% |
| Saturated Fat | 5.3 g | 26% |
| Cholesterol | 66.8 mg | 22% |
| Sodium | 43.6 mg | 1% |
| Total Carbohydrate | 41.2 g | 13% |
| Dietary Fiber | 0.5 g | 1% |
| Sugars | 29.2 g | 116% |
| Protein | 3.3 g | 6% |
Variations & Substitutions
- Gluten-Free: Use a gluten-free flour blend in the crust. Ensure the blend contains xanthan gum for binding.
- Dairy-Free: Substitute the butter in the crust with a vegan butter alternative.
- Lilikoi-Coconut: Add ½ cup of shredded coconut to the crust for a tropical twist. You can also substitute half of the lilikoi juice in the filling with coconut milk.
- Citrus Medley: Experiment with adding other citrus juices like orange or grapefruit to the filling for a more complex flavor profile.
- Cupcakes: As noted in the original instructions, this recipe can be adapted to cupcake form. Simply use cupcake liners in a cupcake pan, fill each liner 1/2 to 3/4 full with batter, and bake at the same temperature for a shorter amount of time (15-20 minutes), checking for doneness with a toothpick.
FAQs (Frequently Asked Questions)
Q: Can I use store-bought lilikoi juice?
A: Yes, store-bought lilikoi juice can be used, but fresh lilikoi juice will provide the best flavor. If using store-bought juice, make sure it is 100% lilikoi juice and not diluted with other fruit juices.
Q: How do I know when the bars are done baking?
A: The filling should be set and no longer jiggly. A slight jiggle in the very center is okay, as it will continue to set as it cools.
Q: Can I make these bars ahead of time?
A: Yes, these bars can be made a day or two in advance. Store them in an airtight container in the refrigerator.
Q: Can I freeze these bars?
A: Yes, these bars freeze well. Wrap them tightly in plastic wrap and then in foil, or place them in a freezer-safe container. They can be frozen for up to 2 months.
Q: What can I do if my crust is browning too quickly?
A: If the crust edges start to brown too quickly while baking the filled bars, you can cover them loosely with foil.
Final Thoughts
These Lilikoi Bars are more than just a dessert; they’re a little slice of paradise. With their bright, tangy flavor and buttery crust, they’re sure to become a new favorite. So gather your ingredients, preheat your oven, and get ready to transport yourself to the tropics. Don’t be afraid to experiment with variations and substitutions to make them your own. And most importantly, enjoy the process and the delicious results! I encourage you to share your baking adventures and feedback – happy baking!