
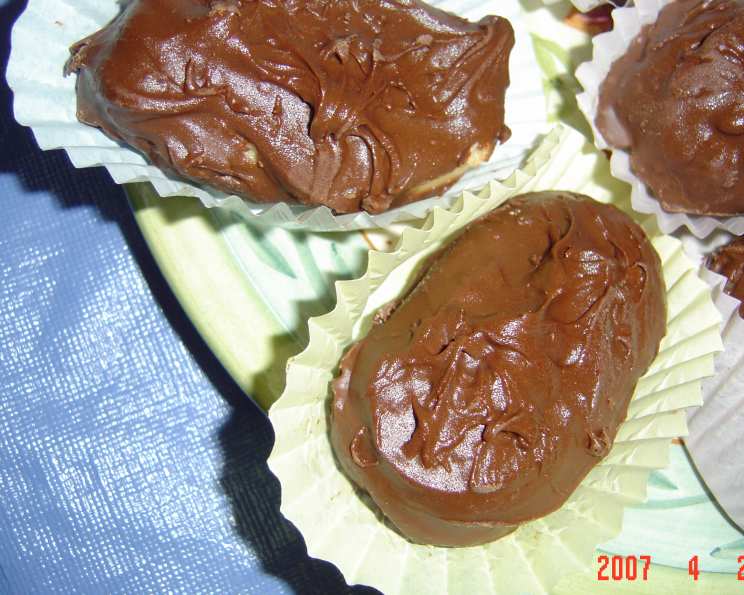
Linda’s Peanut Butter Easter Eggs: A Decadent Homemade Treat
The memory is etched in my mind: a pastel-colored Easter basket overflowing with foil-wrapped chocolates and jelly beans. But nestled among those commercial candies, always, were my Aunt Linda’s homemade peanut butter eggs. Their irregular shapes, a testament to her loving hands, were far more appealing than any perfectly formed confection. Biting into that rich, creamy peanut butter center encased in a generous layer of chocolate was pure bliss. Now, years later, I’m thrilled to share her recipe, allowing you to create your own Easter memories.
Recipe Overview
- Prep Time: 3 hours
- Cook Time: Approximately 10 minutes (for melting chocolate)
- Total Time: 3 hours 10 minutes
- Yields: 28 (3×2 inch) eggs
- Dietary Type: Vegetarian
Ingredients
- 1/4 lb (4 ounces) butter, softened
- 8 ounces cream cheese, softened
- 2 lbs (32 ounces) confectioners’ sugar
- 1 1/2 cups peanut butter
- 1 1/2 teaspoons vanilla extract
- 1/2 teaspoon salt
- 20-23 ounces milk chocolate chips (almost 1 large bag), for milk chocolate, or
- 20 ounces semi-sweet chocolate chips (almost 1 large bag), for dark chocolate
Equipment Needed
- Large mixing bowl
- Electric mixer (optional, but recommended)
- Measuring cups and spoons
- Plastic wrap or parchment paper
- Baking sheet
- Double boiler or microwave-safe bowl
- Spatula
- Butter knife
- Waxed paper
- Candy paper cups
Instructions
-
Begin by preparing the peanut butter filling. In a large mixing bowl, combine the softened butter and cream cheese. You can microwave them for about 40 seconds to soften further, if needed, but ensure they don’t melt. Cream together thoroughly using an electric mixer or a sturdy spoon until the mixture is light and fluffy.
-
Gradually add the confectioners’ sugar, about 1 cup at a time, mixing well after each addition. I find that using my hands towards the end helps to incorporate all the sugar evenly, creating a smooth, cohesive dough. Be prepared for a bit of a workout!
-
Next, add the peanut butter, vanilla extract, and salt to the mixture. Continue mixing until everything is thoroughly blended and a uniform dough forms. Again, using your hands can be helpful here to ensure everything is fully incorporated.
-
Now it’s time to chill the peanut butter mixture. Place the bowl in the refrigerator to chill for at least 1 hour. For a faster chilling process, you can put the bowl in the freezer for about 30 minutes to help the dough harden. This step is crucial for making the eggs easier to handle.
-
Once the peanut butter mixture is sufficiently chilled and firm enough to handle, begin forming it into egg shapes. Aim for approximately 3×2 inch eggs. Place the formed eggs on a baking sheet lined with plastic wrap or parchment paper.
-
Return the formed peanut butter eggs to the refrigerator to chill again for at least 1 hour. Alternatively, you can place them in the freezer for a shorter period for faster hardening. This second chilling step is just as important as the first to ensure the eggs hold their shape during the chocolate coating process.
-
While the eggs are chilling for the second time, prepare the chocolate coating. Melt the chocolate chips in a double boiler or in a microwave oven. I’ve found that using a double boiler yields better results because the steaming water helps the chips stay creamy longer, preventing them from seizing or burning. If using a microwave, heat the chocolate in 30-second intervals, stirring well in between, until completely melted and smooth.
-
The moment of truth! Quickly place the chilled peanut butter eggs, one at a time, into the melted chocolate to coat the bottom. Lift the egg with a thin spatula and use a butter knife to spread the chocolate along the sides and top, ensuring even coverage. For a decorative touch, use the knife to “fluff” the top of the chocolate, creating a textured look. Simply press down lightly on the chocolate and lift up repeatedly across the surface.
-
Work quickly! The heat from the melted chocolate will cause the peanut butter eggs to soften rapidly. If you notice them becoming too soft to handle, immediately return them to the freezer for a few minutes to firm up again.
-
Arrange the chocolate-coated eggs on a tray lined with waxed paper and allow the chocolate to harden completely. To speed up this process, you can place the tray in the freezer.
-
Once the chocolate has hardened, carefully place each peanut butter egg into a paper candy cup.
-
For an extra festive touch, decorate your eggs with pastel-colored Easter sprinkles or pastel jimmies, which can be found in the cake decorating section of most grocery stores.
Expert Tips & Tricks
-
Temperature is Key: The success of this recipe hinges on keeping the peanut butter mixture and chocolate at the right temperatures. Ensure the peanut butter filling is thoroughly chilled before shaping and dipping. Similarly, keep the melted chocolate at a consistent temperature to avoid it thickening too quickly.
-
Chocolate Tempering: For a professional-looking sheen and snap to your chocolate coating, consider tempering the chocolate. This involves melting and cooling the chocolate to specific temperatures to stabilize the cocoa butter crystals. While not strictly necessary for this recipe, it will elevate the final product.
-
Preventing Chocolate Seizing: If your chocolate starts to seize (become thick and grainy), try adding a teaspoon of vegetable oil or shortening. This can sometimes help to restore a smooth consistency. Be careful not to add water, as this will exacerbate the problem.
-
Smooth Dipping: Before dipping, ensure the melted chocolate is completely smooth and free of lumps. If needed, strain the chocolate through a fine-mesh sieve to remove any solid particles.
-
Batch Chilling: To streamline the dipping process, chill a small batch of peanut butter eggs at a time while keeping the remaining eggs in the refrigerator. This prevents them from softening too quickly.
Serving & Storage Suggestions
Serve Linda’s Peanut Butter Easter Eggs chilled or at room temperature. They make a delightful addition to Easter baskets, dessert platters, or as a sweet treat alongside a cup of coffee or tea.
Store leftover eggs in an airtight container in the refrigerator for up to 1 week. You can also freeze them for up to 2 months. To thaw, simply place them in the refrigerator overnight.
Nutritional Information
| Nutrient | Amount per Serving | % Daily Value |
|---|---|---|
| Calories | 373 kcal | N/A |
| Calories from Fat | 171 | N/A |
| Total Fat | 19 g | 29% |
| Saturated Fat | 8.8 g | 44% |
| Cholesterol | 22.3 mg | 7% |
| Sodium | 176.6 mg | 7% |
| Total Carbohydrate | 47.4 g | 15% |
| Dietary Fiber | 1.5 g | 6% |
| Sugars | 43.7 g | N/A |
| Protein | 5.5 g | 11% |
Note: Nutritional information is an estimate and may vary based on specific ingredients and portion sizes.
Variations & Substitutions
-
Dark Chocolate Delight: Use semi-sweet or dark chocolate chips for a richer, less sweet flavor.
-
White Chocolate Dream: Experiment with white chocolate for a completely different taste profile. Consider adding a drop or two of food coloring to the melted white chocolate for pastel-colored eggs.
-
Peanut-Free Version: Substitute the peanut butter with sunflower seed butter (sunbutter) or another nut butter alternative for those with peanut allergies.
-
Crunchy Texture: Add a cup of crushed pretzels or rice cereal to the peanut butter mixture for a delightful crunch.
-
Flavor Infusions: Incorporate a teaspoon of peppermint extract, almond extract, or orange zest into the peanut butter mixture for a unique flavor twist.
FAQs (Frequently Asked Questions)
Q: Why is my peanut butter mixture too soft to form into eggs?
A: The most common reason is that the butter and cream cheese were not sufficiently chilled. Ensure they are properly softened but not melted before mixing. Also, make sure to chill the mixture for the recommended time.
Q: Can I use natural peanut butter in this recipe?
A: While you can, natural peanut butter tends to be oilier and may result in a softer filling. If using natural peanut butter, you may need to add a bit more confectioners’ sugar to achieve the desired consistency.
Q: My chocolate is seizing. What can I do?
A: Try adding a teaspoon of vegetable oil or shortening to the chocolate and stir gently. Avoid adding water, as this will worsen the problem.
Q: How do I prevent the chocolate from cracking after it hardens?
A: Tempering the chocolate will help prevent cracking. Also, avoid exposing the chocolate-covered eggs to drastic temperature changes.
Q: Can I make these ahead of time?
A: Absolutely! These peanut butter eggs can be made several days in advance and stored in the refrigerator. They can also be frozen for longer storage.
Final Thoughts
Linda’s Peanut Butter Easter Eggs are more than just a recipe; they’re a tradition, a memory, and a symbol of love. I encourage you to give this recipe a try and create your own Easter memories with your loved ones. Don’t be afraid to experiment with variations and make them your own. And please, share your creations and feedback – I’d love to hear about your peanut butter egg adventures! Perhaps pair these with a glass of chilled milk or a cup of hot cocoa for the ultimate Easter indulgence. Happy baking!