
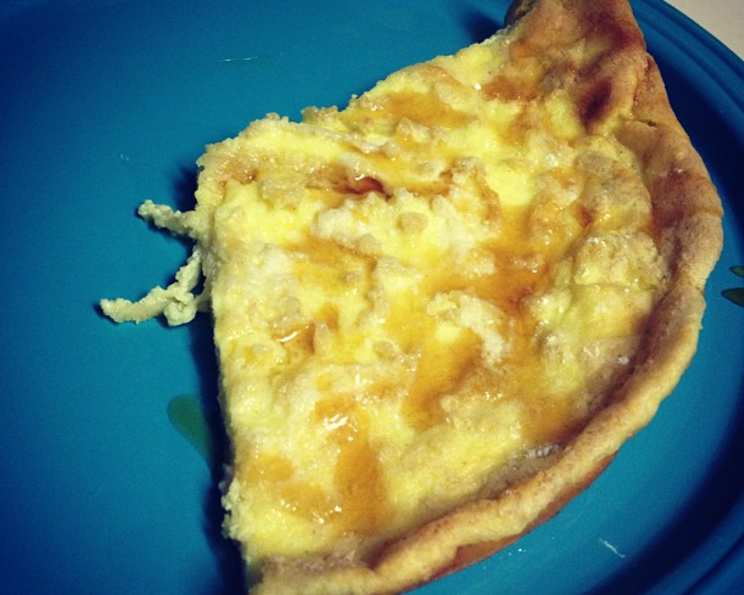
Lindy’s Gluten-Free Dutch Baby (German Pancake)
The first time I had a Dutch Baby, I was visiting my grandmother in her cozy Pennsylvania farmhouse. The scent of warm butter and something sweet baking in the oven filled the air. I remember being absolutely mesmerized as she pulled this puffed, golden-brown creation from the oven, its edges reaching for the sky like a delicious, edible crown. It was dusted with powdered sugar, and the tangy lemon juice made the whole thing sing. To this day, that memory is intertwined with feelings of warmth, comfort, and the unwavering love of family. Now, thanks to my niece Lindy’s gluten-free wizardry, those with dietary restrictions can experience that same joy.
Recipe Overview
- Prep Time: 5 minutes
- Cook Time: 15 minutes
- Total Time: 20 minutes
- Servings: 4
- Dietary Type: Gluten-Free
Ingredients
- 6 eggs
- 1 cup milk
- 1 cup millet flour
- 2 tablespoons coconut flour
- 1/4 teaspoon salt
- 2 tablespoons butter
- Optional: Fruit (blueberries, sliced peaches, sliced apples)
- To Serve: Maple syrup, powdered sugar, lemon juice
Equipment Needed
- Oven
- Blender or whisk
- 9×13 inch baking dish or two round cake pans or two large cast iron skillets
Instructions
-
Preheat your oven to a blazing 450 degrees Fahrenheit. This high heat is crucial for achieving the signature puff of a Dutch Baby.
-
In a blender or using a whisk, beat the eggs until they are well aerated and light in color. This incorporates air, helping the pancake rise beautifully in the oven.
-
Add the milk to the eggs and beat again until combined.
-
Incorporate the dry ingredients: salt, millet flour, and coconut flour. Beat on low speed, or gently whisk, just until everything is blended. Avoid overmixing, as this can develop the gluten (even though it’s gluten-free flours, overmixing toughens it), resulting in a less tender pancake. A few small lumps are perfectly fine.
-
While the batter rests briefly, place the butter into a 9×13 inch baking dish, or divide it evenly between two round cake pans, or use two large cast iron skillets. Place the pan(s) into the preheated oven. This step is vital! You want the pan and butter to get very hot.
-
Carefully tip the pan(s) to spread the melted butter evenly across the bottom and up the sides. The sizzling butter will help prevent sticking and contribute to the crispy edges of the Dutch Baby.
-
Pour the batter into the hot, buttered pan(s).
-
If desired, you can top with fruit at this point. Berries like blueberries are fantastic, as are sliced peaches or apples. Gently press the fruit into the batter.
-
Place the pan(s) in the oven and bake for 15 minutes. Keep a close eye on it, as ovens can vary. You’re looking for a golden-brown, puffed-up pancake.
Expert Tips & Tricks
- Hot Pan is Key: Don’t skimp on preheating the pan with the butter. This creates the initial sizzle that causes the batter to puff up dramatically.
- Room Temperature Ingredients: Using room temperature eggs and milk helps the batter emulsify better, resulting in a smoother texture and more even rise.
- Don’t Open the Oven: Resist the temptation to peek! Opening the oven door during baking can cause the Dutch Baby to deflate.
- Flour Power: The combination of millet flour and coconut flour creates a pleasant flavor and texture in this gluten-free version. If you experiment with other gluten-free flours, be sure to use a blend for the best results. A one-to-one gluten-free baking flour blend might work.
- Prevent Soggy Fruit: If using frozen fruit, toss it in a tablespoon of flour before adding it to the batter. This helps prevent it from making the Dutch Baby soggy.
- Salt is Important: Salt balances the sweetness and enhances the flavor of the Dutch Baby. Don’t skip it!
- Baking Time Variations: Baking time can vary depending on your oven and the pan you use. Start checking for doneness around 12 minutes. The pancake is done when it’s puffed up and golden brown.
Serving & Storage Suggestions
Serve Lindy’s Gluten-Free Dutch Baby immediately after baking while it’s still warm and puffed. Dust generously with powdered sugar and drizzle with maple syrup. A squeeze of fresh lemon juice adds a delightful tang that complements the sweetness.
Leftovers can be stored in the refrigerator for up to 2 days. However, keep in mind that the pancake will deflate and lose its crispy texture. To reheat, place it in a preheated oven at 350°F (175°C) for a few minutes until warmed through. You can also reheat individual slices in a microwave, but it will further soften the texture.
Nutritional Information
| Nutrient | Amount per Serving | % Daily Value |
|---|---|---|
| Calories | 299 kcal | N/A |
| Total Fat | 15.9g | 24% |
| Saturated Fat | 7.5g | 37% |
| Cholesterol | 302.8mg | 100% |
| Sodium | 333mg | 13% |
| Total Carbohydrate | 25g | 8% |
| Dietary Fiber | 3.2g | 12% |
| Sugars | 0.4g | 1% |
| Protein | 15.4g | 30% |
Note: Nutritional information is an estimate and may vary based on specific ingredients and portion sizes.
Variations & Substitutions
- Dairy-Free: Substitute the milk with a dairy-free alternative like almond milk, oat milk, or coconut milk.
- Spice It Up: Add a pinch of cinnamon, nutmeg, or cardamom to the batter for a warm, aromatic twist.
- Savory Dutch Baby: Omit the powdered sugar and maple syrup and serve with sauteed mushrooms, spinach, and a sprinkle of cheese for a savory brunch option.
- Berry Blast: Use a mix of your favorite berries – raspberries, blackberries, and strawberries – for a vibrant and flavorful Dutch Baby.
- Chocolate Chip Dutch Baby: Sprinkle chocolate chips into the batter before baking for a decadent treat.
FAQs (Frequently Asked Questions)
Q: Why did my Dutch Baby not puff up?
A: The most common reason is that the oven or pan wasn’t hot enough. Make sure your oven is fully preheated to 450°F (230°C) and that the pan with the butter is sizzling hot before adding the batter.
Q: Can I make the batter ahead of time?
A: It’s best to make the batter fresh, as it can lose its airiness if it sits for too long. However, you can prepare the batter up to an hour in advance and store it in the refrigerator.
Q: My Dutch Baby deflated after I took it out of the oven. Is this normal?
A: Yes, it’s perfectly normal for a Dutch Baby to deflate slightly after being removed from the oven. The dramatic puff is caused by the hot air inside the batter, which cools and contracts as it sits.
Q: Can I use a different type of flour?
A: This recipe is specifically formulated for millet and coconut flour to be gluten-free. While you could experiment with other gluten-free flour blends, the results may vary. You may have to adjust the flour ratios to get the right consistency.
Q: What is the best way to serve a Dutch Baby?
A: Dutch Babies are traditionally served warm, straight from the oven, dusted with powdered sugar and drizzled with maple syrup and lemon juice. You can also add fresh fruit, whipped cream, or other toppings of your choice.
Final Thoughts
Lindy’s Gluten-Free Dutch Baby is more than just a recipe; it’s an invitation to create moments of joy and connection around the table. Whether you’re gluten-free or simply looking for a delicious and impressive brunch dish, this recipe is sure to become a family favorite. So, gather your ingredients, preheat your oven, and prepare to be amazed as this simple batter transforms into a golden-brown masterpiece. Don’t be afraid to experiment with different toppings and variations to make it your own. And most importantly, share it with the people you love. I hope this recipe brings as much warmth and happiness to your home as it has to mine.