
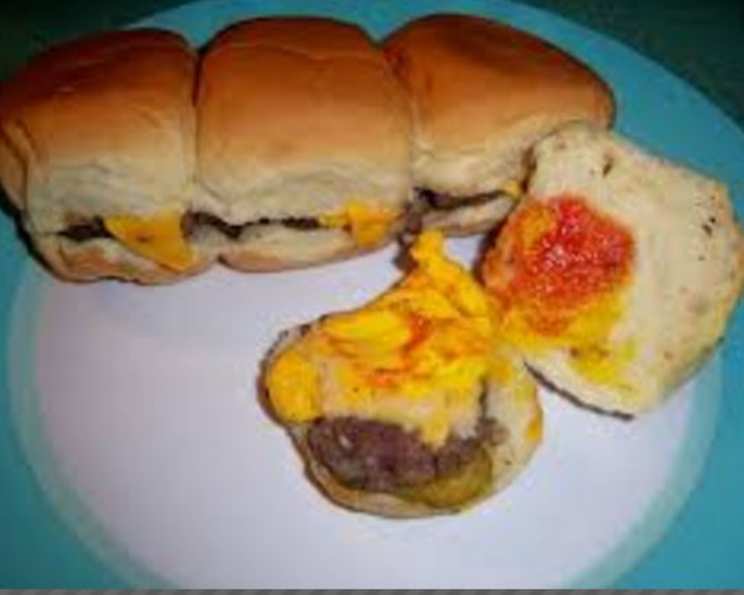
Little Tavern Hamburgers: A Taste of Nostalgia
The smell of grilled onions still transports me back to Saturday afternoons with my grandfather. He always took me to a tiny, unassuming spot that, even to my young eyes, seemed like a relic of a bygone era. The aroma, that mix of beef and caramelized onion, would hit you the moment you stepped inside, promising something simple and incredibly satisfying. The Little Tavern may be gone, but the memory of those little sliders, practically inhaled in two bites, remains a distinct and cherished part of my culinary memories. And now, we can try to recreate that magic.
Recipe Overview
- Prep Time: 10 minutes
- Cook Time: 15 minutes
- Total Time: 25 minutes
- Servings: 8
- Yield: 8 mini-hamburgers
- Dietary Type: None Specified
Ingredients
- 8 ounces hamburger, rolled into 1-ounce balls
- 4 teaspoons dehydrated onion, reconstituted in warm water
- Salt and pepper, to taste
- Hamburger dills, slices
- 8 dinner rolls, sliced
Equipment Needed
- Hot pan or flat-top griddle
- Spatula
Instructions
- Begin by ensuring your dehydrated onions are reconstituted. Place the 4 teaspoons of dehydrated onion in a small bowl and cover with warm water. Allow them to soak while you prepare the rest of the ingredients. This rehydration process helps to soften the onions, allowing them to meld seamlessly with the burger’s flavor during cooking.
- Divide your 8 ounces of hamburger into 1-ounce balls. Consistency in size is key for even cooking and that signature Little Tavern look.
- Place the meat balls in a hot pan or flat-top griddle. The surface should be hot enough to create a good sear upon contact.
- Add a generous pinch (about 1/2 teaspoon each) of the reconstituted onions to the top of each meat ball. This layering of onions on top before smashing infuses the meat with their sweet, pungent flavor.
- Here’s where the magic happens: Smash each meat ball flat with a spatula. This creates the characteristic thin patty that cooks quickly and develops crispy edges. Cook for a minute or so on this side.
- Flip each burger. Season generously with salt and pepper to taste. Remember, seasoning is crucial at every stage to build layers of flavor.
- Optional: If desired, toast/fry the split rolls in the burger grease as the meat is cooking. This adds a delicious richness to the buns and prevents them from becoming soggy. This step is highly recommended for that authentic tavern experience.
- Remove the rolls from the grill and place a slice of pickle on each one. The tang of the pickle provides a welcome contrast to the savory burger.
- Once the burgers are cooked – and remember, they are very small, so it won’t take long at all – place one on each roll. The patties should be nicely browned and cooked through.
- Recreate the Steaming Process: At the restaurant, the burgers were put in a steamer drawer to hold until sale. You may have to come up with some sort of steaming device. Try paper towels or “Handiwipe” towels, soaked in water (and squeezed out to “damp”), to cover the burgers while in the steamer drawer. This keeps the buns soft and the burgers warm and juicy. Alternatively, you can loosely cover them with foil.
- Serve immediately with condiments of your choice. Mustard is a classic pairing, but feel free to get creative.
Expert Tips & Tricks
- Don’t overcrowd the pan. Cook the burgers in batches to maintain the heat and ensure proper searing.
- Use a thin, flexible spatula for smashing and flipping the burgers. This will help you achieve those crispy edges we’re after.
- Don’t be afraid of the smash! Press firmly when smashing the burgers to get them as thin as possible.
- For a richer flavor, consider using a blend of ground beef, such as 80/20. The higher fat content will result in a juicier burger.
- If you don’t have dehydrated onions, you can use finely minced fresh onions. Just be sure to cook them down slightly before adding them to the burgers.
- To speed up the cooking process, lightly preheat your buns in a toaster or oven.
Serving & Storage Suggestions
Serve these mini-burgers immediately while they’re hot and juicy. Arrange them on a platter for a party, or enjoy them as a quick and satisfying meal. They are best served warm.
Leftovers can be stored in an airtight container in the refrigerator for up to 3 days. To reheat, wrap the burgers in foil and warm them in a low oven (around 300°F) until heated through. Microwaving is not recommended, as it can make the buns soggy. While freezing is possible, the texture of the buns and the burger may suffer slightly upon thawing.
Nutritional Information
| Nutrient | Amount per Serving | % Daily Value |
|---|---|---|
| Calories | 153.5 kcal | N/A |
| Calories from Fat | 53 g | 35% |
| Total Fat | 6 g | 9% |
| Saturated Fat | 2 g | 10% |
| Cholesterol | 26.7 mg | 8% |
| Sodium | 159.6 mg | 6% |
| Total Carbohydrate | 13.7 g | 4% |
| Dietary Fiber | 0.6 g | 2% |
| Sugars | 1.7 g | 6% |
| Protein | 10.7 g | 21% |
Note: Nutritional information is an estimate and may vary based on specific ingredients and preparation methods.
Variations & Substitutions
- Gluten-Free: Use gluten-free hamburger buns.
- Vegetarian: Substitute the hamburger with a plant-based ground “beef.”
- Spicy: Add a pinch of red pepper flakes to the burgers for a touch of heat.
- Cheese: Add a small square of American or cheddar cheese to each burger during the last minute of cooking.
- Deluxe: Top with shredded lettuce, tomato slices, and your favorite sauce.
- Onion Variety: Use caramelized onions instead of reconstituted dehydrated onions for a sweeter flavor.
FAQs (Frequently Asked Questions)
Q: Why are the burgers smashed so thin?
A: Smashing the burgers creates a larger surface area that caramelizes quickly, resulting in crispy edges and a flavorful crust. It also helps them cook quickly, which was essential for the fast-food style of the Little Tavern Shops.
Q: Can I use a different type of ground beef?
A: Absolutely! While the recipe calls for standard ground beef, you can use a leaner or fattier blend depending on your preference. A blend with a higher fat content (like 80/20) will result in a juicier burger.
Q: How do I prevent the burgers from sticking to the pan?
A: Make sure your pan is properly heated before adding the meat. Also, using a non-stick pan or a well-seasoned cast-iron skillet can help prevent sticking. A little bit of oil in the pan can help too.
Q: Can I make these burgers ahead of time?
A: You can prepare the meat balls in advance and store them in the refrigerator. However, it’s best to cook the burgers just before serving for optimal flavor and texture.
Q: What’s the best way to serve these burgers at a party?
A: Keep the cooked burgers warm in a slow cooker or warming tray. Offer a variety of condiments and toppings so guests can customize their own sliders.
Final Thoughts
Recreating these Little Tavern Hamburgers is more than just following a recipe; it’s about capturing a moment in time, a memory of simpler days and shared experiences. Whether you have fond memories of these iconic sliders or are simply looking for a delicious and nostalgic bite, I encourage you to give this recipe a try. Share your creations and variations with friends and family, and let the flavors transport you back to a time when a bag of mini-burgers was all you needed for a perfect afternoon. Don’t forget a side of crispy fries and a classic milkshake to complete the experience!