
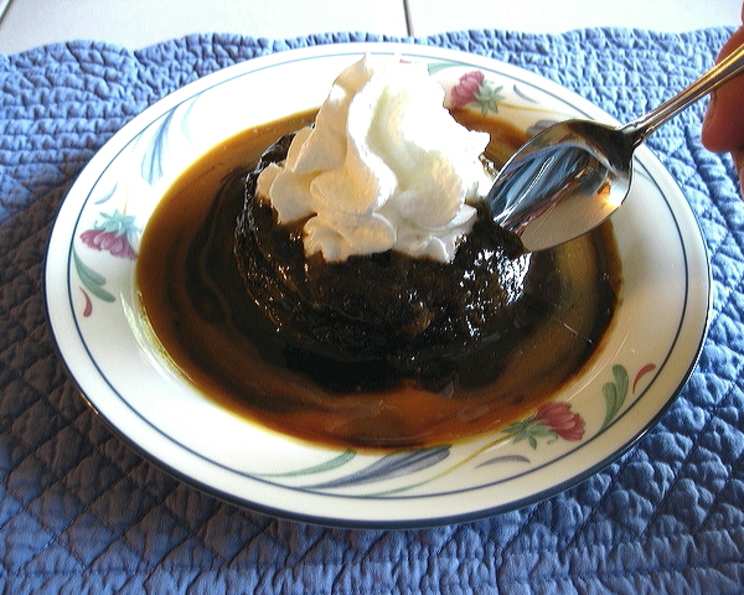
Little Warm Chocolate Caramel Cakes: A Sweet Symphony in a Ramekin
I remember the first time I tasted a molten lava cake. It was at a tiny bistro tucked away on a cobblestone street in Paris, and the experience was nothing short of revelatory. The rich, dark chocolate oozing from the warm center was pure magic. These Little Warm Chocolate Caramel Cakes capture that same sense of comforting decadence, but with a delightful caramel surprise that elevates them to a whole new level. The warmth, the chocolate, the caramel—it’s a hug in a ramekin, perfect for a chilly evening or a special occasion.
Recipe Overview
- Prep Time: 20 minutes
- Cook Time: 20 minutes
- Total Time: 1 hour 40 minutes (including freezing)
- Servings: 6
- Yield: 6 ramekins
- Dietary Type: Vegetarian
Ingredients
- Butter, softened (for greasing ramekins)
- 6 tablespoons high-quality caramel sauce (from a 12 1/4 ounce jar)
- 6 tablespoons chocolate syrup (optional, but highly recommended)
- 1 1/2 cups sifted cake flour (or sifted white flour)
- 1/3 cup dutch-process unsweetened cocoa powder
- 1 teaspoon baking soda
- 3/4 – 1 cup sugar (adjust to your preferred sweetness)
- 1/2 teaspoon salt
- 1 cup strong brewed coffee, warm (decaf works great)
- 1/3 cup light olive oil
- 1 1/2 teaspoons pure vanilla extract
- 1 tablespoon aged balsamic vinegar
Equipment Needed
- Six 6-ounce ramekins
- Whisk
- Large mixing bowl
- Measuring cups and spoons
- Toothpick
Instructions
-
Begin by preheating your oven to 400°F (200°C).
-
Generously coat each of the six 6-ounce ramekins with softened butter. Ensure you reach all the nooks and crannies. This will prevent the cakes from sticking and help them release easily.
-
Place the buttered ramekins in the freezer for about 10 minutes to solidify the butter. This creates a better non-stick surface.
-
Remove the ramekins from the freezer and brush with a second coat of butter, focusing on the bottoms and sides. This extra layer of butter is crucial for easy release.
-
Now for the gooey surprise! Pour 3 tablespoons of caramel sauce into the bottom of each ramekin. Spread it evenly across the bottom.
-
If using, carefully top the caramel sauce with 1 tablespoon of chocolate syrup in each ramekin. The combination of caramel and chocolate is simply divine.
-
Transfer the ramekins to the freezer for approximately 1 hour. This step is essential, as it allows the caramel and chocolate layers to freeze solid, creating that delightful molten center when baked.
-
While the ramekins are chilling, prepare the cake batter. In a large bowl, whisk together the sifted cake flour, dutch-process cocoa powder, baking soda, sugar, and salt. Sifting the flour is important for a light and airy texture. Set the dry ingredients aside.
-
In a separate bowl or measuring cup, stir together the warm coffee, light olive oil, vanilla extract, and balsamic vinegar. The balsamic vinegar might seem like an unusual addition, but it enhances the chocolate flavor and adds a subtle depth to the cake.
-
Pour the wet ingredients into the dry ingredients and whisk gently until just combined. Be careful not to overmix the batter, as this can result in a tough cake. The batter should be smooth but not overly worked.
-
Remove the ramekins from the freezer.
-
Fill each ramekin with about 1/3 cup of the prepared batter. Spread the batter evenly over the frozen caramel and chocolate layers.
-
Bake in the preheated oven for about 20 minutes, or until the cakes are set and a toothpick inserted into the center comes out clean. The edges of the cake should be slightly pulling away from the sides of the ramekin, and the caramel should be bubbling around the edges.
-
Allow the cakes to cool for just a minute or two before inverting onto plates or serving directly from the ramekins. Be careful, as the caramel will be very hot.
Expert Tips & Tricks
- Freezing Time is Key: Don’t skimp on the freezing time. The frozen caramel and chocolate layers are what create the molten center.
- Don’t Overbake: Overbaking will result in a dry cake and no molten center. Keep a close eye on them and check for doneness with a toothpick.
- Ramekin Size Matters: Be sure to use 6-ounce ramekins for the best results. Smaller ramekins may require a shorter baking time.
- High-Quality Caramel: Using a good-quality caramel sauce will make a significant difference in the overall flavor of the cake.
- Enhance the Chocolate: For an even richer chocolate flavor, add a tablespoon of chocolate liqueur (like Kahlua or crème de cacao) to the batter.
- If you don’t have cake flour: You can make your own cake flour by measuring out 1 1/2 cups of all-purpose flour, removing 3 tablespoons, and then adding 3 tablespoons of cornstarch. Whisk together well to combine.
Serving & Storage Suggestions
These little cakes are best served warm, immediately after baking. The warm cake with the molten caramel center is an irresistible combination. You can serve them as is or with a scoop of vanilla ice cream or a dollop of whipped cream.
If you happen to have any leftovers (which is unlikely!), you can store them in the refrigerator for up to 3 days. To reheat, microwave for 20-30 seconds or warm in a low oven until heated through. However, keep in mind that the molten center might not be as prominent after reheating. These are really best when eaten fresh.
Nutritional Information
| Nutrient | Amount per Serving | % Daily Value |
|---|---|---|
| Calories | 552 kcal | N/A |
| Total Fat | 14.7g | 22% |
| Saturated Fat | 2.9g | 14% |
| Cholesterol | 0.9mg | 0% |
| Sodium | 672.8mg | 28% |
| Total Carbohydrate | 104.3g | 34% |
| Dietary Fiber | 3.2g | 12% |
| Sugars | 31.5g | N/A |
| Protein | 5.5g | 11% |
Note: Nutritional information is an estimate and may vary based on specific ingredients used.
Variations & Substitutions
- Gluten-Free: Substitute the cake flour with a gluten-free all-purpose flour blend. Be sure to add 1/2 teaspoon of xanthan gum to help bind the ingredients.
- Dairy-Free: While the main recipe is not dairy-free, you can try using a dairy-free caramel sauce and substitute the butter for greasing the ramekins with coconut oil.
- Espresso Boost: Add a teaspoon of instant espresso powder to the batter for a more intense coffee flavor.
- Spice It Up: A pinch of cinnamon or cardamom in the batter can add a warm, comforting touch.
- Nutty Delight: Add chopped pecans or walnuts to the batter for a bit of crunch and flavor.
- Seasonal Fruit: Place a few fresh raspberries or blueberries on top of the batter before baking for a burst of fruity freshness.
FAQs (Frequently Asked Questions)
Q: Why do I need to freeze the ramekins before baking?
A: Freezing the caramel and chocolate layers solidifies them, which is crucial for creating the molten center when the cakes are baked.
Q: Can I make these cakes ahead of time?
A: You can prepare the batter ahead of time and store it in the refrigerator for up to 24 hours. However, it’s best to assemble and bake the cakes just before serving.
Q: My cakes didn’t come out molten. What went wrong?
A: Possible reasons include not freezing the caramel and chocolate layers long enough, overbaking the cakes, or using ramekins that are too large.
Q: Can I use regular cocoa powder instead of dutch-process?
A: Dutch-process cocoa powder has a smoother, less acidic flavor. If you use regular cocoa powder, you may want to add a pinch more sugar to balance the acidity.
Q: How do I prevent the cakes from sticking to the ramekins?
A: Generously buttering the ramekins, chilling them in the freezer, and then applying a second coat of butter are essential for preventing sticking.
Final Thoughts
These Little Warm Chocolate Caramel Cakes are more than just a dessert; they’re an experience. The combination of rich chocolate cake and gooey caramel is simply irresistible, and the surprise of the molten center is sure to delight everyone who tries them. Don’t be intimidated by the freezing time – it’s what makes these cakes so special. So go ahead, gather your ingredients, and treat yourself to a little bit of heaven in a ramekin. I encourage you to try experimenting with different flavors and variations to make this recipe your own. Enjoy the process, share your creations with loved ones, and let the warm, comforting flavors of these cakes bring a little joy to your day!