
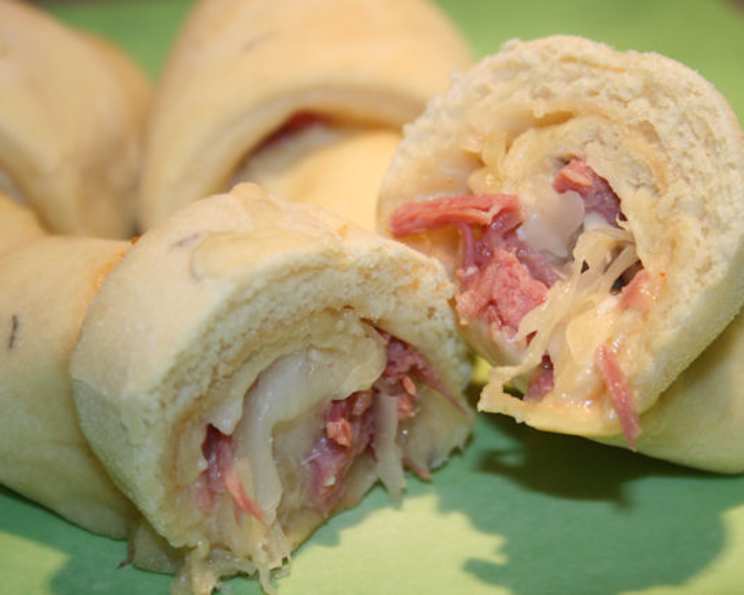
Lorilyn’s Rye Dinner Rolls: A Taste of Home
The smell of baking rye bread is, for me, the very essence of home. I remember my grandmother, a sturdy woman with flour always dusted on her apron, carefully kneading rye dough on her well-worn wooden table. The aroma, earthy and slightly sweet, would fill her small kitchen, a beacon of warmth and love that promised a hearty meal and comforting conversation. These rolls, redolent with caraway and baked to tender perfection, bring back that very feeling every time.
Recipe Overview
- Prep Time: 30 minutes
- Cook Time: 12 minutes
- Rise Time: 1 hour 20 minutes
- Total Time: 1 hour 52 minutes
- Yields: 24-28 rolls
- Serves: 6-8
Ingredients
- 1 (1/4 ounce) packet active dry yeast (2-1/4 teaspoons)
- 3 1/2 cups all-purpose flour
- 1 1/2 cups rye flour
- 1 1/2 tablespoons caraway seeds
- 1/3 cup white sugar
- 1/3 cup vegetable shortening
- 1 teaspoon sea salt
- 1 cup milk
- 2 eggs
Equipment Needed
- Heavy-duty mixer with dough hook attachment
- Small saucepan
- Wooden spoon
- Candy thermometer (optional, for checking milk temperature)
- Mixing bowl
- Non-stick cooking spray
- Baking sheet
- Pizza cutter
Instructions
- In the bowl of a heavy-duty mixer fitted with the dough hook attachment, combine the yeast, 1 cup of the all-purpose flour, and all of the rye flour.
- In a small saucepan over medium-high heat, combine the sea salt, sugar, milk, and vegetable shortening.
- Stir with a wooden spoon until the shortening is nearly melted, with only a few tiny, pea-sized lumps remaining. The mixture should reach approximately 120°F if using a candy thermometer.
- Pour the hot milk mixture into the mixer bowl with the yeast and flour. Add both eggs. Begin mixing on low to medium speed until the mixture is thoroughly combined and wet.
- Gradually add the remaining all-purpose flour by the spoonful, mixing until the dough forms a ball around the dough hook, and the bottom of the mixer bowl is no longer sticky with wet dough. The dough ball should be slightly smooth and spring back when touched with a fingertip.
- Remove the dough from the hook and bowl. Form it into a ball with your hands. Spray the inside of the bowl with non-stick cooking spray. Place the dough ball into the bowl with the smooth side down, then turn it over so the seam side is now down. (This ensures that both the top and bottom of the ball are greased.)
- Cover the mixer bowl with its lid, a towel, or foil. Place it in a warm area to rise for about one hour. The dough should approximately double in size.
- Once risen, use your fist to gently “punch” the dough down in the center to release the air. Remove the dough from the bowl and divide it into two equal balls. Place both balls on a lightly floured surface and cover them loosely with foil. Let them rest for 10 minutes.
- Roll out one dough ball at a time into a large circle, approximately 1/2 inch or less in thickness.
- Use a pizza cutter to slice the dough like a pizza, into about 12 or so triangles.
- Roll each triangle up, starting at the wide end and ending with the “tail” end. Place the rolls 2 inches apart on an ungreased baking sheet with the tail end on the bottom to prevent them from unraveling.
- Cover the baking sheet and let the rolls rise for another 15-20 minutes.
- Bake at 350°F (175°C) for about 12 minutes, depending on your oven and desired level of doneness. For lighter-colored, softer rolls, bake for only 9-10 minutes.
Expert Tips & Tricks
- Temperature is Key: Ensure your milk mixture isn’t too hot, or it will kill the yeast. Aim for 120°F, or just warm to the touch.
- Kneading Matters: The dough should be slightly sticky but still form a ball. Don’t over-add flour.
- Proofing Location: A warm, draft-free environment is essential for proper rising. Consider placing the covered bowl in a slightly warmed oven (turned off!) or near a sunny window.
- Even Baking: Rotate the baking sheet halfway through baking to ensure even browning.
- Egg Wash (Optional): For a shinier crust, brush the rolls with a beaten egg before baking.
Serving & Storage Suggestions
Serve Lorilyn’s Rye Dinner Rolls warm, ideally straight from the oven. They are delicious on their own, with a pat of butter, or alongside soups, stews, and salads. These rolls are also perfect for sandwiches!
Storage: Store leftover rolls in an airtight container at room temperature for up to 2 days. For longer storage, freeze them in a freezer-safe bag for up to 2 months.
Reheating: To reheat, wrap the rolls in foil and warm them in a 350°F (175°C) oven for 5-10 minutes, or until heated through. You can also microwave them for a shorter time, but be careful not to overheat them, or they will become tough.
Nutritional Information
| Nutrient | Amount per Serving | % Daily Value |
|---|---|---|
| Calories | 557.2 kcal | N/A |
| Calories from Fat | 143 g | N/A |
| Total Fat | 15.9 g | 24% |
| Saturated Fat | 4.9 g | 24% |
| Cholesterol | 67.7 mg | 22% |
| Sodium | 434.1 mg | 18% |
| Total Carbohydrate | 89.3 g | 29% |
| Dietary Fiber | 5.9 g | 23% |
| Sugars | 11.6 g | 46% |
| Protein | 14.5 g | 29% |
Variations & Substitutions
- Sweetness Boost: For a sweeter roll, increase the sugar to 1/2 cup.
- Herbaceous Twist: Add 1-2 tablespoons of dried dill or fennel seeds along with the caraway seeds for a more complex flavor.
- Whole Wheat Variation: Substitute up to 1 cup of the all-purpose flour with whole wheat flour for a nuttier flavor and added fiber. Keep in mind this will make the rolls slightly denser.
- Dairy-Free: Use a non-dairy milk alternative, such as almond or soy milk, and a dairy-free shortening or oil.
FAQs (Frequently Asked Questions)
Q: Can I make the dough ahead of time?
A: Yes! After the first rise, punch down the dough, wrap it tightly in plastic wrap, and refrigerate it for up to 24 hours. Allow the dough to come to room temperature before continuing with the recipe.
Q: My rolls are not rising properly. What could be the problem?
A: The yeast may be old or inactive, or the rising environment may not be warm enough. Ensure your yeast is fresh, and find a warmer spot for the dough to rise.
Q: Can I use bread flour instead of all-purpose flour?
A: Yes, bread flour will result in a slightly chewier roll.
Q: How can I prevent the rolls from drying out?
A: Do not overbake the rolls. As soon as they are lightly golden brown, remove them from the oven. Brushing them with melted butter after baking can also help to keep them moist.
Q: What is the best way to reheat these rolls?
A: The best way to reheat the rolls is to wrap them in foil and warm them in a 350°F (175°C) oven for 5-10 minutes. This will help to keep them from drying out. Microwaving is also an option but may make the rolls a bit tough.
Final Thoughts
There’s a certain magic in baking bread, a simple alchemy of flour, water, and yeast transforming into something truly nourishing and satisfying. These Rye Dinner Rolls are more than just a side dish; they’re a little piece of comfort, a connection to tradition, and a taste of home. I encourage you to try this recipe, to fill your kitchen with the warm aroma of rye and caraway, and to share these delicious rolls with the people you love. Let me know how they turn out and what you served them with!