
Mastering the Deep Dish: A Lou Malnati’s Inspired Pizza Crust
The first time I tasted a true Chicago deep dish, I was a culinary student on a whirlwind trip to the Windy City. It wasn’t just pizza; it was an experience. The towering crust, the rich, chunky tomato sauce, the blanket of melted mozzarella – each layer was a revelation. I remember feeling like I’d unlocked a secret, a culinary code I needed to crack. Years later, I’m still chasing that perfect deep-dish dream, and this recipe, inspired by the legendary Lou Malnati’s, gets me closer every time.
Recipe Overview
- Prep Time: 20 minutes
- Rest Time: 4 hours
- Cook Time: 30-40 minutes
- Total Time: 4 hours 50 minutes
- Yield: 4 pizzas
- Servings: 4 per pizza
- Dietary Type: Vegetarian
Ingredients
- 16 ounces water
- 1/8 ounce yeast (about 0.35 ounces or 10 grams active dry yeast)
- 1/2 ounce salt (about 14 grams)
- 2 lbs flour (about 900 grams, all-purpose or bread flour)
- 1/4 cup olive oil
- 1/4 cup cornmeal
Equipment Needed
- Stand Mixer with dough hook
- Large mixing bowl
- Deep dish pizza pan(s) or cookie sheet
Instructions
- In the bowl of a stand mixer, combine the water and yeast. Allow the yeast to dissolve completely in the water, about 5-10 minutes. This step is crucial to activate the yeast and ensure a good rise.
- Add the salt, flour, and olive oil to the water-yeast mixture. Attach the dough hook to your mixer.
- Begin mixing the dough on low speed. Once a ball of dough starts to form, increase the mixer speed to medium.
- Mix on medium speed for approximately 1 to 2 minutes, until the dough becomes elastic and smooth. The dough should pull away from the sides of the bowl and form a cohesive ball. Do not overmix!
- Remove the dough from the mixer and place it in a large bowl that has been lightly coated with olive oil. Turn the dough in the bowl to coat all sides with the oil. This prevents the dough from drying out during its resting period.
- Cover the bowl tightly with plastic wrap and allow the dough to rest in a warm place for approximately 4 hours. This long rest is essential for developing the flavor and texture of the crust. The dough will almost double in size.
- Once the dough has rested, gently deflate it on a lightly floured surface. Divide the dough into four equal portions. At this point, you can freeze any portions you don’t plan to use immediately. To freeze, wrap each portion tightly in plastic wrap and then place in a freezer bag. Dough can be frozen for up to 2 months. Defrost in the refrigerator overnight before using.
- Preheat your oven to 425 degrees F (220 degrees C).
- For deep dish pizza: In a deep baking dish or deep-dish pizza pan, generously oil the bottom and sides of the pan with your fingers. Sprinkle the cornmeal evenly over the oiled surface. The cornmeal adds a distinctive texture and flavor to the crust.
- For thin crust pizza: On a cookie sheet, generously oil the bottom and sides of the pan with your fingers. Sprinkle the cornmeal evenly over the oiled surface.
- Take one portion of the dough and gently press and spread it using your fingers to cover the bottom of the pan. Ensure you have enough dough to extend up the sides of the pan by approximately 1/2 inch for the deep dish pizza. For a thin crust pizza, spread the dough evenly and thinly across the cookie sheet.
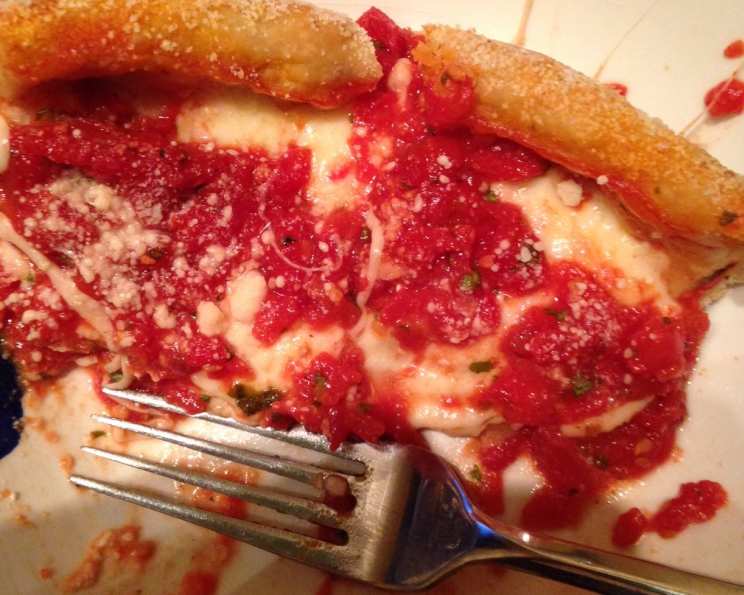
- Now it’s time to add your toppings! For an authentic Chicago-style deep dish pizza, the cheese goes first. Spread a layer of mozzarella cheese directly onto the bottom of the crust. Add the tomato sauce and all of your desired toppings. For a thin crust pizza, add toppings in the order of your choice.
- Place the pizza in the preheated oven and bake for 30 to 40 minutes, or until the crust is golden brown and crispy, and the cheese is melted and bubbly. Keep a close eye on it during the last 10 minutes to prevent burning.
- Remove the pizza from the oven and let it cool slightly before slicing and serving.
- Serve pizza straight from the oven to the table.
Expert Tips & Tricks
- Don’t skip the long rest: The extended resting period for the dough is crucial for developing its flavor and texture. It allows the gluten to relax, resulting in a more tender and flavorful crust.
- Use high-quality ingredients: The quality of your ingredients will directly impact the final result. Use good quality flour, fresh yeast, and flavorful olive oil.
- Adjust baking time as needed: Oven temperatures can vary, so keep an eye on your pizza while it’s baking and adjust the baking time accordingly. You want the crust to be golden brown and crispy, and the cheese to be melted and bubbly.
- Freeze for later: This recipe makes a good amount of dough. Wrap the portions you are not using, and freeze for later use.
Serving & Storage Suggestions
Serve the pizza hot, straight from the oven. A sprinkle of dried oregano or red pepper flakes adds a nice finishing touch. Leftover pizza can be stored in the refrigerator for up to 3 days. To reheat, bake in a preheated oven at 350°F (175°C) until warmed through. You can also reheat individual slices in a skillet over medium heat for a crispy crust. This pizza also tastes great cold, straight from the fridge!
Nutritional Information
(Please note that these values are estimates and may vary based on specific ingredients and portion sizes.)
| Nutrient | Amount per Serving | % Daily Value |
|---|---|---|
| Calories | 650 kcal | 33% |
| Total Fat | 25g | 38% |
| Saturated Fat | 8g | 40% |
| Cholesterol | 15mg | 5% |
| Sodium | 800mg | 33% |
| Total Carbohydrate | 80g | 27% |
| Dietary Fiber | 5g | 20% |
| Sugars | 3g | 6% |
| Protein | 20g | 40% |
Variations & Substitutions
- Gluten-Free: Substitute a gluten-free all-purpose flour blend for the regular flour. You may need to add a binder like xanthan gum to help with the texture.
- Whole Wheat: Replace up to half of the all-purpose flour with whole wheat flour for a nuttier flavor and added fiber.
- Herb-Infused Dough: Add 1-2 tablespoons of dried herbs like oregano, basil, or rosemary to the dough for extra flavor.
- Spicy Crust: Add a pinch of red pepper flakes to the dough for a hint of spice.
FAQs (Frequently Asked Questions)
Q: Can I use instant yeast instead of active dry yeast?
A: Yes, you can. Use the same amount and add it directly to the flour; you don’t need to dissolve it in water first.
Q: Why is the resting time so long?
A: The long rest allows the gluten in the flour to relax, resulting in a more tender and flavorful crust. It also allows the yeast to develop complex flavors.
Q: Can I make the dough ahead of time?
A: Absolutely! The dough can be made up to 24 hours in advance and stored in the refrigerator. Just bring it to room temperature before using.
Q: Can I use a different type of oil?
A: While olive oil is traditional, you can use another neutral-flavored oil like vegetable or canola oil if preferred.
Q: What’s the best way to prevent the crust from sticking to the pan?
A: Generously oiling the pan and sprinkling it with cornmeal will help prevent sticking. You can also use parchment paper to line the pan.
Final Thoughts
This recipe is more than just a set of instructions; it’s an invitation to recreate a little piece of Chicago in your own kitchen. Don’t be intimidated by the resting time; it’s what makes this crust so special. Experiment with your favorite toppings, gather your friends and family, and enjoy the process of creating something delicious together. I encourage you to try this recipe and share your feedback! Serve it with a crisp Italian salad and a glass of Chianti for the complete experience.