
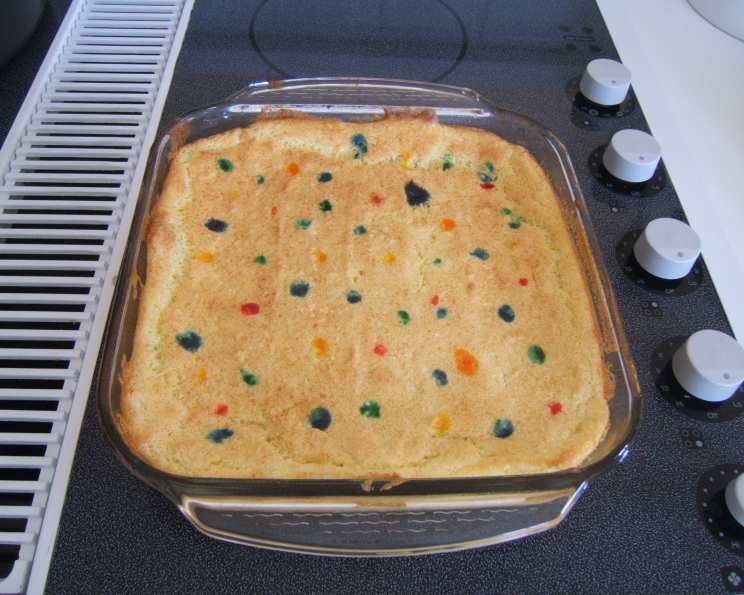
Low Calorie Tata Cake: A Guilt-Free Delight
The aroma of baking cake has always been a shortcut to my childhood. I remember weekends spent in my Tata’s (grandma’s) kitchen, watching her effortlessly whip up treats that seemed to defy gravity – both in their lightness and their ability to disappear in minutes! This cake, a low-calorie reimagining of one of her classics, evokes those warm memories. I hope it brings a smile to your face as well.
Recipe Overview
- Prep Time: 10 minutes
- Cook Time: 20-30 minutes
- Total Time: 30-40 minutes
- Servings: 8
- Yield: 1 cake
- Dietary Type: Low Calorie
Ingredients
- 4 eggs, separated
- 6 tablespoons self-rising flour
- 4 ounces applesauce (approximately 1 small container)
- Pam cooking spray, for greasing pan
- Ground lemon peel (optional, to taste)
- Lemon juice (optional, to taste)
- Food coloring (optional)
Equipment Needed
- Cake pan (round or square)
- Mixing bowls (2)
- Electric mixer or whisk
- Spatula
- Measuring spoons
- Toothpick
Instructions
-
Preheat your oven to 350°F (175°C). While the oven is heating, grease your cake pan thoroughly with Pam cooking spray. Make sure to coat the bottom and sides to prevent the cake from sticking.
-
Separate the eggs, placing the whites in one bowl and the yolks in another. It’s crucial that no yolk gets into the whites, as this will prevent them from whipping properly.
-
Using an electric mixer or a whisk, beat the egg whites in the bowl until they form very stiff peaks. You should be able to turn the bowl upside down without the whites falling out. This step is essential for creating a light and airy texture.
-
In the separate bowl, beat the egg yolks until they lighten in color. Add the applesauce and self-rising flour to the yolks and mix until well combined. This mixture might seem a bit thick, but don’t worry.
-
Optional: This is the stage to incorporate any flavorings. If using, add ground lemon peel and a few squeezes of lemon juice to the egg yolk mixture, adjusting to your personal preference. A little goes a long way! You can also add a few drops of food coloring at this point if desired.
-
Gently fold the egg yolk mixture into the beaten egg whites. It’s important to do this carefully to avoid deflating the whites. Use a spatula and gently cut down into the mixture, then fold the bottom over the top. Continue until just combined, being careful not to overmix. A few streaks of white are okay.
-
Transfer the batter to the prepared cake pan. Spread it evenly.
-
Bake in the preheated oven for approximately 20-30 minutes, or until a toothpick inserted into the center comes out clean. Baking times can vary depending on your oven, so start checking for doneness after 20 minutes.
-
Once baked, remove the cake from the oven and let it cool in the pan for a few minutes before transferring it to a cooling rack to cool completely.
Expert Tips & Tricks
- Achieving Stiff Peaks: For the best results, ensure your egg whites are at room temperature before whipping. A clean, grease-free bowl is also crucial.
- Flavor Variations: Feel free to experiment with different extracts like vanilla, almond, or orange. You can also add spices like cinnamon or nutmeg for a warmer flavor.
- Troubleshooting a Soggy Cake: If your cake comes out a bit soggy, it could be due to underbaking or too much moisture. Ensure your oven temperature is accurate and allow the cake to cool completely before slicing.
- Preventing Sticking: Even with cooking spray, delicate cakes can sometimes stick. Consider lining the bottom of the pan with parchment paper for extra insurance.
- Reviving the Cake: If you find the cake is a bit dry the next day, lightly brush it with a simple syrup (equal parts water and sugar, heated until the sugar dissolves) to add moisture back in.
- Folding Technique: Mastering the folding technique is key to a light and airy cake. Instead of stirring, gently cut through the mixtures and turn your spatula to bring ingredients from the bottom to the top of the mixture.
Serving & Storage Suggestions
This Low Calorie Tata Cake is delicious served as is, or you can dress it up with a variety of toppings. Consider a dollop of light whipped cream, fresh berries, or a dusting of powdered sugar. It also pairs well with sugar-free pudding.
Store leftover cake in an airtight container at room temperature for up to 2 days, or in the refrigerator for up to 4 days. For longer storage, you can freeze the cake, tightly wrapped, for up to 2 months. Thaw it in the refrigerator overnight before serving. Reheating isn’t typically necessary, but you can warm individual slices in the microwave for a few seconds if desired.
Nutritional Information
Note: Nutritional information is an estimate and may vary based on specific ingredient brands and portion sizes.
| Nutrient | Amount per Serving | % Daily Value (approximate) |
|---|---|---|
| Calories | 63.75 kcal | 3% |
| Total Fat | 2.5g | 3% |
| Saturated Fat | 0.8g | 3% |
| Cholesterol | 93mg | 31% |
| Sodium | 110.9mg | 4% |
| Total Carbohydrate | 7.2g | 2% |
| Dietary Fiber | 0.3g | 1% |
| Sugars | 0.1g | 0% |
| Protein | 3.7g | 7% |
Variations & Substitutions
- Gluten-Free Version: Substitute the self-rising flour with a gluten-free blend. You may need to add a binder like xanthan gum to help with the texture.
- Dairy-Free: While this recipe is already relatively low in dairy, ensure your applesauce is dairy-free.
- Sweetener Options: If you prefer a sweeter cake, you can add a sugar substitute like stevia or erythritol to the egg yolk mixture. Adjust the amount to your taste.
- Fruit Infusion: Incorporate other fruits like mashed banana, diced peaches, or blueberries into the batter for added flavor and moisture.
- Spice It Up: Add a pinch of cinnamon, nutmeg, or ginger to the batter for a warm, comforting flavor.
- Citrus Zest: Experiment with different citrus zests like orange or lime to add a bright, aromatic touch.
- Chocolate Variation: Add unsweetened cocoa powder to the batter for a chocolatey treat. You may need to adjust the liquid slightly.
FAQs (Frequently Asked Questions)
Q: Why does this cake taste a bit eggy?
A: Some people find the taste a bit eggy due to the high proportion of eggs to flour. Feel free to experiment with reducing the number of eggs or adding a stronger flavoring like vanilla extract to mask the egginess.
Q: Can I use regular flour instead of self-rising flour?
A: Yes, but you’ll need to add a leavening agent. Use 6 tablespoons of all-purpose flour plus 1/2 teaspoon of baking powder.
Q: How do I know when the cake is done?
A: Insert a toothpick into the center of the cake. If it comes out clean or with just a few moist crumbs, the cake is done. Avoid overbaking, as this can result in a dry cake.
Q: Can I add chocolate chips to this recipe?
A: Yes, you can add a small amount of dark chocolate chips (sugar-free or low-sugar) to the batter for a chocolatey touch.
Q: Is it necessary to separate the eggs?
A: Yes, separating the eggs and whipping the whites to stiff peaks is crucial for creating a light and airy texture in this cake.
Final Thoughts
This Low Calorie Tata Cake is a testament to the fact that you don’t have to sacrifice flavor for health. It’s a delightful treat that’s perfect for satisfying your sweet cravings without the guilt. I encourage you to try this recipe and make it your own by experimenting with different flavor combinations and additions. Let me know what variations you come up with – I’d love to hear your feedback! And remember, the best ingredient in any recipe is love, so enjoy the process and share this delicious cake with those you cherish.