
Decadent Delight: Low Carb Rich Chocolate Ice Cream
I can still remember the summer afternoons spent at my grandmother’s house. The highlight of those visits was always her homemade ice cream, churned with love and a whole lot of sugar. The rich, chocolatey goodness was pure bliss. But as a chef dedicated to healthy eating, I’ve been on a mission to recreate that cherished flavor without the guilt. This low-carb chocolate ice cream recipe is my answer – a velvety, intensely chocolatey treat that satisfies cravings without spiking blood sugar. Prepare to experience the magic of homemade ice cream, reinvented for a modern, health-conscious palate.
Recipe Overview
- Prep Time: 15 minutes
- Cook Time: 15 minutes
- Chill Time: 4 hours (or overnight)
- Total Time: 4 hours 30 minutes (or overnight)
- Servings: 10
- Yield: Approximately 5 cups
- Dietary Type: Low Carb, Keto-Friendly
Ingredients
- 2 cups heavy cream
- 1 cup milk
- ¾ cup cocoa powder
- ½ cup semi-sweet chocolate chips (sugar-free recommended for keto)
- 4 large egg yolks
- ¾ cup erythritol (Swerve) (or your preferred low-carb sweetener)
- 1 teaspoon vanilla extract
Equipment Needed
- Medium saucepan
- Whisk
- Medium mixing bowl
- Mesh strainer
- Ice cream maker
Instructions
- In a medium saucepan over medium heat, combine the heavy cream, milk, and cocoa powder. Whisk continuously to ensure the cocoa powder dissolves completely and the mixture is well combined.
- Bring the mixture to a simmer, watching carefully to prevent it from boiling over. Once it simmers, immediately remove the saucepan from the heat.
- Stir in the semi-sweet chocolate chips until they are completely melted and the mixture is smooth and glossy. Set the chocolate cream mixture aside.
- In a medium mixing bowl, whisk together the egg yolks and erythritol (or your chosen sweetener) until the mixture becomes pale yellow and slightly thickened. This process typically takes about 2-3 minutes. The paler and thicker the yolks, the better they will emulsify with the cream.
- Temper the egg yolks: Gradually add the hot cream mixture to the egg yolk mixture. Start by adding ½ cup of the hot milk mixture to the egg/sugar mixture while continuously whisking vigorously to prevent the eggs from scrambling.
- Repeat this process two more times, each time adding ½ cup of the milk mixture to the egg mixture while continuously whisking. Tempering the eggs gradually raises their temperature, allowing them to blend smoothly into the cream without cooking into clumps.
- Pour the tempered egg mixture back into the saucepan with the remaining milk mixture. Place the saucepan back on the stove over medium-low heat.
- Continue to stir constantly until the mixture thickens slightly and coats the back of a spoon. This usually takes about 5-7 minutes. To test for doneness, dip a spoon into the mixture and run your finger across the back of the spoon. If the line holds its shape and doesn’t immediately run back together, it’s ready. Be careful not to overheat the mixture, as this can cause the eggs to curdle.
- Remove the saucepan from the heat and pour the mixture through a mesh strainer into a medium bowl. This step is crucial for removing any lumps that may have formed during cooking, resulting in a perfectly smooth ice cream base.
- Stir in the vanilla extract.
- Place the bowl in an ice bath to cool the mixture to room temperature. An ice bath helps to rapidly cool the mixture, preventing ice crystals from forming during the freezing process. Stir occasionally to ensure even cooling.
- Once the mixture has cooled to room temperature, cover the bowl and completely chill it in the refrigerator for at least 4 hours, or preferably overnight. Chilling the mixture allows the flavors to meld together and also improves the texture of the final ice cream.
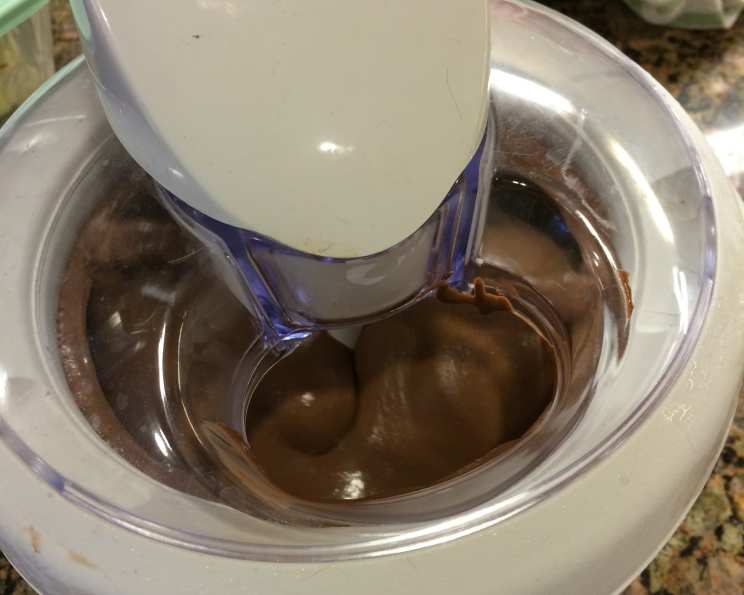
- Freeze the chilled mixture in your ice cream maker according to the manufacturer’s directions. This typically takes about 20-30 minutes, depending on your machine. The ice cream is ready when it has reached a soft-serve consistency.
- For a firmer texture, transfer the ice cream to an airtight container and freeze for an additional 2-3 hours before serving. This will allow the ice cream to harden and develop a more scoopable consistency.
Expert Tips & Tricks
- Sweetener Choice: While this recipe recommends Swerve (Erythritol), feel free to experiment with other low-carb sweeteners like monk fruit or allulose. Be mindful that different sweeteners have varying sweetness levels, so adjust the quantity accordingly.
- Chocolate Intensity: For a deeper, more intense chocolate flavor, use a high-quality dark cocoa powder. You can also add a tablespoon of instant espresso powder to enhance the chocolate notes.
- Smooth Texture: The key to a creamy, smooth ice cream is to prevent ice crystal formation. Rapid cooling in an ice bath and thorough chilling in the refrigerator are crucial steps.
- Avoid Over-Churning: Over-churning the ice cream can result in a grainy texture. Follow your ice cream maker’s instructions carefully and stop churning when the ice cream reaches a soft-serve consistency.
- Make Ahead: The ice cream base can be prepared up to 3 days in advance and stored in the refrigerator until ready to churn. This makes it a convenient option for entertaining or meal prepping.
Serving & Storage Suggestions
Serve this decadent low-carb chocolate ice cream on its own, or pair it with your favorite low-carb toppings like sugar-free chocolate sauce, chopped nuts, or fresh berries. It also makes a delightful accompaniment to low-carb brownies or cookies.
Store leftover ice cream in an airtight container in the freezer for up to 2 weeks. To prevent ice crystal formation, press a piece of plastic wrap directly onto the surface of the ice cream before sealing the container. If the ice cream becomes too hard to scoop, let it sit at room temperature for a few minutes to soften slightly before serving.
Nutritional Information
Here is an estimate of the nutritional information per serving. Keep in mind that the exact values may vary depending on the specific brands and ingredients used.
| Nutrient | Amount per Serving | % Daily Value |
|---|---|---|
| Calories | 258 kcal | 13% |
| Total Fat | 23.7 g | 36% |
| Saturated Fat | 14.2 g | 70% |
| Cholesterol | 142.4 mg | 47% |
| Sodium | 35.6 mg | 1% |
| Total Carbohydrate | 11.9 g | 3% |
| Dietary Fiber | 2.6 g | 10% |
| Sugars | 4.8 g | 19% |
| Protein | 4.5 g | 8% |
Variations & Substitutions
- Dairy-Free Option: While this recipe uses heavy cream and milk, you can experiment with using full-fat coconut milk for a dairy-free alternative. Keep in mind that the flavor and texture may be slightly different.
- Nutty Delight: Add ½ cup of chopped walnuts, pecans, or almonds to the ice cream base for a crunchy and flavorful twist.
- Mint Chocolate Chip: Incorporate a few drops of peppermint extract and ½ cup of sugar-free chocolate chips for a refreshing mint chocolate chip ice cream.
- Spicy Chocolate: Add a pinch of cayenne pepper to the cocoa powder for a subtle kick of heat.
- Coffee Chocolate: Stir in 1-2 tablespoons of strong brewed coffee or espresso to the ice cream base for a rich coffee chocolate flavor.
FAQs (Frequently Asked Questions)
Q: Can I use a different sweetener besides erythritol?
A: Yes, you can substitute with other low-carb sweeteners like monk fruit or allulose. Just be sure to adjust the amount based on the sweetener’s sweetness level.
Q: Do I really need to chill the mixture for 4 hours or overnight?
A: Yes, chilling the mixture is essential for the best texture. It allows the flavors to meld together and prevents ice crystals from forming during churning.
Q: What if I don’t have an ice cream maker?
A: While an ice cream maker is recommended for the best results, you can still make ice cream without one. Pour the chilled mixture into a freezer-safe container and freeze for 2-3 hours, stirring every 30 minutes to break up ice crystals. The texture won’t be as smooth as with an ice cream maker, but it will still be delicious.
Q: Can I add alcohol to this recipe?
A: Yes, you can add a tablespoon or two of your favorite liqueur, such as rum or bourbon, to the ice cream base for an extra layer of flavor. Be sure to add it after the mixture has cooled to prevent the alcohol from evaporating.
Q: My ice cream is too hard to scoop. What should I do?
A: Let the ice cream sit at room temperature for a few minutes to soften slightly before serving. You can also try running your ice cream scoop under warm water.
Final Thoughts
This low-carb rich chocolate ice cream is more than just a recipe; it’s an invitation to indulge in a healthier way. The rich, chocolatey flavor and creamy texture will transport you back to cherished memories, all while staying true to your health goals. I encourage you to give this recipe a try and share your feedback. Perhaps you’ll discover a new favorite flavor combination or a creative twist of your own. Serve it with a sugar-free hot fudge sauce for an extra special treat! Enjoy!