
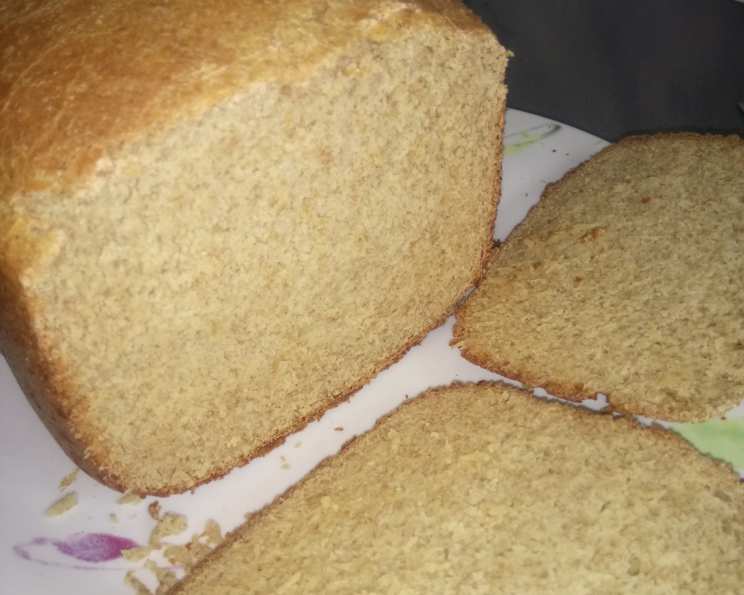
Low Cholesterol, Vegan Brown Bread: A Heart-Healthy Delight
My grandmother, a woman whose love language was undeniably bread, instilled in me a deep appreciation for the simple pleasure of a warm, homemade loaf. I remember the comforting aroma that would fill her kitchen every Sunday morning, a symphony of yeast and warmth that promised good things to come. When I had to adjust my diet for cholesterol reasons, I was determined to find a way to recreate that experience without compromising my health. This vegan brown bread recipe is the result of that journey – a testament to the fact that delicious and heart-healthy can absolutely coexist.
Recipe Overview
- Prep Time: 20 minutes
- Cook Time: 1 hour
- Total Time: 1 hour 20 minutes
- Servings: Approximately 12 slices
- Yield: 1 Large Loaf (900g)
- Dietary Type: Vegan, Low Cholesterol
Ingredients
- 330 ml water
- 12 g virgin olive oil
- 8 g sea salt
- 10 g total sweet artificial sweetener
- 21 g soya milk
- 2 cups strong wholewheat flour
- 2 cups quinoa flour
- 1 cup gluten-free self-raising flour
- ½ cup plant-based protein powder
- 6 g yeast
Equipment Needed
- Breadmaker (optional)
- Mixing bowl
- Measuring cups and spoons
- Bread pan (900g capacity)
- Cling film or clean kitchen towel
- Oven
- Toothpick
Instructions
-
Prepare the Wet Ingredients: If using a breadmaker, always start with the wet ingredients. Pour the water and soya milk into the breadmaker pan. Add the virgin olive oil and artificial sweetener.
-
Add the Dry Ingredients: Gradually add the dry ingredients: wholewheat flour, quinoa flour, gluten-free self-raising flour, plant-based protein powder, and sea salt. Make a small well in the center of the dry ingredients and add the yeast last, ensuring it doesn’t come into direct contact with the salt.
-
Breadmaker Method: Select the wholewheat setting on your breadmaker. Choose the 900g loaf size and a medium crust setting. The cooking time will be approximately 3 hours. Let the breadmaker work its magic!
-
Mixing Bowl Method – Dough Kneading: If using a mixing bowl, combine all the ingredients in the order described above. Begin to knead the dough for approximately 10 minutes until it forms a smooth, elastic ball. The dough may be slightly sticky, but avoid adding too much extra flour.
-
First Rise: Place the dough in a lightly oiled bowl. Cover it with cling film or a clean kitchen towel. Put the bowl in a warm place and let the dough rise for approximately 1 hour, or until it has doubled in size.
-
Preheat the Oven: While the dough is rising, preheat your oven to Gas Mark 250 (approximately 120°C).
-
Prepare the Bread Pan: Lightly grease your bread pan with low-cholesterol spread or a touch of olive oil.
-
Shape and Second Rise: Gently punch down the risen dough to release any air. Shape the dough into a loaf and place it in the prepared bread pan, moulding it to fit the size of the pan. Cover the pan loosely with cling film or a towel and let it rise for another 30 minutes in a warm place.
-
Bake: Place the bread pan in the preheated oven. Immediately lower the oven temperature to Gas Mark 150 (approximately 65°C). Bake for 1 hour, or until the bread is golden brown.
-
Check for Doneness: After an hour, insert a toothpick into the center of the bread. If the toothpick comes out clean, the bread is done. If it comes out with wet dough clinging to it, continue baking for another 10-15 minutes, checking frequently.
-
Cooling: Remove the bread from the oven and let it cool in the pan for 10 minutes before transferring it to a wire rack to cool completely.
Expert Tips & Tricks
- Dough Consistency: The dough should be slightly sticky, which contributes to a softer, more moist loaf. Avoid the temptation to add too much flour, as this can result in a dry bread.
- Oven Temperature: Baking at a lower temperature for a longer period ensures that the bread cooks evenly and doesn’t burn on the outside before the inside is done.
- Yeast Activation: Ensure your yeast is fresh. You can test it by mixing it with a little warm water and sugar. If it foams up within 5-10 minutes, it’s active and ready to use.
- Protein Powder Choice: Experiment with different flavors of plant-based protein powder. Vanilla, unflavored, or even a subtle chocolate flavor can add a unique twist to your bread.
- Kneading Time: Proper kneading is crucial for developing the gluten in the flour, which gives the bread its structure. Don’t skimp on the kneading time!
Serving & Storage Suggestions
This low-cholesterol vegan brown bread is delicious served warm or toasted. It pairs perfectly with sugar-free jam, almond butter and sliced banana, or a smear of low-cholesterol spread. Store the cooled bread in an airtight container at room temperature for up to 3 days, in the refrigerator for up to a week, or freeze for up to 2 months. To reheat, simply toast a slice or warm it in the oven at a low temperature. Freezing individual slices can be very convenient.
Nutritional Information
(Approximate values per slice, based on 12 slices per loaf)
| Nutrient | Amount per Serving | % Daily Value |
|---|---|---|
| Calories | 170 kcal | 9% |
| Total Fat | 2 g | 3% |
| Saturated Fat | 0.3 g | 1% |
| Cholesterol | 0 mg | 0% |
| Sodium | 261 mg | 11% |
| Total Carbohydrate | 32.5 g | 11% |
| Dietary Fiber | 4.5 g | 18% |
| Sugars | 0.1 g | 0% |
| Protein | 2.4 g | 5% |
Variations & Substitutions
- Gluten-Free: While this recipe already contains gluten-free flour, you could experiment with other gluten-free flour blends to find your preferred taste and texture. Ensure that the overall quantity of flour remains the same.
- Sweetener: Adjust the amount of artificial sweetener to your taste. You can also use other vegan-friendly sweeteners like stevia or erythritol.
- Nuts and Seeds: Add a handful of chopped nuts or seeds (such as sunflower seeds, pumpkin seeds, or flax seeds) to the dough for extra texture and nutritional value.
- Spice it Up: A pinch of cinnamon, nutmeg, or cardamom can add a warm and comforting flavor to the bread.
FAQs (Frequently Asked Questions)
Q: Can I use regular milk instead of soya milk?
A: This recipe is designed to be vegan and low cholesterol. Using regular milk would alter the nutritional profile. However, you can substitute with other plant-based milks like almond milk or oat milk.
Q: What if I don’t have quinoa flour?
A: You can substitute the quinoa flour with an equal amount of wholewheat flour or another gluten-free flour blend. Keep in mind that this might slightly alter the texture and flavor of the bread.
Q: My bread is too dense. What did I do wrong?
A: A dense bread can be caused by several factors, including using old yeast, not kneading the dough enough, or not letting the dough rise sufficiently. Make sure your yeast is fresh, knead the dough for the full 10 minutes, and ensure it rises in a warm place.
Q: Can I make this recipe without a breadmaker?
A: Absolutely! The mixing bowl method is outlined above. Just follow the instructions for kneading, rising, and baking in a conventional oven.
Q: How can I make the crust softer?
A: After baking, brush the crust with a little melted low-cholesterol spread or olive oil. This will help to soften the crust as the bread cools.
Final Thoughts
Embarking on a heart-healthy journey doesn’t mean sacrificing the joy of good food. This low-cholesterol vegan brown bread recipe is proof of that. I encourage you to give it a try, adapt it to your own preferences, and share your creations with loved ones. It’s a simple pleasure that nourishes both body and soul, a warm and comforting reminder that we can enjoy the things we love while taking care of our health. Don’t hesitate to leave feedback and let me know how it turns out!